Growing up, Sundays were designated cleaning days. My three brothers and I would rotate tasks. Each task would include a section of the house; such as cleaning a bathroom, vacuuming the entire house or helping in the kitchen which included taking out all the garbage everywhere.

My dad had a ruthless rule. Sunday cleaning waited for no one and if things were left on floors in our bedrooms before it was time to vacuum, everything would get dumped on our beds.
One weekend, my room was a disaster, and he piled it all—books, toys, clothes—onto my bed, forcing me to deal with it before I could sleep in my bed.
I didn’t love the process, but I eventually learned something: tackling a mess is easier when everything is in one spot first.
It was easier to sort through everything when you can see it all at once.
This was revolutionary (Thanks, Dad!)
I consider myself very lucky because I genuinely love organizing. I love sorting and compiling everything around me.
I love doing it even more for others. Over the years, I’ve helped organize other people’s homes, both professionally and just for fun. Yes, for fun. It’s a LOT easier to organize for other’s as I am not sentimentally attached to anything… I don’t spend time thinking about what I want, its more of a logical choice.
When I took all peoples things and consolidated it all one place, like my dad did to me, people could see what they had and, with my guidance and support, were able to make choices of what to keep or not. It made me realize that consolidation didn’t just work for me, it helped others too.
Professionally, I needed to know how to charge them. I needed a plan of what we are tackling and how long it would take. When doing it for friends, I couldn’t tackle too much at a time otherwise they would be left with a disaster when it was time for me to go home, so a plan needed to be made.
This made me realize another thing. Choosing a focus or theme just made sense for timing and to not feel overwhelmed.
And so the steps were created:
STEP ONE: Choose a Theme
When there is a theme, or a space that I need to focus on, it makes it easier and faster to complete.
I’ve realized that often when I try to organize a space or deep clean without a focus, I get sidetracked, overwhelmed, and stuck. I end up jumping from room to room which turns into the entire house and very often leaves me in more of a mess than before… I start putting away one thing, notice something else that needs attention, and before I know it, I’m overwhelmed and nothing gets finished. But when I focus on a single theme, it’s so much easier.

You can choose as narrow of a theme (marker brands) or as wide of a theme (art supplies) as you want. Generally the more stuff in that theme, the more narrow you can usually get.
If you know you get overwhelmed easily, start with a small theme.
There is no hard rule here as themes can sometimes overlap (for example the dreaded junk drawer - it tends to have every theme you can think of in it!). Sometimes a theme is not related by similar items, but by location!
SMALL HACKs FOR CHOOSING A THEME:
If you are stuck on a theme, choose a space. Choose an area in your house that needs your attention: Where are you getting frustrated loosing items? Where do you avoid going? What do you avoid putting away? For example:
Is your front closet overflowing? Take everything out of it and you will see a theme emerge.
Do you keep loosing your sponge or rubber gloves under the sink because it gets lost in all the stuff? Take out everything from under the sink, this is your theme.
Everyday themes You Can Organize:
If everything feels like a mess and you’re not sure where to start, another strategy is to choose an everyday category:
1. Hobby or creative supplies
🎨 Art materials (I am not a hoarder but I have A LOT of art materials. When I am organizing my art materials, I break it down even further, for example pens and markers, paper, sewing, beads and jewelry, oil pastels and chalk pastels etc.)
🔥 Pyrography tools
🪵 Wood for burning (or all burnable surfaces)
📚 Books & sketchbooks
2. Home and living essentials
🛏️ Bedding & towels
🍽️ Kitchen gadgets & utensils
🕯️ Candles & home decor
🔋 Random junk drawer items (this one is a tough one… It always takes the longest because everything is, well, random)
3. Clothing and accessories
👕 T-shirts & sweaters
👖 Jeans & pants
👟 Shoes
👜 Bags & accessories
4. Paper or office supplies
📂 Important documents
🖊️ Pens & markers
📒 Notebooks & planners
💌 Old greeting cards & letters
5. Sentimental and miscellaneus
This one takes long too so give yourself extra time for anything sentimental! this one is mentally taxing too so breaking it up into different days helps.
📸 Photos & keepsakes
🧩 Board games & puzzles
🛍️ Seasonal decor
🛠️ Tools & hardware
Again, if you get easily overwhelmed, choose a small area to sort, one that brings you joy (I can organize my art supplies for days…) or tackle one that has been a constant irritation.
STEP TWO: Consolidate

This is that fun moment of throwing everything into one heaping pile. Yes, it’s also terrifying as there is no turning back after you do this.
I can’t prove my dad throwing everything onto my bed was the moment that shaped my approach to organizing, but as an adult, I’ve realized that the best way to get organized is to consolidate everything into one place before sorting.
During the consolidation process, (if you don’t want to just dump it all at once) I try to sort slightly as I remove everything from it’s current spot:
Designate a spot on the floor or a corner of the room for the beginnings of categories: i.e.. if i am sorting my art closet: I will try to put all my scissors in one pile, all my paper in another pile, all my pyro stuff in another and so on. This is a rough sort (more or less) until the closet is empty. Stuff that takes more than a couple seconds to decide where it goes, goes right in the the center as a miscellaneous pile.
Throw out obvious garbage right away.
If there are items that aren’t garbage but you know immediately that you do not want them, put them in a “donate” pile. Try to locate this pile the furthest away from where you are organizing so it’s “out of sight, out of mind” as much as it can be.
If there are items that belong in another room or section of the house, put them in a pile by the door. Don’t go organizing these things, but get them out of your line of sight by placing them in a pile FURTHER away and by the exit.
I usually make a “to fix” pile at this point too.
Don’t to think too hard about this part. It’s more of a rough categorization (I’ll give you some examples later on). The goal is to just clear the space. So, if starting to categorize is slowing you down, then just do the dump.
STEP THREE: Categorize

I absolutely love organizing things into categories and groups. There’s something so satisfying about gathering similar things together, seeing exactly what I have, all in one space.
Make sure everything is in a category that makes sense. Put items together that match by type and or function.
For example, if you’re organizing the front closet, all the shoes (type) would go in one pile, all the jackets (type) in another pile, all the umbrellas in another, dog leashes in another etc… you may be surprised how many duplicates you have.
You can then sort by function. All winter gear would be categorized (mittens, hats, boots) and the winter section would be a functional category because these items work in the winter and can be put away in a deeper location until they are needed).
The key here is to zoom in on each category of item so you can deal with the item.
STEP FOUR: Finish
In each category, you will have three options (if you haven’t already started doing this during the dump).
Keep
Donate
Trash
Donating and trashing items are self-explanatory.
Now. The keep items.
Essentially we want to designate a spot for each category of items. This means to put them away and give them a permanent home. This is the moment where you can start putting back the items where they came from.
Some tips to remember:
I like to fix items that are easy to fix right away. If it takes longer than a few minutes, I designate a place in my house for things I need to fix/repair that will take longer and get to them when I have time.
Put loose things that belong together in one container (i.e. all charged batteries in a small plastic bin, all batteries that need charging in another small plastic bin - label these for less confusion).
Labelling may sound a little much but a label goes a long way (even if its just temporary). I use masking tape and a sharpie and keep the label on for a little while until everyone in the house learns the new spot. Often, I will make a nicer looking label with a label maker but sometimes I just leave the tape on forever or eventually take it off once the habit to put the item it’s spot is created.
Make it accessible according to their function. For example, Winter holiday stuff can go in a box and be put away deeper than other boxes, or at the bottom because you take them out once a year. Art supplies, however, should be more accessible and easy to take out and put back in.
You don’t need to spend money to have an organized space. Sure, it’s nice to have the perfect pantry with all matching clear boxes organized in rainbow colours... But the idea is to have accessible and functional storage that makes sense to what you are storing. I use boxes that I have on hand, like shoe boxes and plastic bins, even food containers!
HOW I ORGANIZE: An Example
I use this method every time I clean. Instead of tackling an entire room, I
Choose and focus on a theme. In this case: puzzles.
Gather all the puzzles I own (consolidate) and put them in one place.
Then I sort them (categorize). In this case, the categories are:
My puzzles (I have a couple puzzles that go high up in a place no children can reach because they are very special to me)
Kids’ puzzles
The rest of them (I put the kids on one side and more difficult ones on the other)
During this process. I make sure to:
✔ Fix up any broken boxes or peeling pieces—tidy the boxes, tape up any worn edges, and make sure all the pieces are there (this step is obviously easy for kids’ puzzles. for larger puzzles, I just wait to complete them). For boxes I cant fix, I will put all the loose parts in a container.
✔ Donate the ones I no longer love (after they have been repaired)
✔ Trash any that have no hope
And then I store them neatly so they’re easy to access and give them a designated spot on my shelf.
A Bigger Example:
I recently used this method to organize two really big categories in my house.
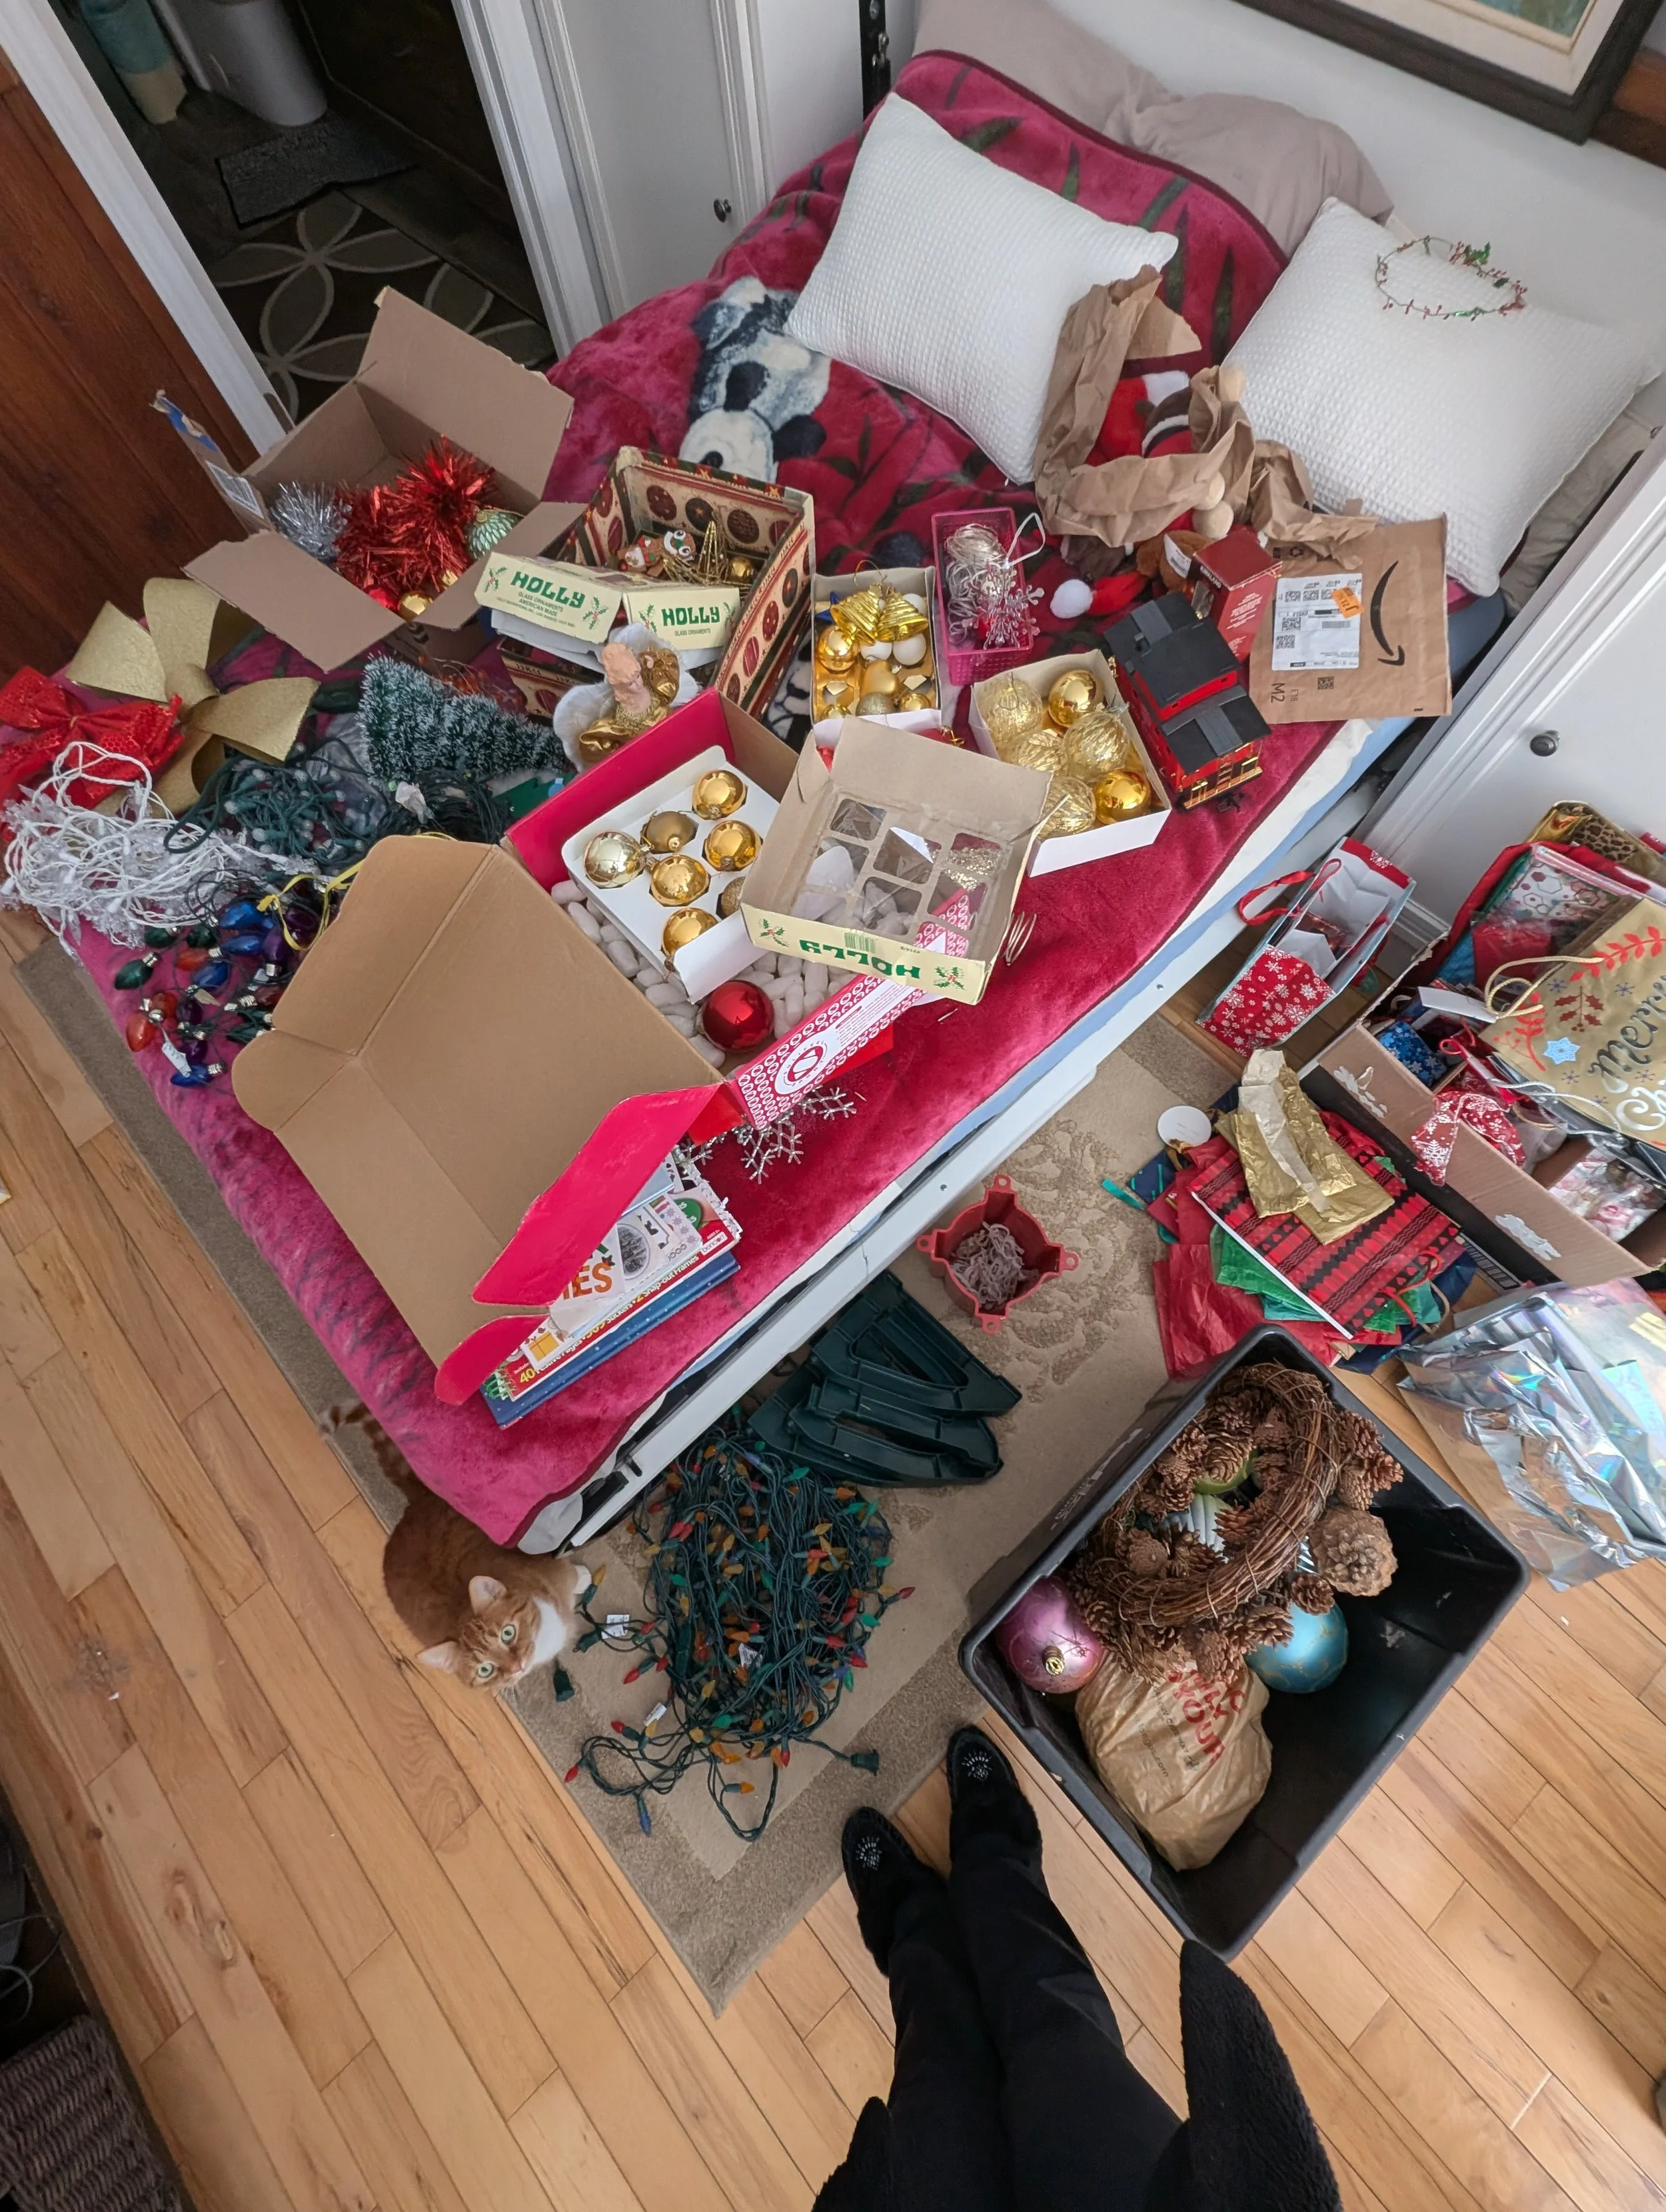
First was Christmas stuff (step one: theme)
I collected and gathered everything in one room (step two: consolidation). Once the holiday season was done, I took all the decorations and supplies, along with a bunch of hand-me-downs from my parents (which live part time in Mexico so they spend winter down there and they had a lot of Christmas stuff to give away).
There were boxes that have seen better days, ribbons from presents everywhere, lights, and general decorations….

Once it was all there, I started sorting (step three: categorize). I took anything that was broken and either fixed it, took it apart to use in other ways or tossed it. This allowed me to see more clearly what I have.
Then I sorted everything into categories.
I put all the ornaments that could break in small boxes (which I taped up and fixed), I tied up all the lights with this awesome reusable Velcro straps made for cables, and put anything breakable in tissue paper or brown packing paper.
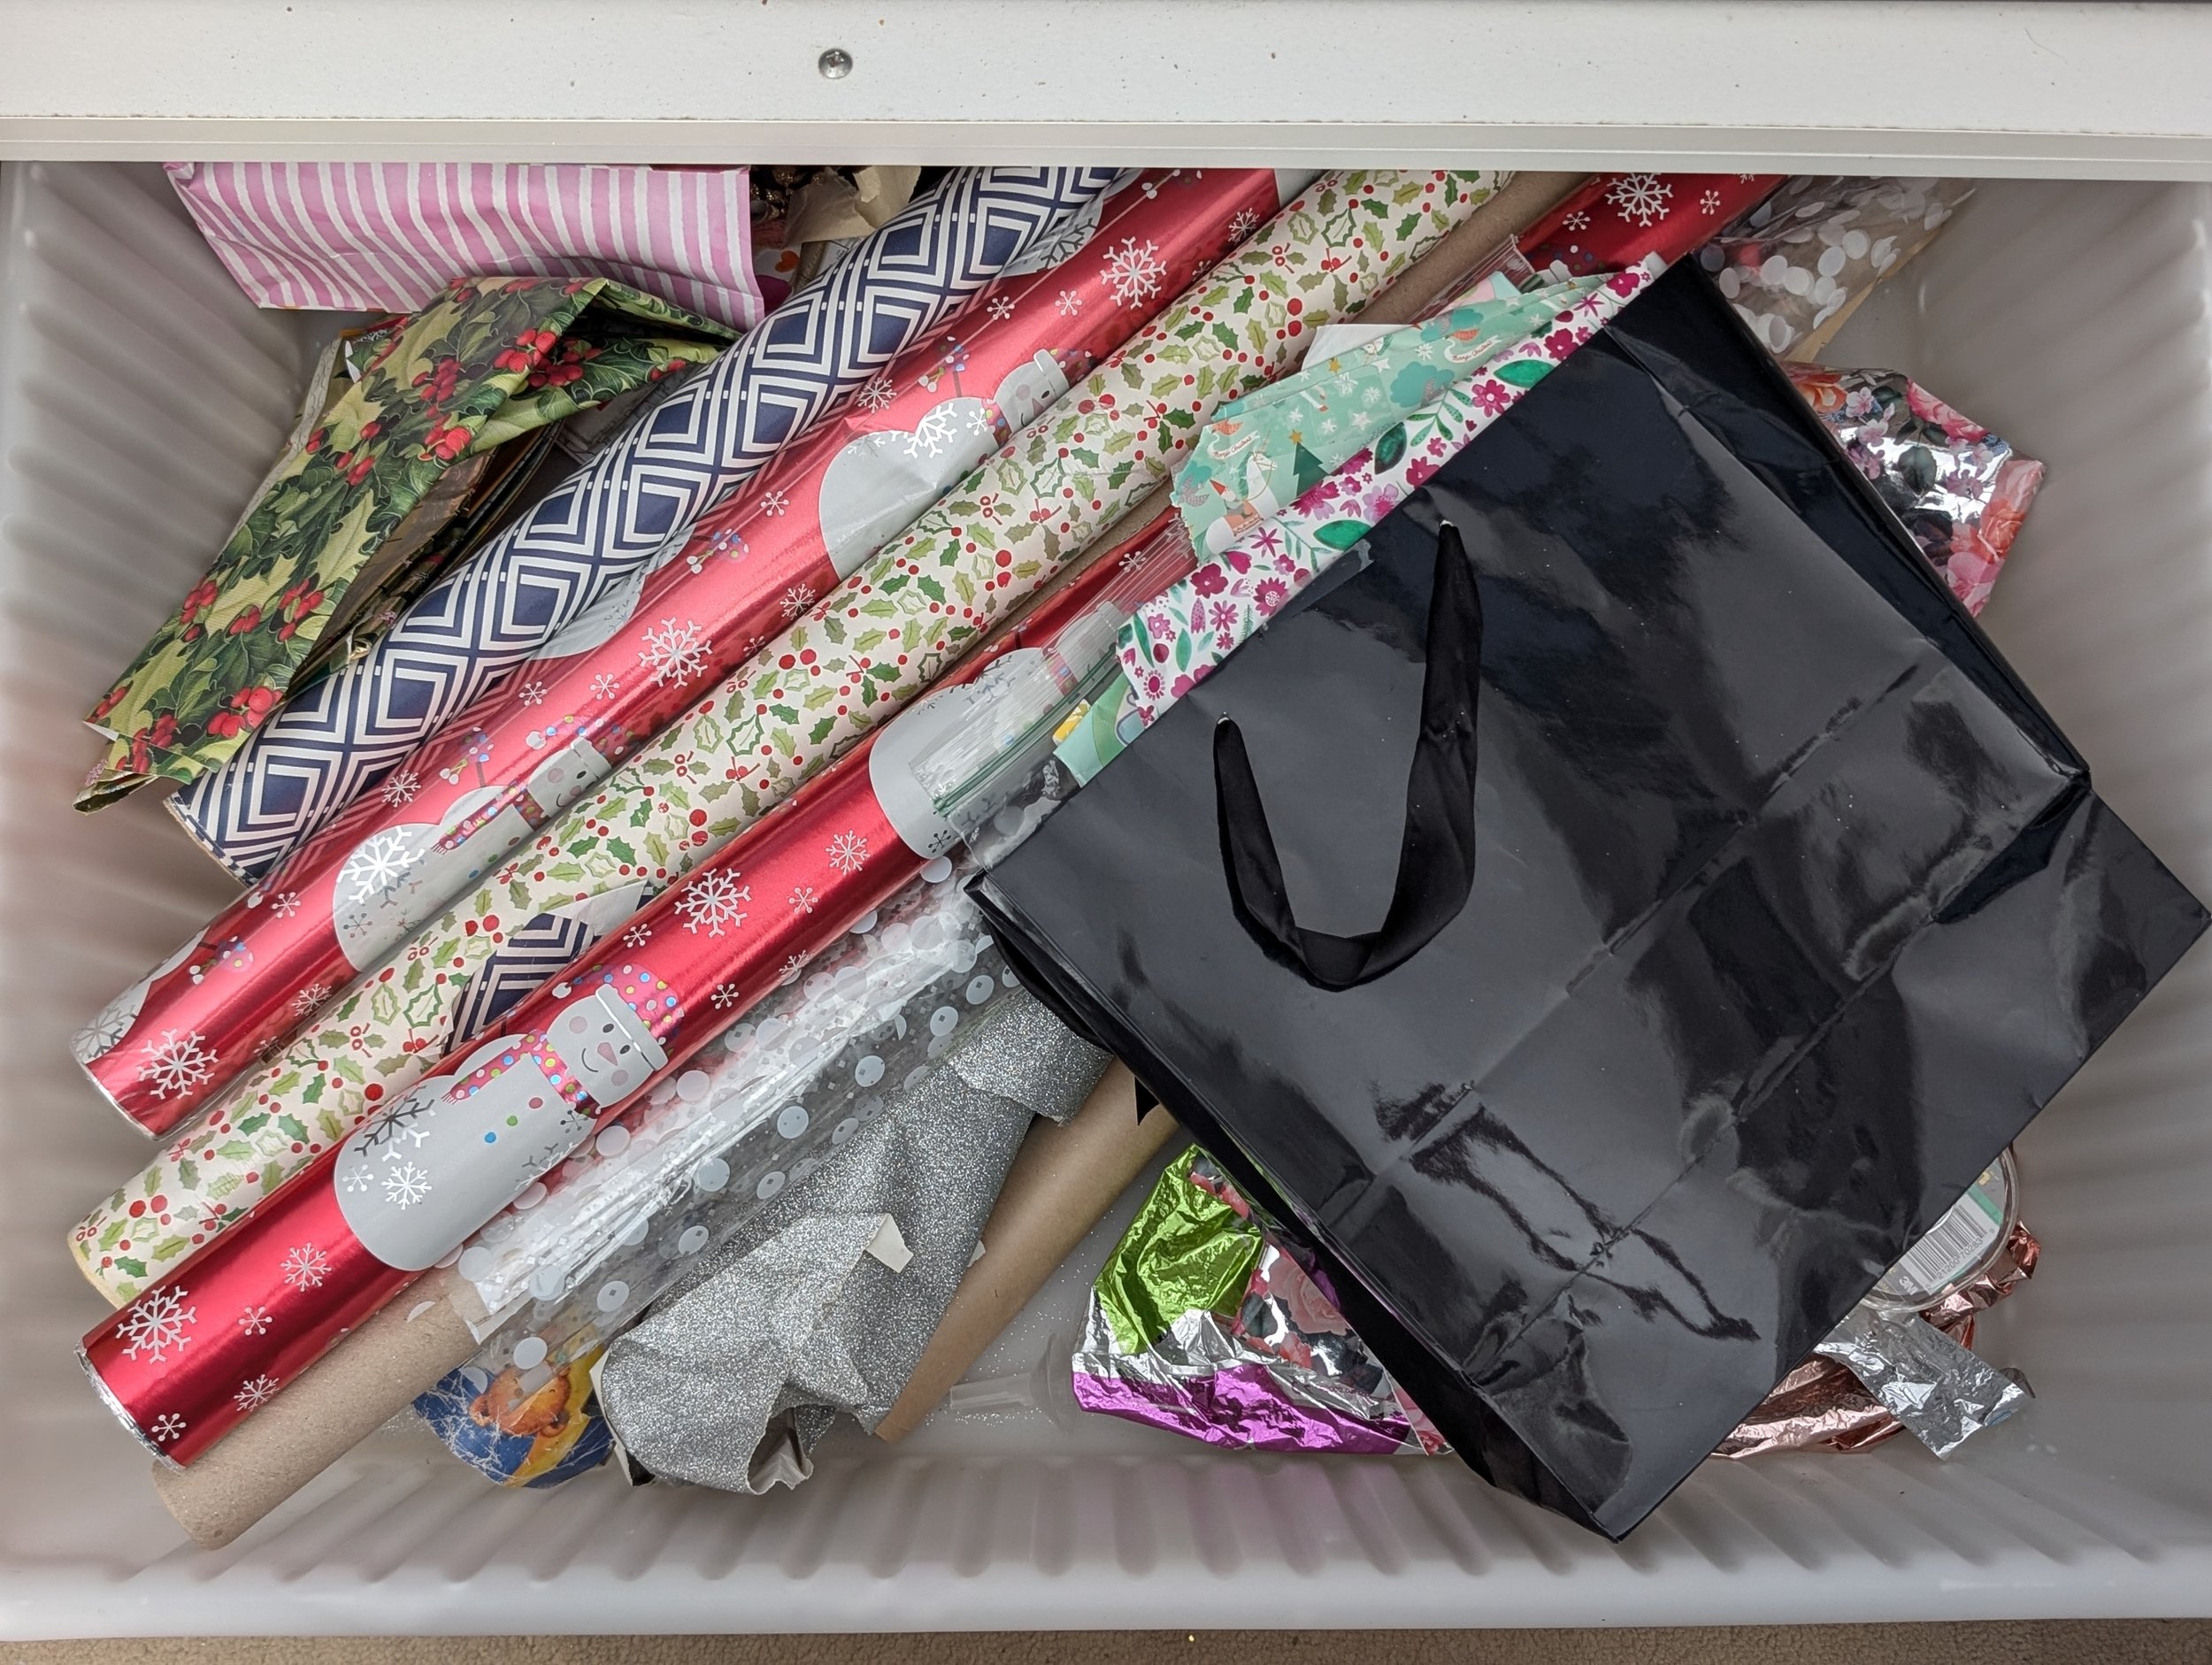
There was one section of the Christmas stuff that was kinda big: gift wrapping stuff. I found I had a lot of different ways to wrap gifts, so I further sorted this category:
Gift bags
Wrapping paper
Tissue paper
Gift boxes
Gift tags
Then I found the gift wrapping items a home (first part of step four: finish)
As you can see below, I used random boxes that made sense and fit all the items. I could have put everything in a large box, but instead kept them like this in the shed because I like to be able to pull individual ones out when I need them. I don’t do all my wrapping at one time, so this will be more accessible and convenient to see and find the right size during the holidays.

Large Gift Bags, Tags, Boxes and Soft Bags
Wrapping Paper (new and used that I will reuse)

Small Gift Bags

Tissue Paper
The tissue paper is actually a category that overlaps. I keep it accessible all year-round with the gift bags and wrapping paper that is not holiday themed.
I labelled each box and put everything away in the shed (step four: finish).
The other theme I tackled was all my pyrography supplies and books—especially since I got a lot of goodies from Rachel recently. I gathered everything in one spot, sorted and categorized into the following categories:

Wood and surfaces to burn on
Burners
Tips and pens
Other accessories (erasers, cleaning tools)
Tracing things (graphite paper and all designs)
Books
I put everything in a large box and kept the items I used most out for now. Since it’s getting warmer here, I will be bringing everything out to my garage art space and will write a detailed blog about how I organize my wood burning supplies in the next few weeks! I will show you all my hacks for storing wood and cables and tools etc…
Even just doing this step made such a difference and now finding things is easy!
Some themes are more fun than others, but in the end, when things are easy to find and look neat, it’s totally worth the effort!
Last bit of advice and final thoughts:
Organization isn’t set in stone—it requires some upkeep, especially for items used often. The easier it is to put things away (physically), the longer your efforts will last.
It’s much easier to keep track of your belongings when you can see them, which is why clear containers are ideal for frequently used items. Being able to quickly spot what you need helps prevent overbuying, misplaced items, and clutter from piling up. But when clear containers aren’t an option, labels are the next best thing. A simple, well-placed label removes the guesswork, making it just as easy to find and put things away.
Since belongings fluctuate (things get donated, new items come in, and some break), having a little breathing room in containers allows for flexibility and prevents constant reorganization.
Staying organized doesn’t have to mean massive overhauls (although sometimes things get so out of hand, they need to be big steps). Essentially small, consistent steps make a big difference. Taking a few minutes to return things to their place, decluttering one drawer at a time, or doing a quick reset at the end of the day prevents mess from piling up. These small habits add up, making organization feel effortless rather than overwhelming. A little effort now saves a lot of time and frustration later.
Do you have an organizing trick that works for you? Let me know in the comments—I’d love to hear!