Personal Corner

The Secret to Organizing Without Overwhelm

Growing up, Sundays were designated cleaning days. My three brothers and I would rotate tasks. Each task would include a section of the house; such as cleaning a bathroom, vacuuming the entire house or helping in the kitchen which included taking out all the garbage everywhere.

My dad had a ruthless rule. Sunday cleaning waited for no one and if things were left on floors in our bedrooms before it was time to vacuum, everything would get dumped on our beds.

One weekend, my room was a disaster, and he piled it all—books, toys, clothes—onto my bed, forcing me to deal with it before I could sleep in my bed.

I didn’t love the process, but I eventually learned something: tackling a mess is easier when everything is in one spot first.

It was easier to sort through everything when you can see it all at once.

This was revolutionary (Thanks, Dad!)

I consider myself very lucky because I genuinely love organizing. I love sorting and compiling everything around me.

I love doing it even more for others. Over the years, I’ve helped organize other people’s homes, both professionally and just for fun. Yes, for fun. It’s a LOT easier to organize for other’s as I am not sentimentally attached to anything… I don’t spend time thinking about what I want, its more of a logical choice.

When I took all peoples things and consolidated it all one place, like my dad did to me, people could see what they had and, with my guidance and support, were able to make choices of what to keep or not. It made me realize that consolidation didn’t just work for me, it helped others too.

Professionally, I needed to know how to charge them. I needed a plan of what we are tackling and how long it would take. When doing it for friends, I couldn’t tackle too much at a time otherwise they would be left with a disaster when it was time for me to go home, so a plan needed to be made.

This made me realize another thing. Choosing a focus or theme just made sense for timing and to not feel overwhelmed.

And so the steps were created:

STEP ONE: Choose a Theme

When there is a theme, or a space that I need to focus on, it makes it easier and faster to complete. 

I’ve realized that often when I try to organize a space or deep clean without a focus, I get sidetracked, overwhelmed, and stuck.  I end up jumping from room to room which turns into the entire house and very often leaves me in more of a mess than before… I start putting away one thing, notice something else that needs attention, and before I know it, I’m overwhelmed and nothing gets finished. But when I focus on a single theme, it’s so much easier.

You can choose as narrow of a theme (marker brands) or as wide of a theme (art supplies) as you want. Generally the more stuff in that theme, the more narrow you can usually get.

If you know you get overwhelmed easily, start with a small theme.

There is no hard rule here as themes can sometimes overlap (for example the dreaded junk drawer - it tends to have every theme you can think of in it!). Sometimes a theme is not related by similar items, but by location!

SMALL HACKs FOR CHOOSING A THEME:

If you are stuck on a theme, choose a space. Choose an area in your house that needs your attention: Where are you getting frustrated loosing items? Where do you avoid going? What do you avoid putting away? For example: 

  • Is your front closet overflowing? Take everything out of it and you will see a theme emerge.

  • Do you keep loosing your sponge or rubber gloves under the sink because it gets lost in all the stuff? Take out everything from under the sink, this is your theme.


Everyday themes You Can Organize:

If everything feels like a mess and you’re not sure where to start, another strategy is to choose an everyday category:

1. Hobby or creative supplies

🎨 Art materials (I am not a hoarder but I have A LOT of art materials. When I am organizing my art materials, I break it down even further, for example pens and markers, paper, sewing, beads and jewelry, oil pastels and chalk pastels etc.)
🔥 Pyrography tools
🪵 Wood for burning (or all burnable surfaces)
📚 Books & sketchbooks

2. Home and living essentials

🛏️ Bedding & towels
🍽️ Kitchen gadgets & utensils
🕯️ Candles & home decor
🔋 Random junk drawer items (this one is a tough one… It always takes the longest because everything is, well, random)

3. Clothing and accessories

👕 T-shirts & sweaters
👖 Jeans & pants
👟 Shoes
👜 Bags & accessories

4. Paper or office supplies

📂 Important documents
🖊️ Pens & markers
📒 Notebooks & planners
💌 Old greeting cards & letters

5. Sentimental and miscellaneus

This one takes long too so give yourself extra time for anything sentimental! this one is mentally taxing too so breaking it up into different days helps.

📸 Photos & keepsakes
🧩 Board games & puzzles
🛍️ Seasonal decor
🛠️ Tools & hardware


Again, if you get easily overwhelmed, choose a small area to sort, one that brings you joy (I can organize my art supplies for days…) or tackle one that has been a constant irritation.

STEP TWO: Consolidate

This is that fun moment of throwing everything into one heaping pile. Yes, it’s also terrifying as there is no turning back after you do this.

I can’t prove my dad throwing everything onto my bed was the moment that shaped my approach to organizing, but as an adult, I’ve realized that the best way to get organized is to consolidate everything into one place before sorting.

During the consolidation process, (if you don’t want to just dump it all at once) I try to sort slightly as I remove everything from it’s current spot:

  • Designate a spot on the floor or a corner of the room for the beginnings of categories: i.e.. if i am sorting my art closet: I will try to put all my scissors in one pile, all my paper in another pile, all my pyro stuff in another and so on. This is a rough sort (more or less) until the closet is empty. Stuff that takes more than a couple seconds to decide where it goes, goes right in the the center as a miscellaneous pile.

  • Throw out obvious garbage right away.

  • If there are items that aren’t garbage but you know immediately that you do not want them, put them in a “donate” pile. Try to locate this pile the furthest away from where you are organizing so it’s “out of sight, out of mind” as much as it can be.

  • If there are items that belong in another room or section of the house, put them in a pile by the door. Don’t go organizing these things, but get them out of your line of sight by placing them in a pile FURTHER away and by the exit.

  • I usually make a “to fix” pile at this point too.

Don’t to think too hard about this part. It’s more of a rough categorization (I’ll give you some examples later on). The goal is to just clear the space. So, if starting to categorize is slowing you down, then just do the dump.

STEP THREE: Categorize

I absolutely love organizing things into categories and groups. There’s something so satisfying about gathering similar things together, seeing exactly what I have, all in one space. 

Make sure everything is in a category that makes sense. Put items together that match by type and or function.

For example, if you’re organizing the front closet, all the shoes (type) would go in one pile, all the jackets (type) in another pile, all the umbrellas in another, dog leashes in another etc… you may be surprised how many duplicates you have. 

You can then sort by function. All winter gear would be categorized (mittens, hats, boots) and the winter section would be a functional category because these items work in the winter and can be put away in a deeper location until they are needed).

The key here is to zoom in on each category of item so you can deal with the item.


STEP FOUR: Finish

In each category, you will have three options (if you haven’t already started doing this during the dump).

  1. Keep

  2. Donate

  3. Trash

Donating and trashing items are self-explanatory.

Now. The keep items.

Essentially we want to designate a spot for each category of items. This means to put them away and give them a permanent home. This is the moment where you can start putting back the items where they came from.

Some tips to remember:

  • I like to fix items that are easy to fix right away. If it takes longer than a few minutes, I designate a place in my house for things I need to fix/repair that will take longer and get to them when I have time.

  • Put loose things that belong together in one container (i.e. all charged batteries in a small plastic bin, all batteries that need charging in another small plastic bin - label these for less confusion).

  • Labelling may sound a little much but a label goes a long way (even if its just temporary). I use masking tape and a sharpie and keep the label on for a little while until everyone in the house learns the new spot. Often, I will make a nicer looking label with a label maker but sometimes I just leave the tape on forever or eventually take it off once the habit to put the item it’s spot is created.

  • Make it accessible according to their function. For example, Winter holiday stuff can go in a box and be put away deeper than other boxes, or at the bottom because you take them out once a year. Art supplies, however, should be more accessible and easy to take out and put back in. 

  • You don’t need to spend money to have an organized space. Sure, it’s nice to have the perfect pantry with all matching clear boxes organized in rainbow colours... But the idea is to have accessible and functional storage that makes sense to what you are storing. I use boxes that I have on hand, like shoe boxes and plastic bins, even food containers!

HOW I ORGANIZE: An Example

I use this method every time I clean. Instead of tackling an entire room, I

  1. Choose and focus on a theme. In this case: puzzles.

  2. Gather all the puzzles I own (consolidate) and put them in one place.

  3. Then I sort them (categorize). In this case, the categories are:

  • My puzzles (I have a couple puzzles that go high up in a place no children can reach because they are very special to me)

  • Kids’ puzzles

  • The rest of them (I put the kids on one side and more difficult ones on the other)

During this process. I make sure to:

Fix up any broken boxes or peeling pieces—tidy the boxes, tape up any worn edges, and make sure all the pieces are there (this step is obviously easy for kids’ puzzles. for larger puzzles, I just wait to complete them). For boxes I cant fix, I will put all the loose parts in a container.

Donate the ones I no longer love (after they have been repaired)

Trash any that have no hope

And then I store them neatly so they’re easy to access and give them a designated spot on my shelf.

A Bigger Example:

I recently used this method to organize two really big categories in my house. 

how-to-organize

First was Christmas stuff (step one: theme)

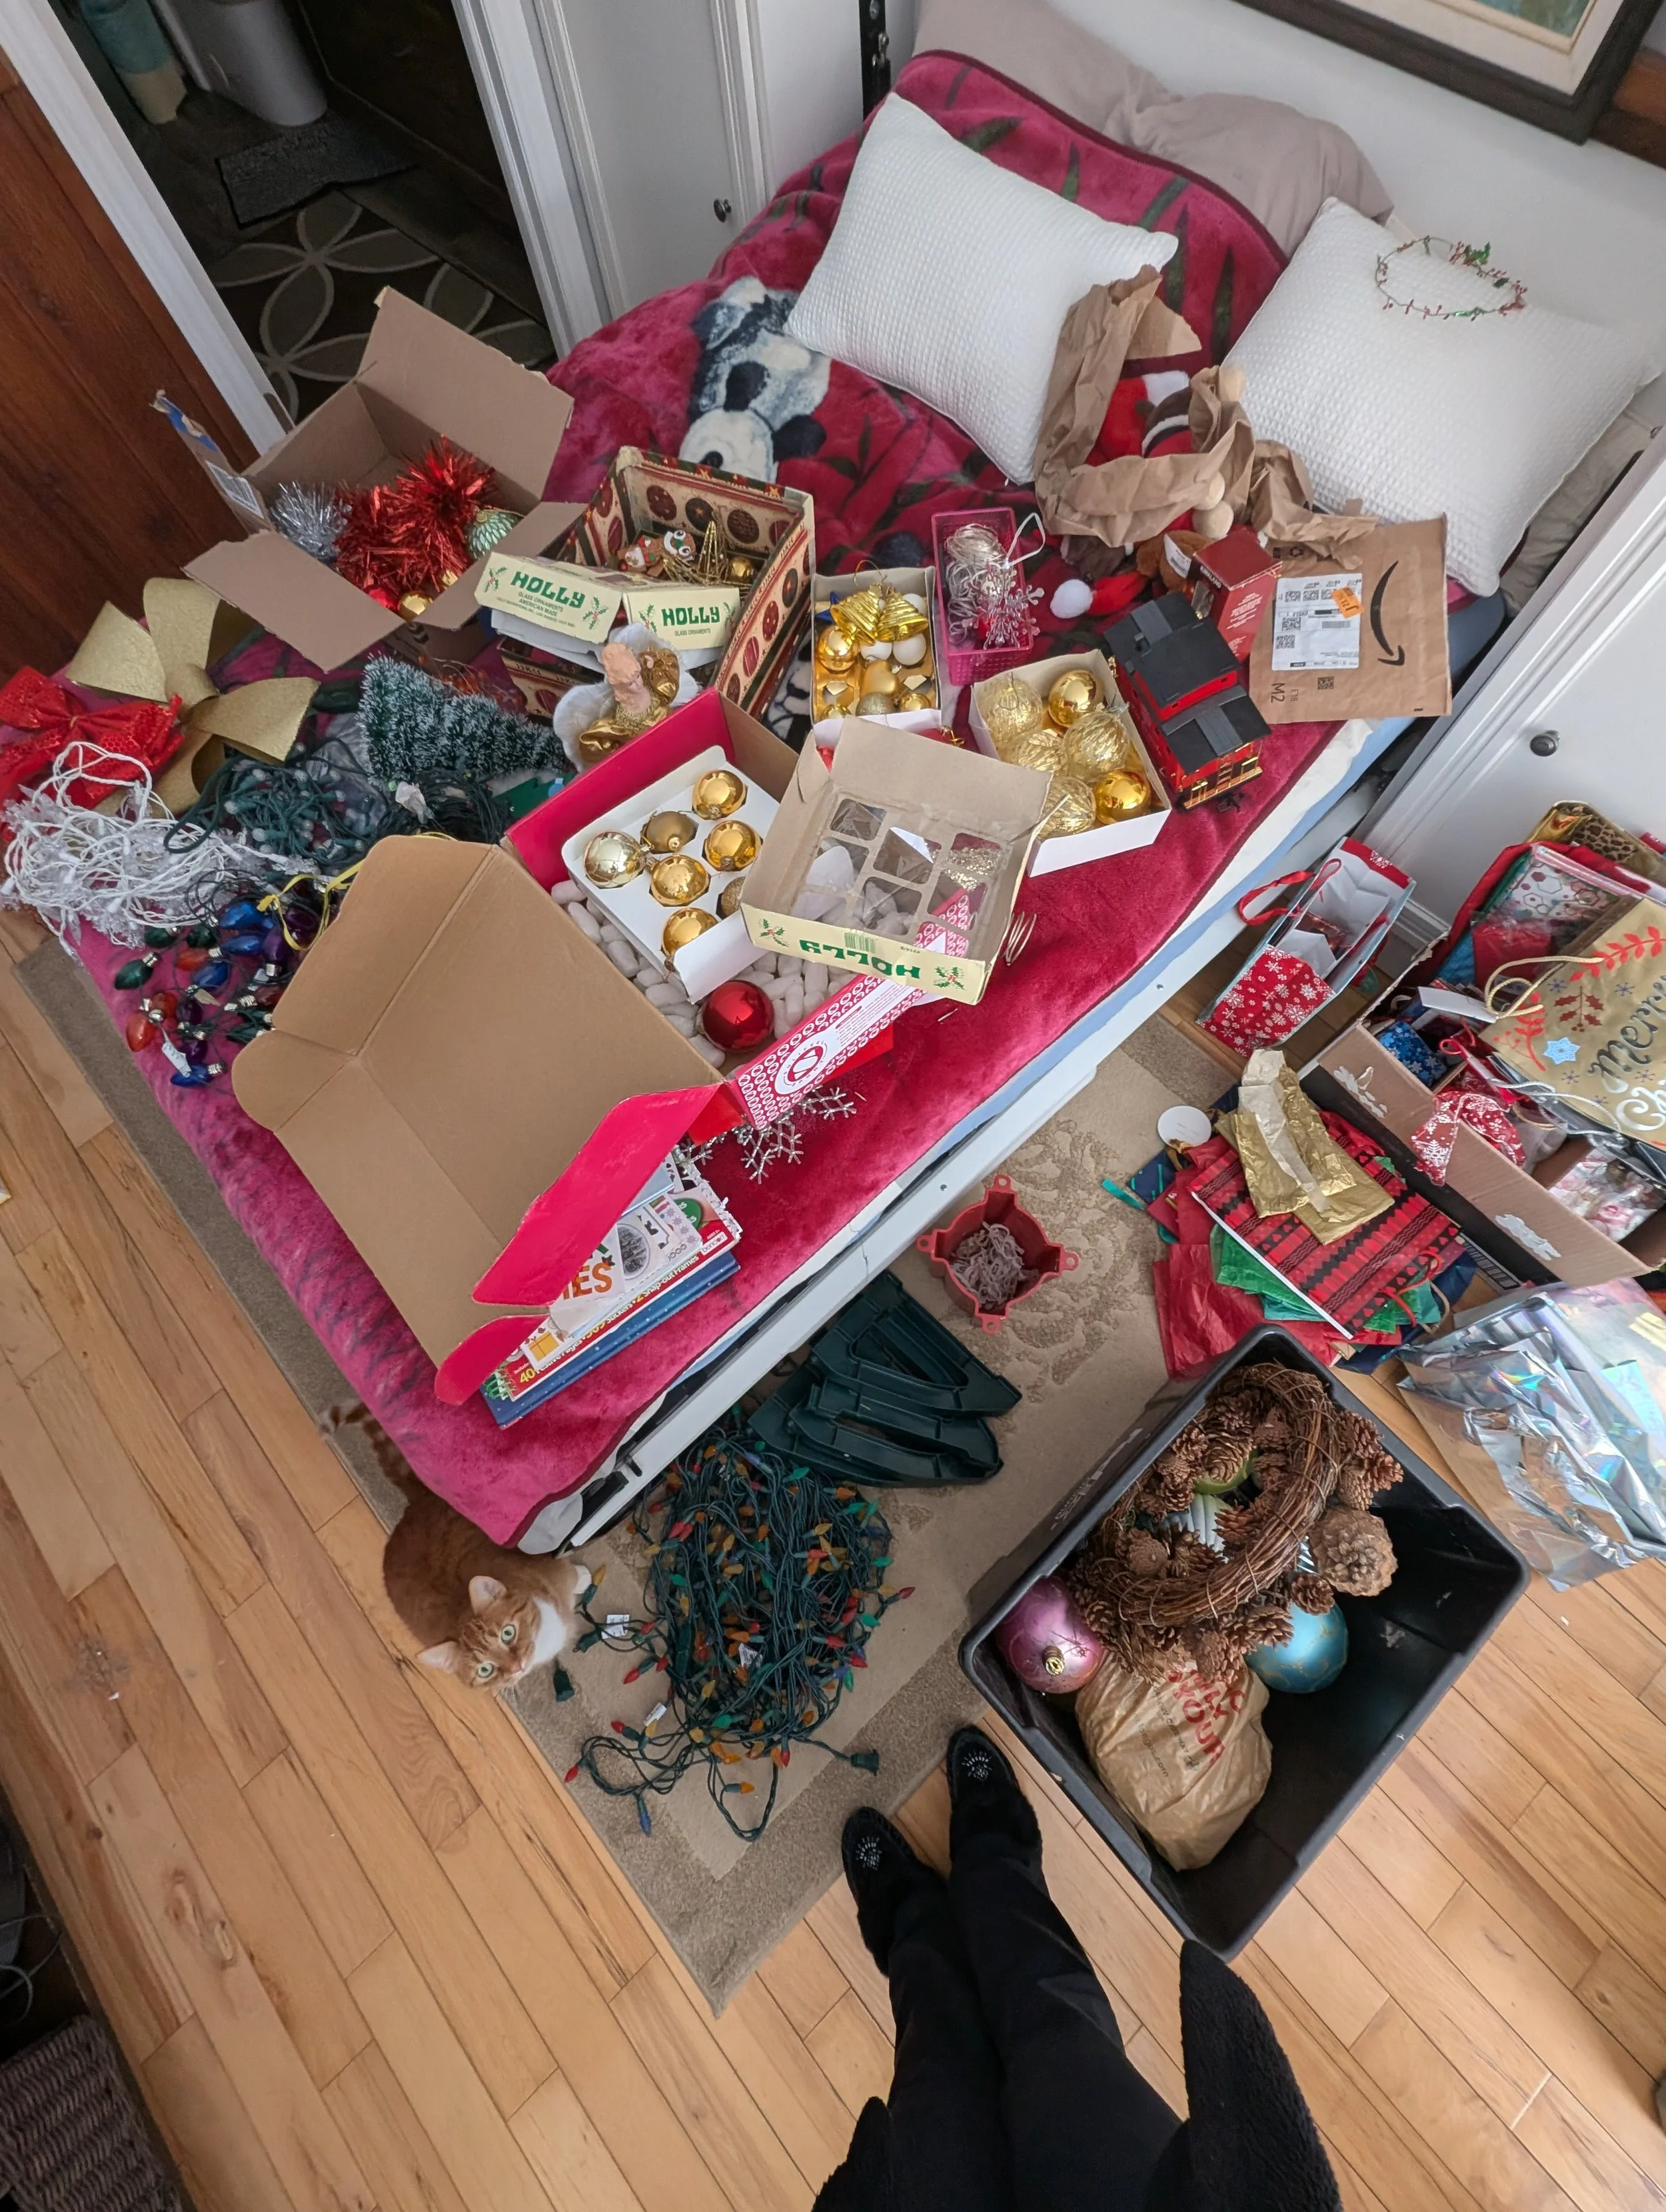
I collected and gathered everything in one room (step two: consolidation). Once the holiday season was done, I took all the decorations and supplies, along with a bunch of hand-me-downs from my parents (which live part time in Mexico so they spend winter down there and they had a lot of Christmas stuff to give away).

There were boxes that have seen better days, ribbons from presents everywhere, lights, and general decorations….

Once it was all there, I started sorting (step three: categorize).  I took anything that was broken and either fixed it, took it apart to use in other ways or tossed it. This allowed me to see more clearly what I have.

Then I sorted everything into categories.

I put all the ornaments that could break in small boxes (which I taped up and fixed), I tied up all the lights with this awesome reusable Velcro straps made for cables, and put anything breakable in tissue paper or brown packing paper.

There was one section of the Christmas stuff that was kinda big: gift wrapping stuff. I found I had a lot of different ways to wrap gifts, so I further sorted this category:

  • Gift bags

  • Wrapping paper

  • Tissue paper

  • Gift boxes

  • Gift tags


Then I found the gift wrapping items a home (first part of step four: finish)

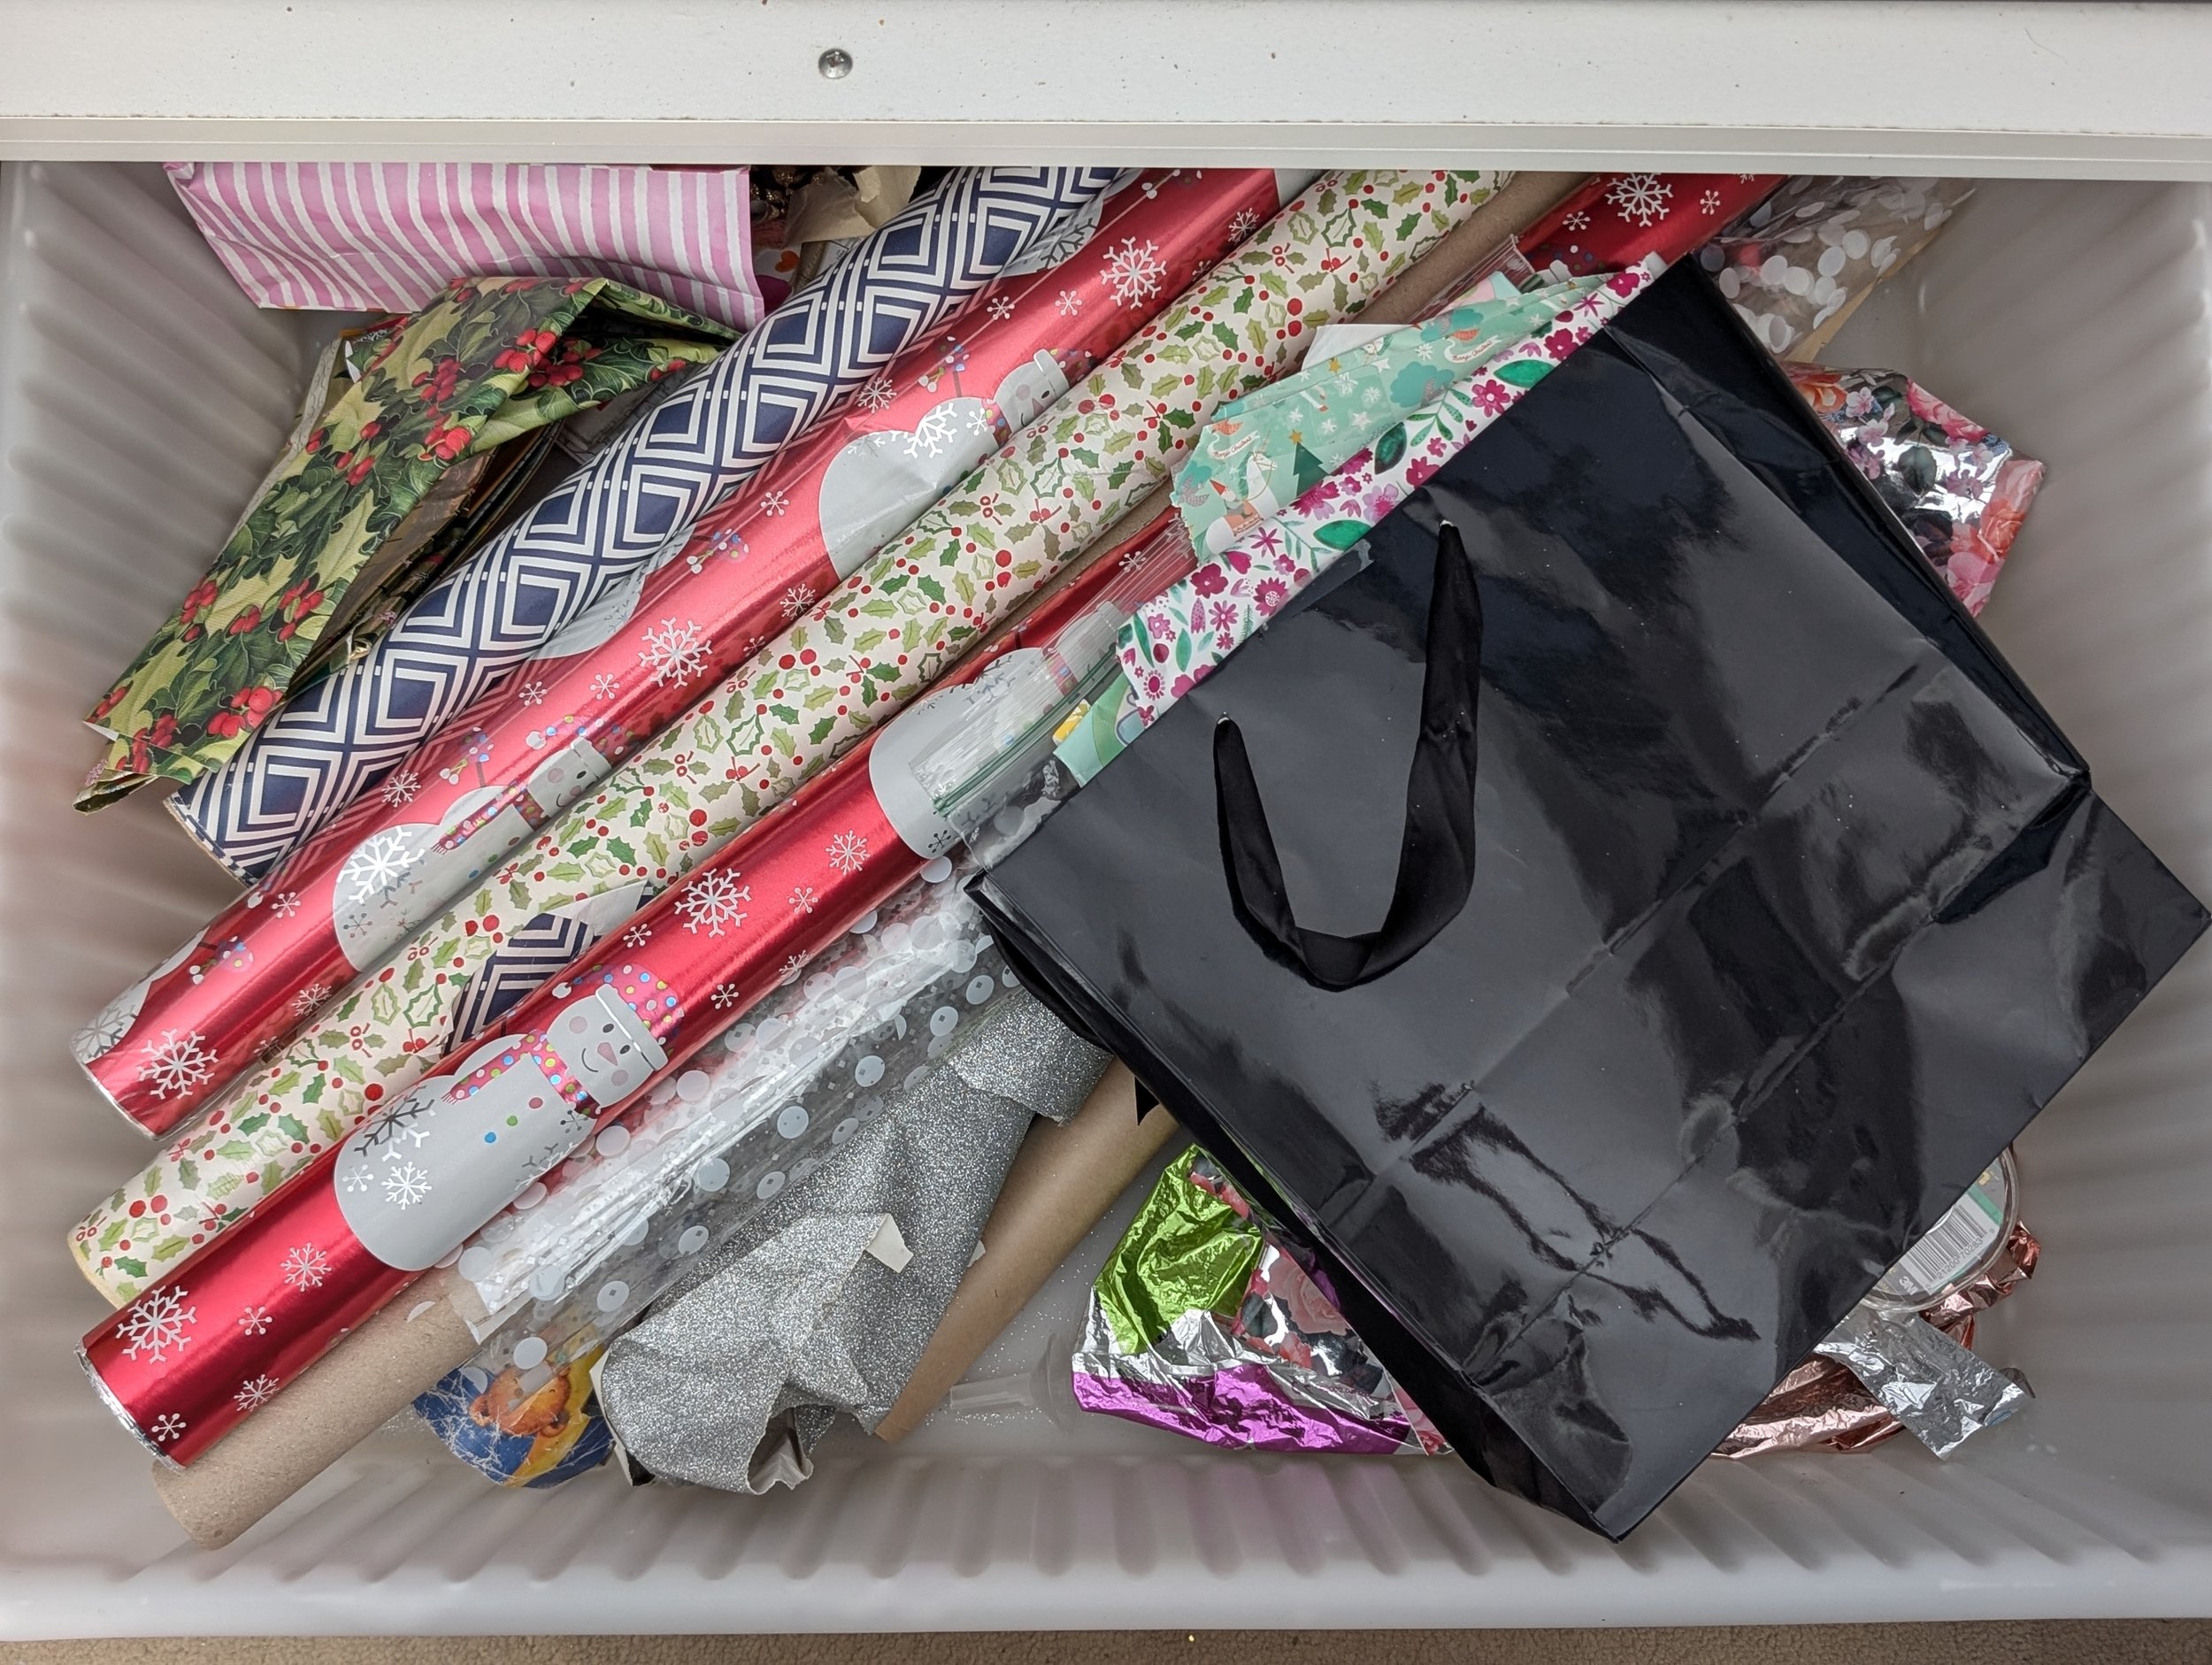
As you can see below, I used random boxes that made sense and fit all the items. I could have put everything in a large box, but instead kept them like this in the shed because I like to be able to pull individual ones out when I need them. I don’t do all my wrapping at one time, so this will be more accessible and convenient to see and find the right size during the holidays.

Large Gift Bags, Tags, Boxes and Soft Bags

wrapping-paper-organization

Wrapping Paper (new and used that I will reuse)

Small Gift Bags

tissue-paper-organization

Tissue Paper

The tissue paper is actually a category that overlaps. I keep it accessible all year-round with the gift bags and wrapping paper that is not holiday themed.

I labelled each box and put everything away in the shed (step four: finish).


The other theme I tackled was all my pyrography supplies and books—especially since I got a lot of goodies from Rachel recently. I gathered everything in one spot, sorted and categorized into the following categories: 

  • Wood and surfaces to burn on

  • Burners

  • Tips and pens

  • Other accessories (erasers, cleaning tools)

  • Tracing things (graphite paper and all designs)

  • Books 

I put everything in a large box and kept the items I used most out for now. Since it’s getting warmer here, I will be bringing everything out to my garage art space and will write a detailed blog about how I organize my wood burning supplies in the next few weeks! I will show you all my hacks for storing wood and cables and tools etc…

Even just doing this step made such a difference and now finding things is easy!

Some themes are more fun than others, but in the end, when things are easy to find and look neat, it’s totally worth the effort!


Last bit of advice and final thoughts:

Organization isn’t set in stone—it requires some upkeep, especially for items used often. The easier it is to put things away (physically), the longer your efforts will last.

It’s much easier to keep track of your belongings when you can see them, which is why clear containers are ideal for frequently used items. Being able to quickly spot what you need helps prevent overbuying, misplaced items, and clutter from piling up. But when clear containers aren’t an option, labels are the next best thing. A simple, well-placed label removes the guesswork, making it just as easy to find and put things away.

Since belongings fluctuate (things get donated, new items come in, and some break), having a little breathing room in containers allows for flexibility and prevents constant reorganization.

Staying organized doesn’t have to mean massive overhauls (although sometimes things get so out of hand, they need to be big steps). Essentially small, consistent steps make a big difference. Taking a few minutes to return things to their place, decluttering one drawer at a time, or doing a quick reset at the end of the day prevents mess from piling up. These small habits add up, making organization feel effortless rather than overwhelming. A little effort now saves a lot of time and frustration later.


Do you have an organizing trick that works for you? Let me know in the comments—I’d love to hear!


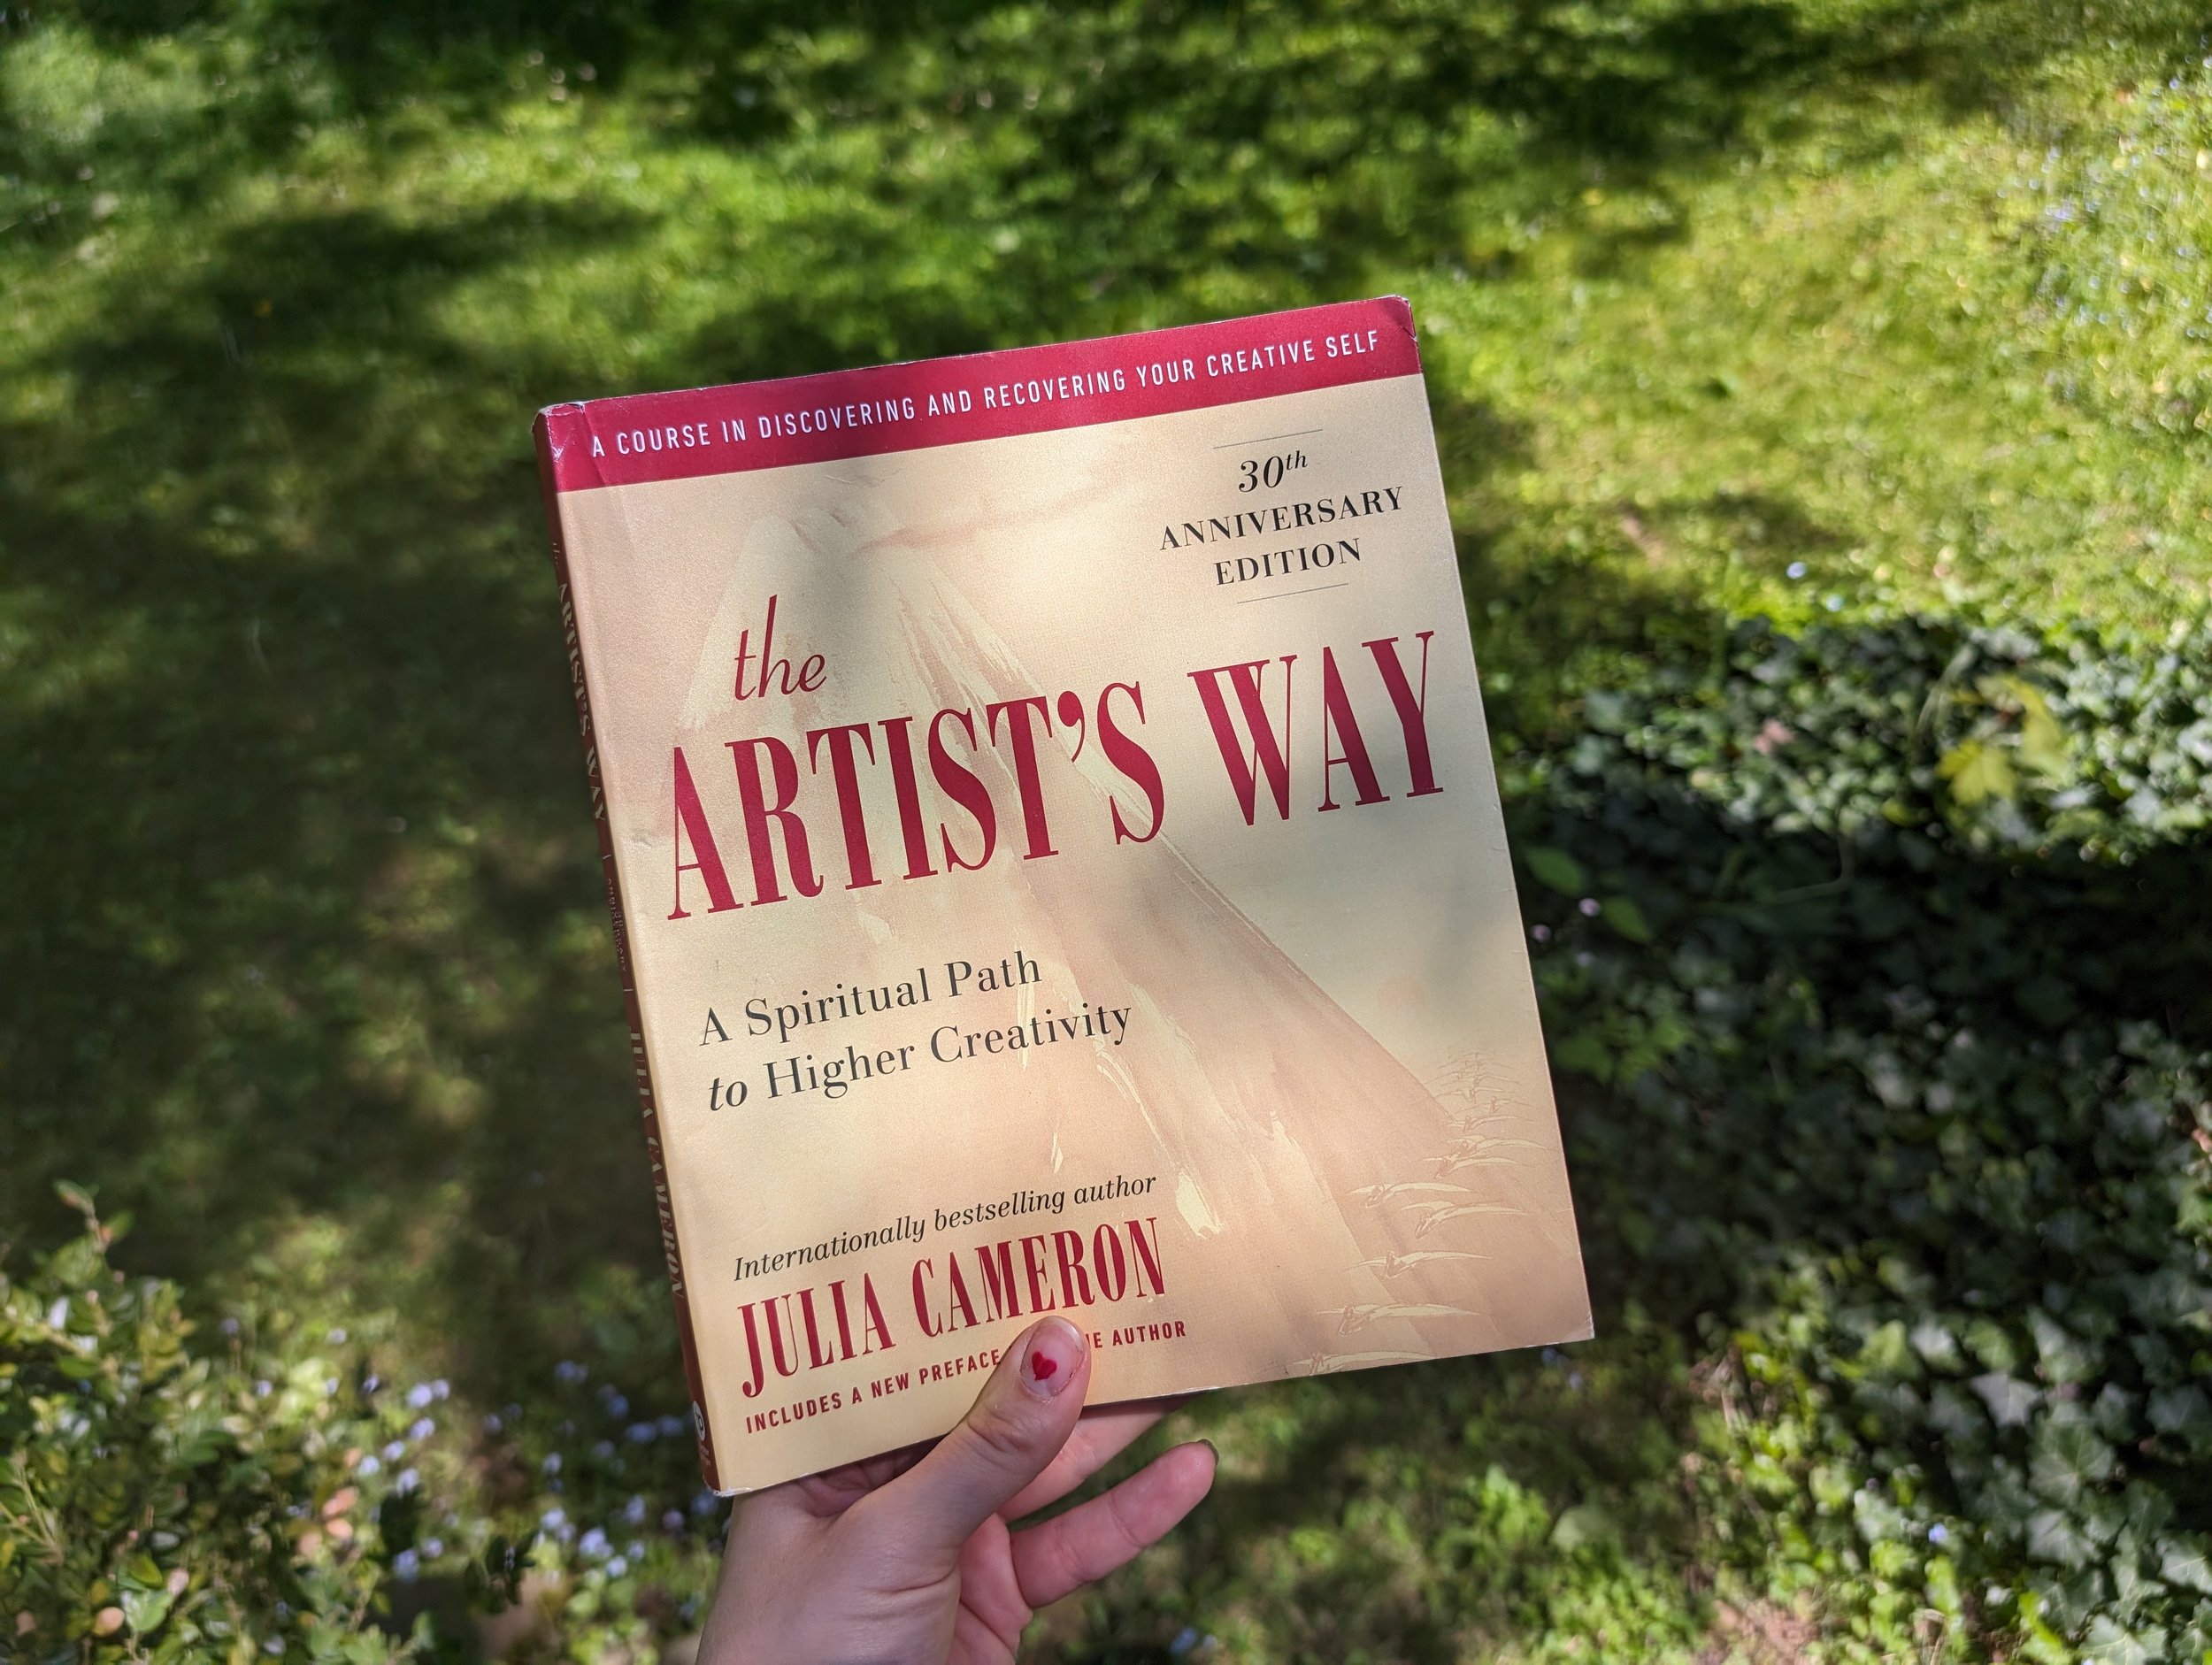
The Artists Way by Julia Cameron

how-to-spark-your-creativity

"The Artist's Way" by Julia Cameron a 12-week adventure designed to help anyone rediscover their creative mojo.

Each chapter mixes motivational essays, fun exercises, and some serious soul-searching tasks aimed at breaking down the barriers we set up against our own creativity.

It’s Basia here and I just wanted to take a moment and share this book and the beginning of my journey through it.

Rachel has completed the book several times and said that each time, she seemed to uncover new depths of herself as well as her creativity that even she didn't know existed. She recommended that I give it a try, and I'm embarking on this journey once again, alongside her.

Especially since moving an hour up North, I was in the thick of change and needed some guidance. I felt stuck with which direction to go, art wise, as well as in other facets of my life.

There are a bunch of tasks, and activities and such which go with each week, but there are two things you need to complete every week, consistently.

ONE:

The first is an artists date. This is a date with yourself, the artist, doing whatever it is you want to do! It can be as simple as going for a walk, to visiting the museum, to making a new art piece... It’s a chance to intentionally treat yourself!

My last date included going to the a small local greenhouse with a gardening store attached to it. I didn’t go with the intention of buying anything; I went with the intention of perusing slowly through the isles and looking at all the flowers, taking photos, getting inspired by all the colours, textures and nature. It’s such a simple thing, yet it made a big impact on my mood and inspired me in many ways… It was also really nice to slow down and literally smell the roses.

tulip
flowers
double-tulip
nature-rules

TWO:

The second part of this journey includes writing daily. It’s journaling but in a freestyle, nonsense way. More like brain dumping than anything.

I've never considered myself a writer; in fact, writing has always given me anxiety and felt like a chore. Previous attempts at journaling felt forced and were invariably brief. It took long and always came out sounding forced.

Julia Cameron suggests this freestyle way of writing that's all about just letting it out. Now I write quickly and freely, without concern for structure, spelling, or even readability. The purpose is to simply let the words flow, knowing I'll never revisit these pages (I actually burn a lot of the pages I write and my writing is so messy, i can barely read it)! This has proven to be incredibly cathartic and freeing with many many many micro epiphanies about myself, my life and everything around me!

My biggest epiphany so far is about the style of writing itself. Writing in this way allows me to slow my mental chatter to one thought at a time, helping me to process each thought thoroughly instead of letting them all swirl around unexamined (and worst of all, usually repeating). It’s a simple, yet profoundly effective, way to clear the mind, which I never knew I had to do… I really never knew this kind of expression existed and I never really knew I needed it!

If you've ever felt stuck, unsure, or just curious about what your creative mind can do, "The Artist's Way" could be a thrilling experiment for you. It’s not just about becoming an artist—it’s about becoming more yourself. You don’t need to be good at drawing, writing, or anything at all; you just need to be open to exploring what creativity means for you.

Click here to see the book on Amazon. This is an affiliate link; I strongly recommend this book to anyone in search of inspiration, self-reflection, self-exploration and motivation.

Possibly, in time, I will share more about my creations and how my dates go, as well as give insight into my journey with this book.


Basia's Radial Symmetry Art (Digital Form)

Basia here! As you already know, I love to make art with patterns. Especially circular and symmetrical patterns!

I really got into creating digital art because it was just so easy to create on the go. I moved up North and while my things were packed, there were images in my head that I had to get out onto something tangible.

These will definitely inspire my future wood burning work.

Of course, I still stick to nature themed images as they continue to inspire me to create more art and also to get outside more. I moved into the forest, and plan to continue taking more photos and playing with more nature to find and create symmetrical artworks.

These digital artworks were made using procreate using my own photo’s as well as AI photos (using Midjourney).

I am addicted. It is so much fun to create these organized abstract designs!

To see my collection, and get them in a sticker, on a pillow, or even a shower curtain, check out my shop:

Below is a time-lapse of a floral pattern I made using my photos, cut, paste, arranged and then arranged again:

What is radial symmetry to me?

a radial symmetry pattern to me is the end result of a mindfulness journey.

It is what I get at the end of a creative meditation, a zone out, a doodle session (whatever you want to call it!)

I use drawing a mandala (wether in digital format or on paper/wood) as a form of meditation.

The repetitive patterns I make help me zone out and immerse myself in each second.


If you want to learn how to make your own pattern (non-digital form), check out the Community Book of Templates (Radial Symmetry Edition) with instructions and a variety of templates for you to transfer onto wood and burn, OR the Art Deco/Art Nouveau style bundle, which I call Presence (digital and hardcopy available) full of templates and also step-by-step instructions to drawing your own patterns.

Once you learn how to draw your patterns, you can easily transfer them (or draw them directly) onto wood!


Click through the following links to learn how to transfer your designs using heat and without using heat!


Transforming a Dull Laundry Room into a Stylish Dog Washing Station

Home Project: Laundry Room

dog

Welcome to my latest home improvement project journey! Today, I'm excited to share how I turned my uninspiring laundry room into a functional and chic dog washing station. With a little creativity and some DIY magic, I was able to breathe new life into this space and create a haven for both me and my furry friends.

Before:

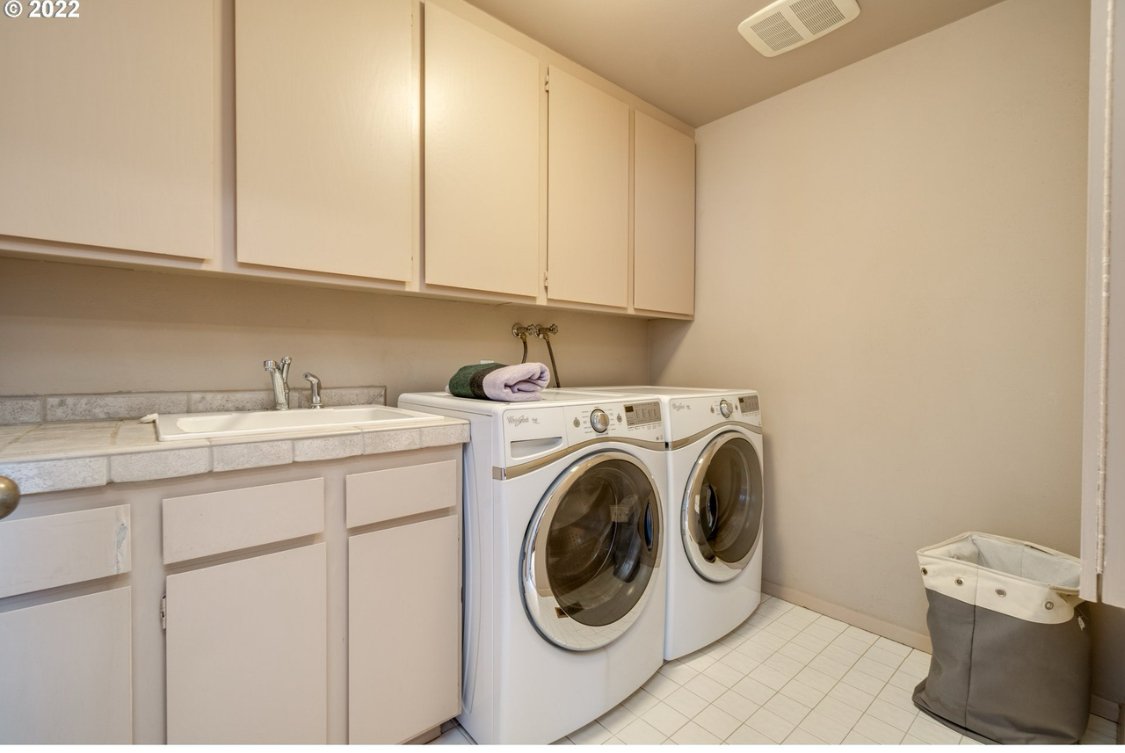
Let's start with the before photos. My laundry room was, to put it bluntly, lackluster. The walls were painted a dull boring tan shade, the sink was outdated and too small to wash my pups in, the laundry machines were old and never got the clothes clean, the paint was chipping in places, and the countertops were a gross outdated tile. It was a space that kind of served its purpose but lacked personality and charm. It wasn’t a space I wanted to spend any time in, and we wanted to make it serve multiple uses: Laundry, Storage, and a Dog Washing Station without breaking the bank.

Products Used:

Before diving into the transformation process, let me introduce you to the MVPs (Most Valuable Products) that helped bring my vision to life: (Please Note: These include some Amazon Associate Links for the products we used. WBC receives a tiny portion of sales from Amazon)

  1. Wallpaper: I chose a vibrant and eye-catching floral peel and stick wallpaper to add a pop of color and pattern to the walls. It instantly brightened up the space and set the tone for the entire room. Bonus: it is super easy to install yourself.

  2. Sink: Say goodbye to the old, dingy sink and hello to the sleek and modern dog washing station. I opted for a deep stainless steel sink. It is not easy finding a sink that is both long and super deep. This one is 12” deep and 30” wide, and is perfect for my pups.

  3. Wood Countertops: To add warmth and texture to the room, I installed custom faux wood countertops from IKEA. Not only are they beautiful to look at, but they also provide a durable surface for all my laundry and dog grooming needs.

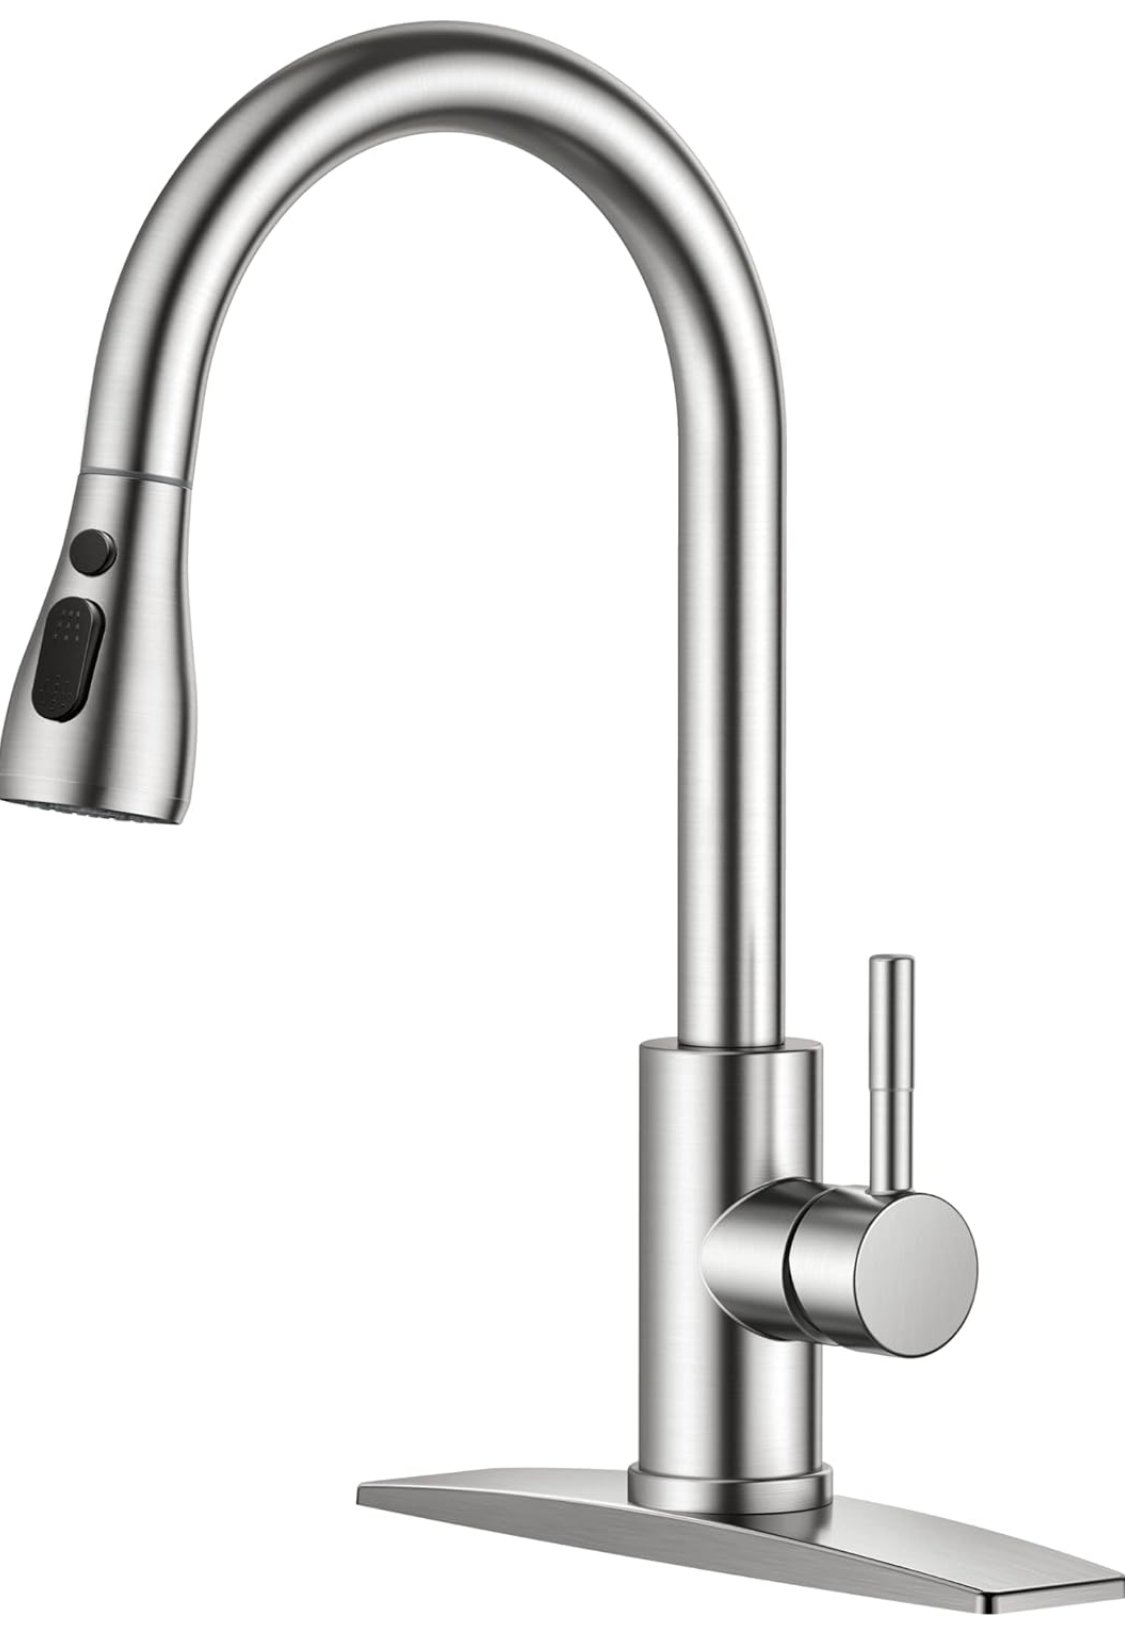
  4. Faucet: We wanted a simple faucet with the retractable nozzle for easy dog washing, but it was also important to have the handheld off button for easy pausing. This $79 faucet was on sale for $39 on Amazon, and is perfect!

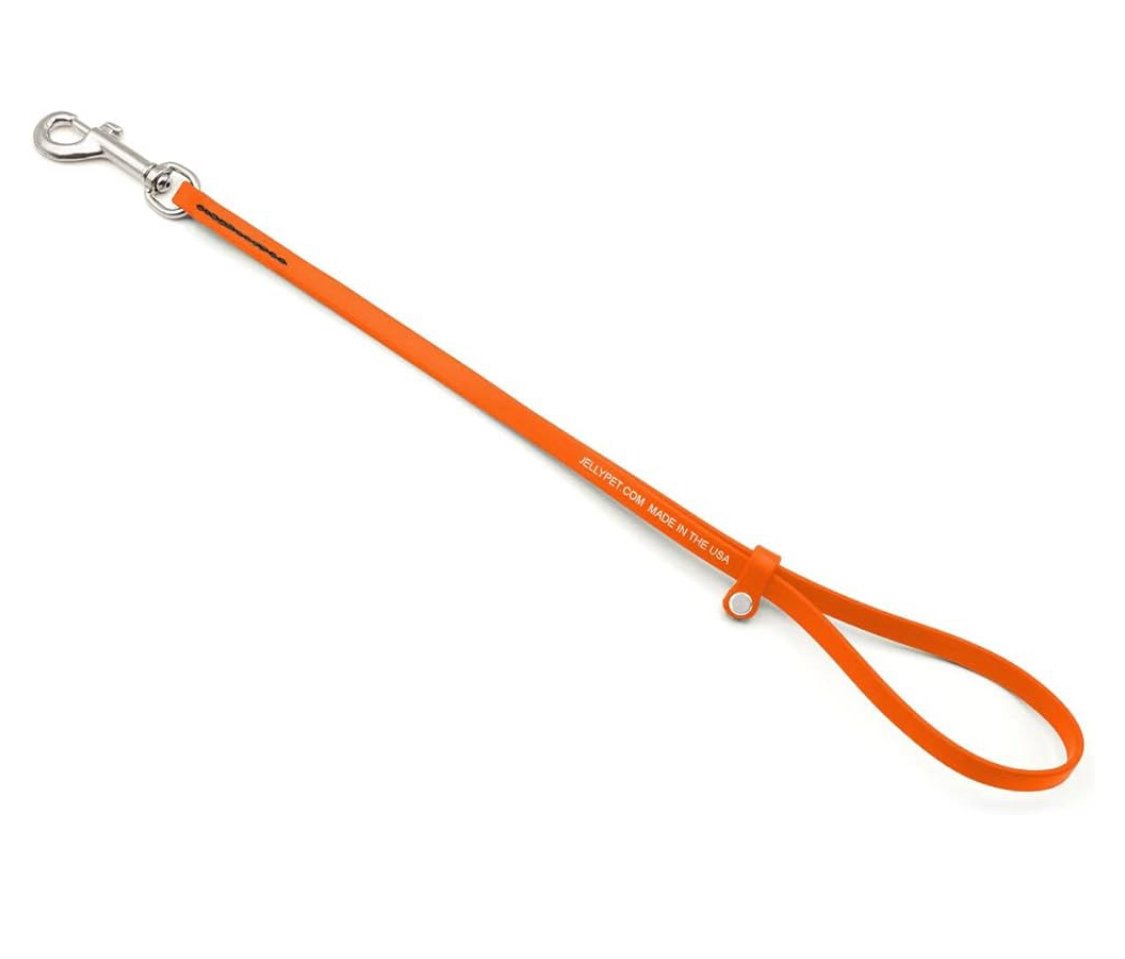
  5. Dog Grooming Loop: This is key for a successful wash in our house. These dog grooming loops make it super simple to keep your dog in the sink while they are getting clean. We secured it to the wall using an eye hook, and now we are ready to clean our dirty pups, without breaking our backs!

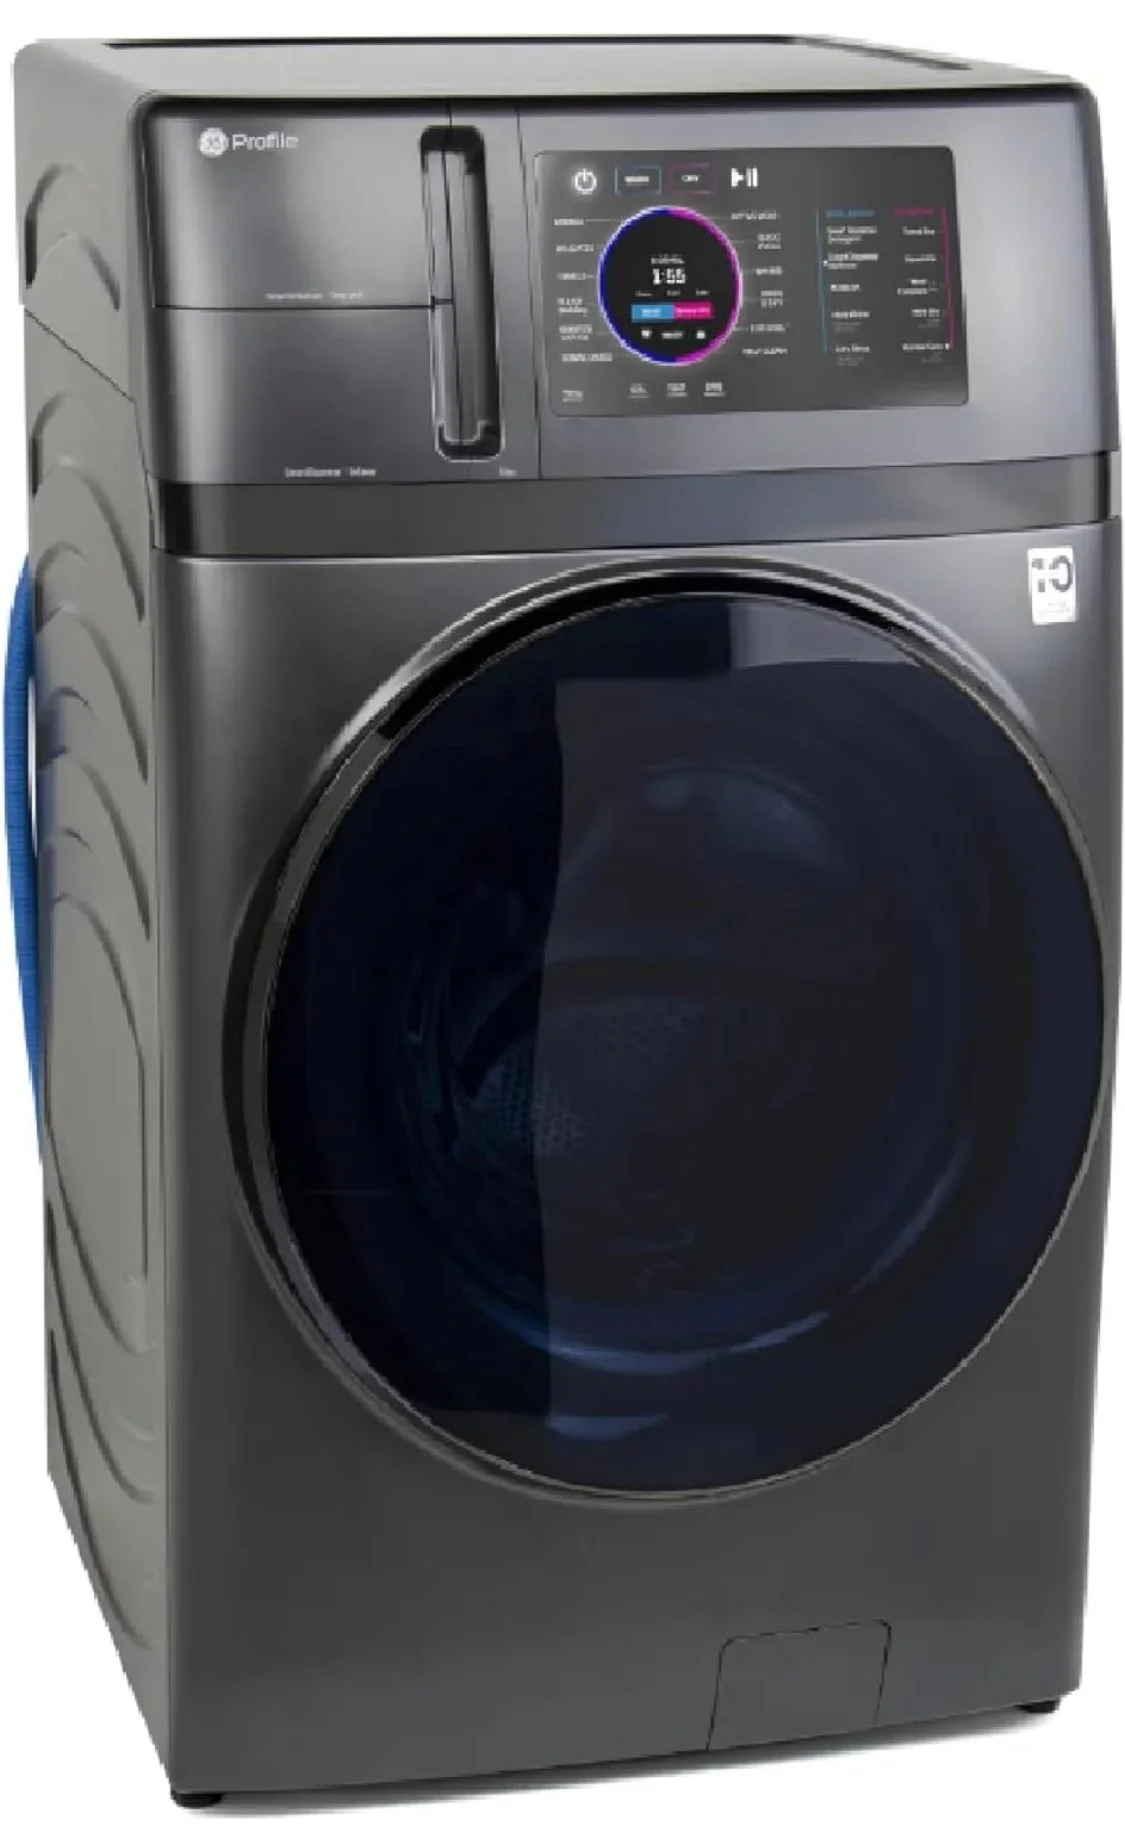
  6. Washer/Dryer Combos: This has been an absolute game changer! Two large capacity washer/dryer combos from GE. I put the clothes in and come back to washed and dried clothes! No more needing to rewash or re-dry clothes. No more forgetting clothes in the washing machine. This has been a huge time saver. And, it has the amazing feature of automatically dispensing detergent and softener. Laundry has become considerably more tolerable with these machines.

Transformation Process:

Now, let's talk about the fun part – the transformation process! With the help of some handy tools and a lot of elbow grease, I was able to turn my laundry room into a space that I'm proud to show off.

  1. Prep Work: The first step was to clear out the room and remove the old countertop and sink. Once the space was empty, I prepped the walls for wallpaper installation by filling in any cracks and sanding down rough surfaces. (Spackling Compound, Sanding Sponge)

  2. Wallpaper Installation: With the walls prepped and ready to go, it was time to apply the wallpaper. This step required careful measurements and precise cutting to ensure a seamless finish. After a few hours of work, the wallpaper was up, and the transformation was already taking shape. (Razor Blade Pen)

  3. Time to paint those drab lower cabinets. I wanted it to be a color in both the laundry machines themselves and in the wallpaper, and this dark grey is it! (I used a paint we already had on hand from my stairwell trim, it was the perfect color and helps tie the house together).

  4. Sink, Faucet, and Countertop Installation: Next up was installing the new sink and countertops. This involved some plumbing work and carpentry skills, but with the help of my handy hubby, measuring multiple times, some liquid nails, and a bit of trial and error, we were able to get everything installed correctly. (Liquid Nails, Quick Clamps)

After:

And now, the moment you've all been waiting for – the after photos! Drumroll, please... Ta-da! The once-dull laundry room has been completely transformed into a stylish and functional dog washing station. The vibrant wallpaper adds personality to the space, while the sleek sink and wood countertops provide both beauty and practicality.

Final Thoughts:

In conclusion, I couldn't be happier with how my laundry room makeover turned out. By investing a little time and effort, I was able to create a space that not only serves a practical purpose but also brings a bit of joy to my not so joyful chores. Whether I'm doing laundry or giving my furry friends a bath, this room now feels a whole lot better.

Thank you for joining me on this journey, and I hope you feel inspired to tackle your own home improvement projects. Stay tuned for more adventures in DIY!

A Radial Symmetry Guide and Colouring Book


This is a radial symmetry guide, a collection of 25 unique colouring designs, three blank grids and six outlines to doodle in providing a gateway to a world of mesmerizing patterns, relaxing mindfulness and endless creativity.

For all you pyrography artists, the 25 designs are also made for traceability so you can transfer/trace and burn them! Instructions to that are included on the initial download with the digital version.

Designed to help both novices and seasoned artists explore the captivating realm of radial symmetry, this book guides you step-by-step through the creation of intricate and balanced designs.

The first half of the book dives into all the details from making a grid, to 7 different creative variations of a circular pattern.

The intention is to give you the knowledge and easy to follow instructions for you to continue making one-of-a-kind radial symmetry patterns using only a few basic tools.


It includes 3 blank grids for you to practice on.

Print out as many as you like with the digital download!


And it also includes 6 outlines (in 3 different styles) for you to practice on and doodle in along with a simple creativity exersize to get you going.


The second half of the book has 25 original patterns for you to colour and reimagine. Inspired by the art deco and art nouveau artistic movements, the intention with these finished patterns is the get you inspired, relaxed and also hone in your artistic skills.


Not only can you grab your favourite colouring tools, let your imagination soar, and get ready for a transformative artistic journey, you can also learn a new hobby.


Learn How to Wood Burn

pyrography-templates-ideas

The book includes links to free resources that help you take the patterns off the page and onto wood.

If you’ve ever wanted to go beyond coloring and actually try your hand at wood burning, this is your invitation.

You’ll learn exactly how to transfer the designs and start burning your own radial symmetry art—no guesswork, just a clear path into a whole new creative world.


OR download a digital copy to easily resize any design in the book and wood burn onto a wood slice using the art of pyrography!

Links to all the resources you need are included and are free.


Rachel's February Reading List

February was a shorter month, and work on the Pyrography + Business Summit picked up, so I didn’t get quite as many books read as I would have liked. What I did read, I mostly enjoyed, and I am excited to share them with you.

All books are linked directly to Amazon for easy purchasing. I receive a tiny portion of Amazon’s profits if you choose to purchase one, but this in no way effects my reviews. I will always be honest with my thoughts on products, books, services, etc.

  1. Jab, Jab, Jab, Right Hook by Gary Vaynerchuk - I really like Gary as a no-nonsense speaker on business. He is a bit abrasive, but in a good, motivating way. This book talks about give, give, giving before you ask of your customers/clients. The jabs being the value you provide and the right hooks being the ask. Effot is important for telling your unique story in a noisy world.

  2. Little Fires Everywhere by Celeste Ng - I liked this book, ok. It is a NY Times Bestseller, but I have read better as of late. The characters were well developed, there is an artist in the story, and a couple twists and turns. There is a push and pull with the storyline, and it is clear that there is no black and white or wrong and right when it comes to some things, and there are plenty of those in this book. Well written.

  3. The Power of Persuasion by John Myers - Lots of persuasive tactics. At one point he lists off over a hundred different ways to convince people to do something. It is also helpful in being able to spot persuasion when it is being used on you.

  4. How to Stop Time by Matt Haig - “It only takes a moment to live.” This was a very cool book. Gets you thinking about the long and short of history and how it repeats itself. Really enjoyed the concept and the name drops throughout. I loved how the author played with time, locations and memories. “Sometimes you can just look around and be happy right where you are.”

  5. Reminders of Him by Colleen Hoover - Another great story from Coleen Hoover. Heartache, death, forgiveness, and connection, this book has it all and you will fly through it. You will feel for the main character who is stuck in an impossible situation. “Regret keeps you stuck on pause.” Makes you think about mistakes that you have made in life, and how one small act can change everything. “Are you going to live in the sadness or die in it?”

  6. On The Shortness of Life by Seneca - This was recommended by several Titans in their fields out of the book Tools of Titans by Timothy Ferris. It is a really really old book written by a Roman philosopher. It is said her wrote it to his father-in-law, a mortal essay. It has since been translated and transcribed over time. “Life is long if you know how to use it.”

  7. Steal Like an Artist by Austin Kleon - Our Keynote Speaker for the upcoming Pyrography + Business Summit! This is a NY Times bestselling book with over 1 million copies sold in English alone. Such a great read that I think every artist out there should get their hands on. “Do good work and share it with people.”

  8. Where the Crawdads Sing by Delia Owens - This was a STUNNING book! So incredibly well written, and made you feel like you were there, in Kya’s beautiful world. It is a story of perseverance through extreme neglect, trauma, and solitude. A beautifully sad story that definitely made me weep. Trigger warning for SA.

  9. Talk Triggers by Jay Baer and Daniel Lemin - This book was all about ways to get the most powerful and efficient marketing tool, word-of-mouth, to trigger. The types of talk triggers that can be utilized for business, and how to get it working for yours. It was good and I got a couple good points out of it, but I think it is best for larger corporations rather than small creative businesses.

  10. Show Your Work by Austin Kleon - Another book that EVERY ARTIST NEEDS TO READ! Do good work, and the rest will come. This author, Austin Kleon, is so great at getting right to the point in both his writing and illustrations. For a visual learner, like myself, this is really helpful. Can’t recommend his trilogy enough, and so excited to hear him speak in May at our Summit!


Want to know what I read in January? Check out Rachel's January Reading List


Goal Setting and Creating Habits with Radial Symmetry Trackers

There's never a wrong time to set new habits and goals. Life constantly evolves, offering endless opportunities for growth and improvement. Whether it's personal, professional, or health-related, every moment is ripe for change and self-betterment. Embracing this mindset allows us to continuously evolve and adapt, making the most of each day as a fresh start towards achieving our aspirations.

A daily habit tracker gives you small wins to look forward to every day!

If you enjoy making to-do (and ta-da) lists, then you will enjoy tracking your daily habits, and you will find that you accomplish way more in a day. If you are anything like me, you may be thinking, that is great, but I will stop using it in a week/2 weeks/2 months. I have a solution for you! Put this list next to a habit you already have in place. Something you do daily without fail. For me, that is brushing my teeth at night before bed. I will do this no matter how tired I am. Putting my tracker next to my toothbrush has not only given me something to do during the two minutes I am brushing, but it also ensures that I do it DAILY without fail, too! Try this hack, and I think you will find that you stick to your tracker, and therefore your larger goals.

We love to use our own trackers we made.

track three habits a day:


Track Seven Habits a day


Or track a single habit for a year!


Need some guidance on finding focus and creating the goals you need? Check out: Focus Five - The 5 Things That Describe Your Business

WHY TRACK?

Daily trackers make goals more attainable and less intimidating. Rather than looking at a large goal and how long it will take, a habit tracker allows you to break it down into daily wins.

The beauty of a tracker is that you get to track what YOU want to track. You get to personalize it to your individual goals. Whether that be personal and/or business.

You can use these trackers for personal items like:

  • exercise

  • water intake

  • mood

  • stretching

  • meditation

  • journaling

  • gratitude

  • creating art

  • alcohol intake

  • reading

  • medications/vitamins

  • and so much more

You can also use them for your business goals.

You can track longer term goals and/or small daily actions that add up to your larger picture goals for yourself and your business. Track things like:

  • crossing off at least three things from your to do list

  • stopped working at 5pm and/or started by 8am

  • no personal social media during business hours

  • took a walk at break time

  • writing a blog

  • posting on a social media platform

  • pinning on pinterest

  • checking in on asana (or your daily to do list)

  • spent 5 minutes plugging away at a long term project (i.e. organizing canva documents or your google photos or a course you are creating)

  • spent less than 15min on social media (check your IOS device for a breakdown)

  • promoting/marketing yourself

  • whatever it is YOU want to work on for your business to reach your goals

Being able to see each day filled out with a simple pattern or color gives you a sense of accomplishment and a positive feeling. It gives you motivation to keep filling each day up and complete the month. It keeps you on track for your goals and the best part is that you decide what those goals are.


We’ve created printable, mandala style habit trackers! These can be used in a couple ways. The first way is simply coloring each section in with color(s). The other way is doodling in each section with little creatures, nature pattern or whatever you are into!

Once your habit is done (or at the end of the day, when you are brushing your teeth and getting ready for bed) you can make a quick doodle, like a heart or just some simple lines. If you are feeling fancy, add some detailed patterns. When your month is complete, you will have a pretty mandala that makes you proud!

We have individual trackers with 31 spaces or you can get the whole year where each tracker is numbered and has it’s corresponding spaces!


Rachel's January Reading List

january-book-reviews

One of my biggest goals for this year is to read more. I have ADHD and have always struggled with reading. I would read a page while my mind wandered and then have to re-read the page again. I found that this was especially true when I was reading material that I did not enjoy, or really that I was not in the mood to read.

Well, I don’t know how I started doing this, probably out of just not wanting to read what I was currently reading that moment, but I started picking up more than one book at a time. Like, 8-12 books at a time. This might sound ludicrous, but it allowed me to pick up the book that I am in the mood for, and therefore can actually focus on what it is I am reading. IT HAS CHANGED MY READING GAME!

The other thing I implemented at the beginning of the year was starting a daily tracker to track my habits. I wanted to create better habits, and focus on my goals for the year, but again, struggled with keeping up with a tracker. I wrote about it in this blog post, but basically I hacked the system by putting my tracker next to a habit I already have: brushing my teeth. Now, I don’t miss any days of tracking my habits, and this has been an incredible encourager as well as accountability for the things I want to focus on this year.

So, in doing these two things, my read book count for the month of January more than doubled the normal number of books I read in a year!

Here is what I read, in the order I finished them, and my take on them:

  1. Erotic Stories for Punjabi Widows by Balli Kaur Jaswal - A delightful read. Surprising and fun. Some erotic stories, and some humor. I’d recommend this one.

  2. Yearbook by Seth Rogen - I listened to this one, and I am glad I did. Hearing it in Seth’s voice was great. A mischievous kid with some funny stories.

  3. Love Warrior by Glennon Doyle - I LOVE Glennon! I think she is a great thinker of our time. I love her sensitivity, and her honesty. This is an autobiography and touches on love, religion, cheating, self-growth, and being your authentic self.

  4. One Thousand White Women by Jim Fergus - This was a fantastic story, the author had me convinced it was a true story. Clearly well researched, and well written. The concept: 1,000 white women are to live and bear children with Indigenous people of America in exchange for horses to help colonize them. Such an interesting read.

  5. Regretting You by Colleen Hoover - I read almost all Colleen Hoover books in a day. They are really hard to put down. This was told from a mother and from a daughter’s perspectives. It is steamy, there is tension, and as always with Colleen Hoover books, twists and turns. Great and quick read.

  6. It Ends with Us by Colleen Hoover - This Romantic book does come with a domestic violence trigger warning. So much passion, tension, love, and fear in this novel. Could not put it down.

  7. Emotionally Absent Mother by Jasmin Lee Cori MS LPC - I listened to this book. This is about relationships, and attachment styles. I have been doing a lot of therapeutic work, and this was a hard one for me, but necessary. If you have a difficult relationship with your Mother, I recommend this read.

  8. Heart Bones by Colleen Hoover - Another great one from Colleen Hoover. Couldn’t put it down. Trigger warning for drug abuse, and neglect. It involves falling in love, trust, and heartache. Full of twists and turns. You really feel for the main characters.

  9. Mother Hunger by Kelly McDaniel - Another book recommended by my therapist. It was healing for me to read this. Helped me to understand myself more, and validated my feelings.

  10. Art of War by Sun Tzu - A very quick listen. It really is a book about the art of war, and yet the lessons in it can be used for almost anything you encounter in regular life. I bought this one in physical book form after listening to it.

  11. Idiot by Laura Cleary - I listened to this lighthearted book. Trigger warning for domestic violence and addiction. It was just ok. It is an autobiography of Laura, a comedian and Tiktok star. It had good reviews, but I am not sure I would recommend it and don’t plan on reading her other book.

  12. 4 Hr Workweek by Timothy Ferriss - EVERY ENTREPRENEUR SHOULD READ THIS BOOK. So many pages dog eared, and I fully plan on reading it again.

  13. Tools of Titans by Timothy Ferriss - I listened to this 24 hour long book. It is interviews from Titans in different fields. Very interesting and gave me some great ideas. If you like hearing interviews, this is a good one. Took some really valuable things away from this as well as many book recommendations.

  14. The War of Art by Steven Pressfield - Self-help book for the creative. It will help you break through blocks, win inner creative battles, and get rid of resistance. The author encourages you to lean in and get a little scared. Follow your passions and create for the sake of creating.

  15. Essentialism by Greg McKeown - I love this author. I listened to this one. It is about eliminating the unnecessary, and focusing on the essential parts of life and business. Choosing choice. Highly recommend it.


WANT TO KNOW WHAT I READ IN February? CHECK OUT Rachel's February Reading List