How to have fun with loose watercolor and pyrography

poppy+splatter.jpg

What you need: Get all your supplies for this project in The Wood Burn Box or check this blog post to learn which tool is best for you!)

Below are to all the products we used (some are Amazon affiliate links):

I show you the whole process of how to wood burn and add loose watercolor from start to finish here:


Creative Woodburner - 4 new nibs and how to use them

The Creative Woodburner from Walnut Hollow is a wire-tipped burner that comes with four interchangeable points/nibs.

Walnut Hollow just created four new nibs that work with this burner, and in this video I show them to you.

The 4 new nibs or points (Stamping Point 1, Drawing Point 2, Spoon Shading Point 1 and Spoon Shading Point 2) are now available for the Creative Woodburner. This is how each of the nibs can be used.

You can purchase these individually at walnuthollow.com

To see the Creative Woodburner’s original set of 4 nibs that come with the burner, check out this blog post!

Interview with Megan from Unstrung Studios

Name: Megan Farrell-Zweigle

Burning since: Fall 2017

Location: Rochester, NY

@unstrungstudios and unstrungstudios.com

unstrung studios

When and how did you first pick up a wood burning tool?

Leading up to my wedding in 2017, I was really into hand lettering. I had done a bunch of the decorations for my own, and a ton of signage for other friends ceremonies and random gifts. After I got married (wohoo!), my husband and I both found ourselves in a very odd (but very good) 3 week period where neither of us were working, and we could just spend time settling into our home. I started to feel kind of stagnant in the lettering world, and wanted to switch it up. So I found my dad’s soldering iron, and decided to see if I could burn letters into some (very smelly) driftwood. All it took was that first burn for me to be like, “uh yeah, this could be really cool.” 


How did you get your business name, Unstrung Studios?

Well, before lettering, I was making recycled guitar string jewelry under a different business name (lol, like, pick a lane, Meg). I had rebranded, and wanted something to allow for more flexibility in case i decided to branch out from jewelry, but wanted a nod to where I started. I loved the concept of taking something “Unstrung” and making it have a new purpose. It was only later that I realized that Unstrung Studios also oddly connected with my disability journey. I have something called Ehlers-Danlos Syndrome, and the way I describe it to people is that my body is like one of those “stand-up-man” dolls with the joints unstrung. All my joints are loose and floppy, and the string “holding” me together doesn’t really know how to do its job. So, I guess “Unstrung Studios” started as a very literal name for a guitar string jewelry business, but has become more of a metaphor for my condition, and how life can change when disability enters the picture. 


Have you always been artistic?

In a way? Yes? Yeah, I’ve definitely always been crafty... I was the kid that would spend hours on a diorama, painting all the details just right and creating little figures and furniture from cardboard and random things (hot glue was a favorite). I didn’t realize that I could actually draw until I was maybe, 15? And then it was all I did. 

I was one of the “art kids” in high school, that really came to school for art class and free periods which I would spend in art class. But the nice thing in high school art was, that was really all I HAD to focus on. Even my job was artistic (I worked at a paint your own pottery place). When I got to college, I found myself not having as much time as I wanted to draw the intricate, large pieces I wanted to do, so I shifted away from drawing into forms of creativity that I could do in lectures, or pick up for 5 minutes between classes. So I crocheted: a lot. And tried embroidery, and then lettering towards the end. 


How much time do you typically spend on art in a given week?

Oof. This is a hard one. I spend a ton of time dreaming and thinking about art I want to create, but time like hands-on the making of art runs anywhere from like 20 hours (a slow week or sick week) to…. well lets just say that during the holiday season I once logged a 60 hour burn week. I can get a bit obsessive about making new things in the week before an update or event. 

Screen Shot 2020-11-25 at 9.04.11 AM.png

How did you find your artistic voice/style/specialty?

Screen Shot 2020-11-25 at 9.04.22 AM.png

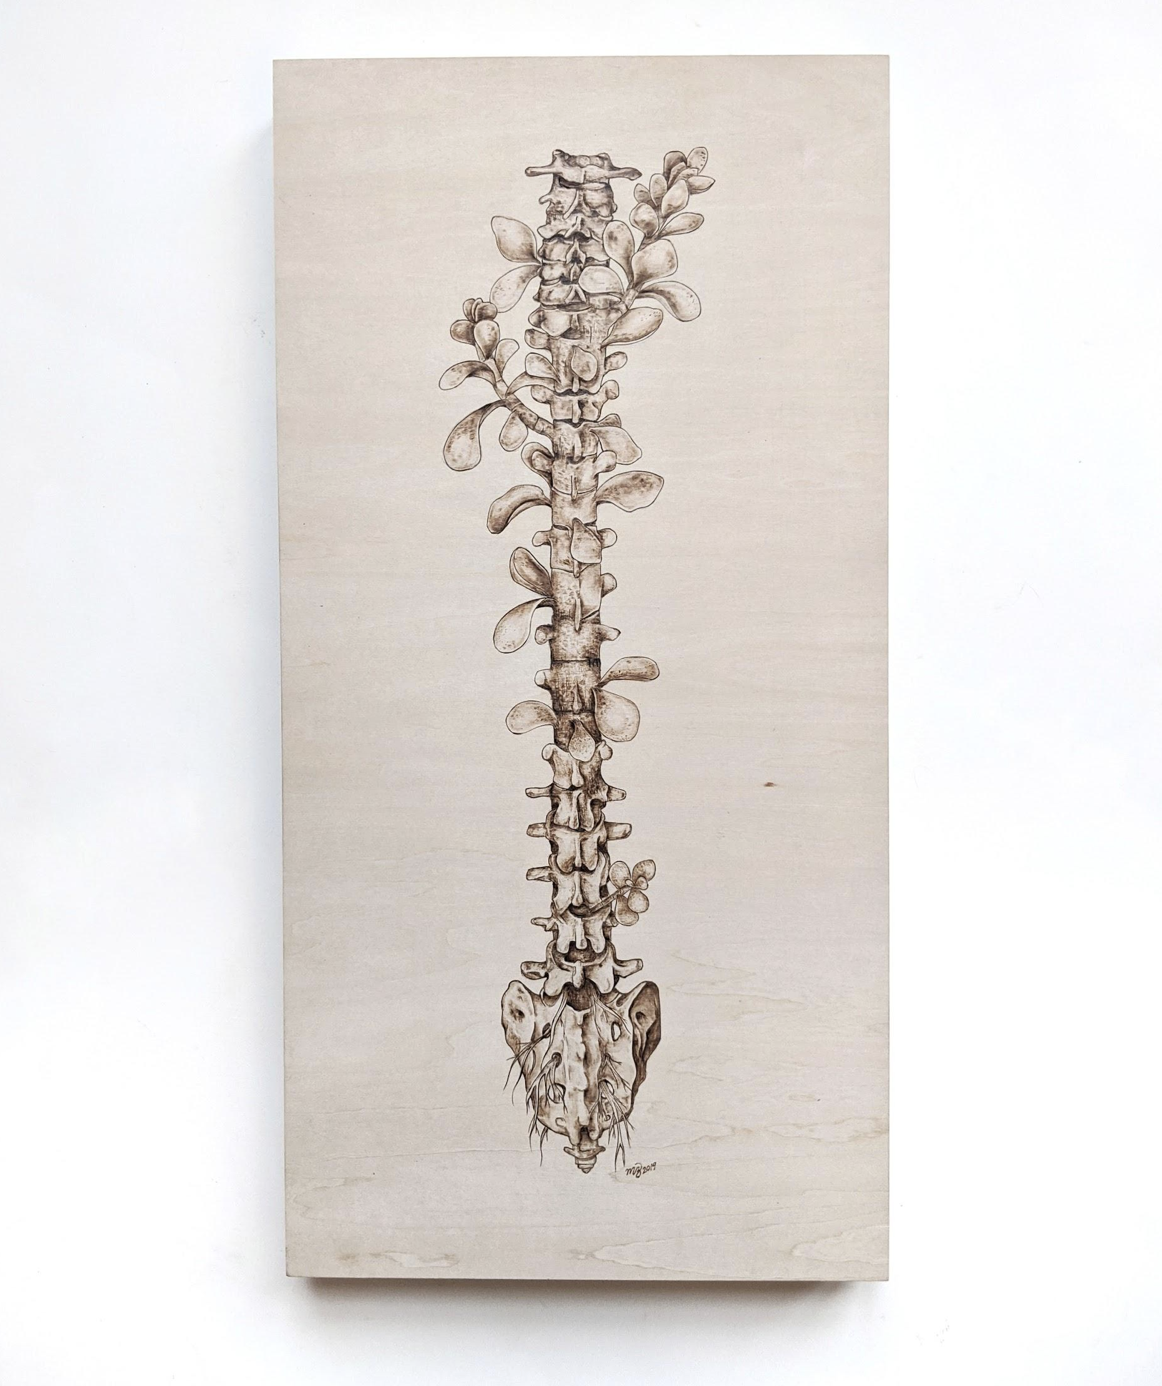
I tried to burn what I thought people wanted, and was miserable (and surprise: people didn’t want it!). I was the happiest when I was making “weird” art, even though a bunch of people told me it wasn’t marketable. So for a while I was trying to do both. Like I would do an anatomy illustration, but then slap a really corny lettered quote on it. Or I’d come up with a weird idea, and sketch it over and over until I had kind of — tamed it down? But then I reached a point where I threw my hands up and was like, “well, if they don’t like it, they don’t like it. I wanna draw weird things” And that’s when I fell into my artistic groove. When I stopped policing my ideas, and stopped sketching watered down versions of my ideas I really started to find my niche, and find out that — as a matter of fact — there are PLENTY of people that love anatomy, love the human body, and want work that can function in both fine art and educational realms. 

As far as style? I take a lot of inspiration from classic anatomical illustrations, and have TONS of books just filled with reference photos and drawings. A huge part of my philosophy on artistic inspiration is also this: at least half of your inspiration should come from mediums outside of your own. For that reason, I follow a lot of wood burners,but I follow even more ceramicists, embroidery artists, needle felters, and jewelers. It’s led me to take some the techniques and lines and textures from these various mediums and incorporate them into my woodburning. 


How has your disability affected your art in both positive and negative ways?

We’ll go bad news / good news so we can end on a high note. 

The hardest part about woodburning physically is that you have to sit upright (for safety). With POTS, there are stretches of days / weeks / months where it can be hard for me to sit upright for more than a half hour at a time without passing out. Because of this, it can be really difficult to get into an artistic flow. I work in a lot of shorter “chunks,” which in some ways is great, but when you’re working on a 3 foot project it can be really discouraging to see progress go so slowly. Sometimes the smoke can trigger migraines, sometimes the migraines mean I can’t see well enough to actually burn anything accurately (or safely), and sometimes my joints are just too painful to hold the pen the way I need to. 

On the other hand, my journey with health has been the driving force in my creating art and in me finding my niche. The first anatomical piece I ever did was as a way to cope with my cardiac condition, and to emotionally process a health crisis that my MIL went through. Dealing with my health every day, and trying to keep up with recent research on my conditions means that I am never short on inspiration or new information to incorporate into art pieces. 


Teaching about disability, diseases, health and science seem to be part of your mission. Was that always the purpose or did it find you?

I think it was the purpose before I knew it was the purpose! Some of my biggest frustrations are 1) medical misinformation that is shared as fact, and 2) not being able to find the words to explain how I am feeling - physically. 

In college I had a friend ask me what it “felt like to be me?” It took like an hour of talking for me to understand that she was really asking was for me to explain how being disabled actually, physically, felt. She was a fellow OT, so I could talk about my symptoms in medical mumbo jumbo and she would understand, but there were other parts of being sick that I just couldn’t figure out how to explain with words. So I started drawing.

Screen Shot 2020-11-25 at 9.20.18 AM.png

Words can be hard, but visuals take the jargon out of the equation. In some ways, I feel like visual representation of physical conditions can be a less intimidating, more direct way to explain to people what something feels like. And even if it is a piece that can be interpreted in different ways, they can be conversation starters. Like my floral stomach: I’ve had people say it resonates with them because of their Chron’s disease, IBD, chronic pain, anorexia, gastroparesis, and more. 

The educational aspect for me goes beyond just correct medical information, and includes providing an avenue for people to share their experience with health and disability. 


I would love for you to talk a bit about disability advocacy and how we can help.

The biggest thing I’d say is: Normalize access. If you go to a restaurants website and they don’t have anything about their accessibility (where their accessible entrance is, if they even have one, etc), email them and ask for it to be posted. Request for event planners to include access information on their flyers. If you see a wheelchair lift or a curb cut that is blocked by garbage, tables, or advertisements, request for it to be moved, and point out that they’re blocking an entire group of people from accessing their business.

It may seem like a small thing, but when you’re in a wheelchair and you show up to a place that said it was accessible, only to find out that the wheelchair lift is not at all easy to find, it’s outside, and the door to enter is locked from the inside (yep, that happened) it gets old REALLY quick. Making accessibility information public and easily found benefits everyone and hurts literally nobody. 

The second (and equally important) part of this is to follow disabled voices, and listen to what we have to say. Did you know that I’d prefer you call me “disabled” rather than “a person with disabilities?” Or did you know that when you tell me that you don’t “see me as disabled,” that actually is NOT a compliment? There’s enough of this topic to make 18 blog posts about it in itself (and people have!), but I’ll leave it at this: when deciding what’s important to disabled people, it’s important to prioritize disabled voices in the conversation. 

If you want to know more about any of this, I highly suggest the following accounts to follow on insta/twitter:

@Nina_Tame

@Crutches_And_Spice

@JessicaOutOfTheCloset

@TheSparkledLife

OH. Last thing I swear: 

  • caption your videos dang it

  • Use #CamelHumps for hashtags (that way screen readers identify each word, and don’t just try to read the whole thing as one)

  • Use Image Descriptions (I need to be better about this!)


What have you learned the hard way that you want to spare other people the pain of learning when it comes to anything wood burning or business related?

Make what you like. Make what you like. Make what you like. I spent almost a year talking myself out of burning anatomy art, for fear that it would be too weird. That year was the most frustrating, unfulfilling artistic year for me. 

And clean your dang tips. LOL. I still am awful at this, especially when burning a blackout background. I get so mad because I keep having to turn the heat up, or can’t get a nice smooth black and then I realize it’s because I have so much gunk on my burner! Every time I take 10 minutes to clean my tips I always go back to burning and am like, “Why didn’t I do that sooner!”


What goals do you have for your art or your business?

I have two goal shows: Oddities Flea Market in NYC (Ryan Matthew Cohn if you read this, hi), and doing the OOAK Show in Chicago (also Hi!) but those are big goals, and especially with COVID-19 being what it is, I’m not too keen on putting a timeline on those goals. 

My other goals include specific projects that are on my “bucket-list” if you will: burning a kitchen island, kitchen cupboards, a waterfall table, a full skeleton on a table. 


Deserted Island with power. You can choose ONE

Burner: Razertip SK (the only burner I’ve ever used, after my dad’s soldering iron)

Nib: Chisel Tip for sure!

Type of wood: Olive Wood!!! 

Non-essential tool (but basically essential to you): projector. Or coffee. But probably the projector!


Can you show us some of your favorite tools, must haves? Your favorite nibs? Or hacks?

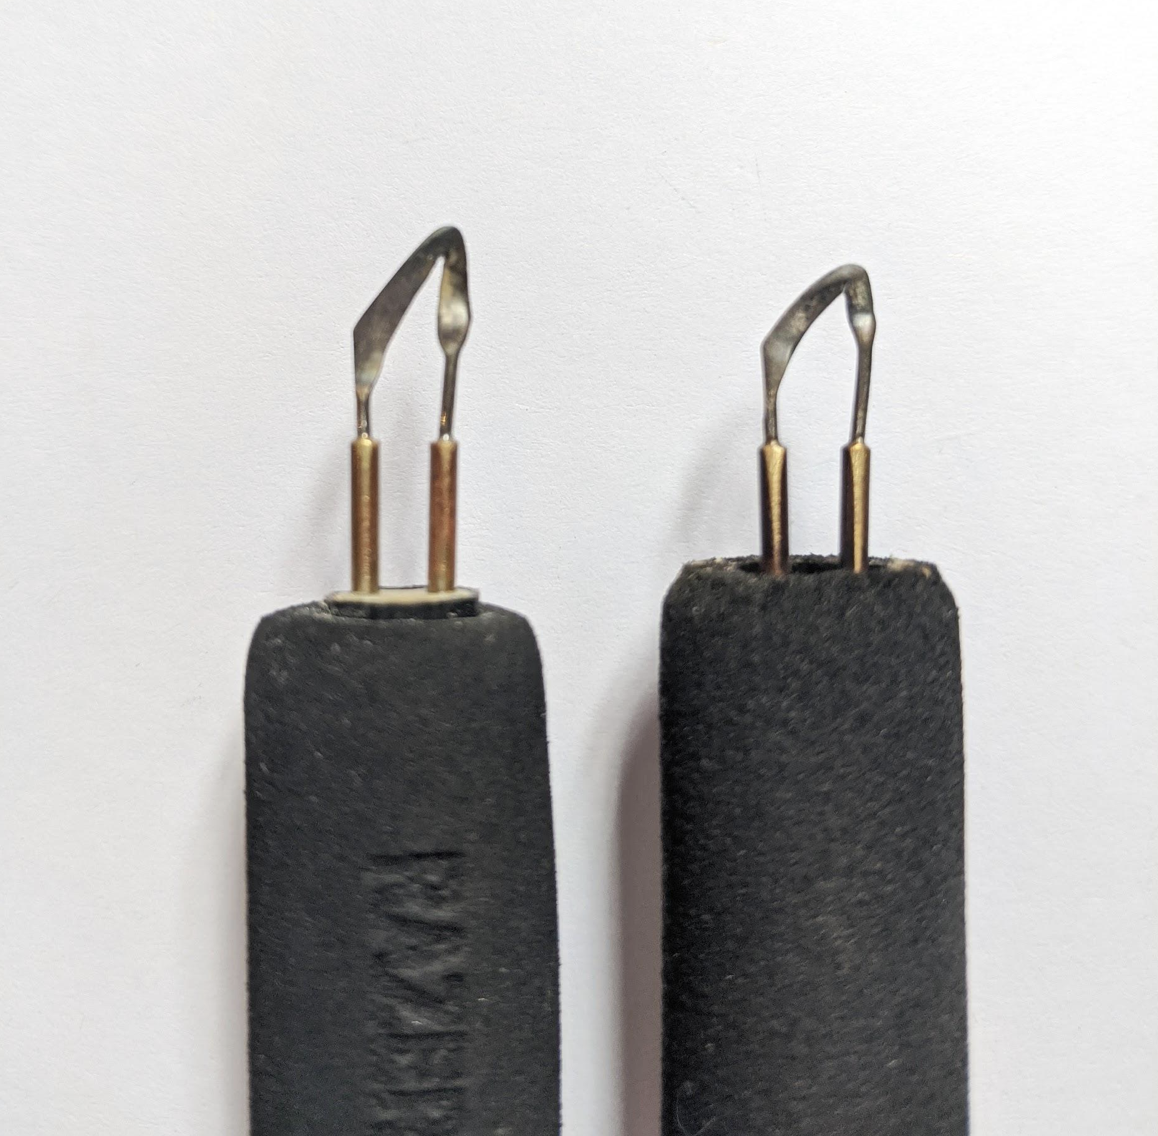
Oooh yes. So, I have a chisel tip that I have sanded down (sorry Razertip), to be even more narrow for when I am doing teeny line-work on some of my more complex illustrations. Here’s the two tips in comparison: 

 
Screen Shot 2020-11-25 at 8.57.03 AM.png
 

As far as hacks go, I am a big fan of the projector. With many of my designs, they look best when they fill the wood up a certain way. But if I were to resize and print out a template for every piece of wood, I’d kill so many trees. So instead, I photograph my drawings, digitize them, and then use a projector to get the image onto the wood. That way I can size it PERFECTLY to fit any shape, orientation, or size of wood! It also allows me to see exactly where different knots or colorations in wood will fall within a template. Especially with some of the really intricate designs, it can totally wash out the details if I place them over a darker part of wood, or even over a prominent grain pattern. 


You were working on a piece with a brain, can you share that piece with us?

Screen Shot 2020-11-25 at 9.04.30 AM.png

Do you see yourself veering away from anatomy, or are you happy right where you are?

I see myself bringing more INTO anatomy, but don’t see the anatomy going away. I am very happy playing with bones and organs right now, but I enjoying bringing in botany, other animal anatomy, and just generally pushing the limits of what can be incorporated into different structures while still keeping some realism and believability. I have a few pieces with mushrooms coming, some insects, some snakes, but all still have the human body as the main feature. 


What’s one piece of advice you would offer to a new pyrographer?

Don’t let other people tell you what to make. And DRAW. I know drawing is hard, and it’s frustrating when things don’t turn out the way you want, but practice practice practice is what will get you there. 

Draw what you see, and if it helps? Turn your piece upside down so you are focusing on line and shape, and not having your silly advanced brain focusing on the “whole picture” at one time. It takes you away from “This is what a petal looks like” and lets you focus on the actual, sometimes weird looking, shapes and shades that make things look realistic. I draw and burn upside down all the time! 


Watch the recorded live video:


How to get your kids involved in pyrography

E4DD1206-F8A6-4A83-BD8D-D5744C621CA5.jpeg

My kids are always so excited to see what I am making. They watch the process, they see the finished results, and they cheer me on, which is why getting them involved is so much fun. Collaborating with them to create a unique piece gives them such pride. You can use a design they have already drawn, or have them create something new.

I like to do the burning while they watch, and then have them finish it off with markers, colored pencils or watercolor.

This makes an amazing gift for a grandparent, spouse, or loved one. It is also a great class option if you teach, especially around Mothers/Father’s Day.

What you will need:

Watch the FREE video below or click here for written step-by-step instructions!

Complete Wood Burning + Business Toolkit

Everything business + wood burning into one.

With this Toolkit, you are investing in your education, your business, and in yourself. I really believe in what is in it, and its ability to help businesses grow.  

BLOG COVER images.png

Many people have told me that I have an excitement for life, and that my energy is contagious. I have a tendency to get people fired up about business, pyrography, and going after their goals, and I am excited to help YOU!

I am natural born helper. It's always been in my nature. Before wood burning, I was a registered nurse, and a nanny. Helping is my love language. That is where I find the most satisfaction out of life, and why I created this Toolkit.

While the Toolkit puts everything at your fingertips, you will still have to put in the work to see the results, you just won't have to do it the long + hard way.

This Toolkit is meant to help you. To assist you. To guide you. It is meant to offer advice and provide resources so you can make the best decisions for you and your unique business and the goals you have for it.

This isn't just a course. It is a toolkit that you can come back to time and time again, anytime you want and complete at any order and pace you want. The Toolkit will be updated, free of charge, and you will always have access to it.

As we learn and grow, so will the Toolkit.

So What’s inside???

The following are sections right out of the Toolkit. We take a deep dive into each one using audio lessons (transcripts included), written lessons, mini exercises, video and picture tutorials, as well as PDF printables:

Goal Setting

Finding Focus

Community + Collaboration

Productivity, Assigning Tasks + Accomplishing Goals

Artist Health

Photography + Videography

Copyright Basics + Art Reference

Avenues of Revenue

Selling

Selling In-Person

Email Lists

Website + eCommerce

Social Media

Digital Prints + Licensing

Subscriptions
Book Recommendations

Pyrography

I'm so eager for you to dive in and see why I am really excited for this #wbctoolkit. I seriously can't wait to watch your business grow!


Looking for a toolkit for just the pyrography side or vice versa? Check these out:


Want some more personal support and guidance? Check out my one-on-one coaching services or join Burn Club+, a place where you can ask questions, and get the full answers; a place of fun and learning!


Why you need to start an email list today!

If Instagram, TikTok, and Facebook were to disappear tomorrow, would your business survive? With these platforms, they decide what your audience sees, or if they see it at all. Do you have a way of getting ahold of your clients? Of your fans? Or your followers? THIS is one reason why it is important to have an email list. Having a back-up plan is really important.

Connecting with your audience is another really important reason. Your e-mails are a chance to make the person receiving them feel special and individualized. This in turn creates a closer, more personal connection and gives them a sense of trust making them more likely to choose you when they are ready to purchase that custom art piece for their living room. Consider building this list an investment. Over time you will build a faithful following which will show its value as time passes.

Email is King.

Repeat after me: Email is KING!

If you haven't started your email list, you will now. Having an email list is so very important for business.

Why is having an EMAIL LIST so important?

Email is your backup plan. It's your insurance in case your social media fails/changes...

It's also a list of your most loyal fans. (This is important)

Emails have a much higher success rate for reaching your people, then any social platform.

It's also YOURS. You own it.

You can build intimate relationships with the emails you write.

Your readers can refer back to it and search for anything you send them, whenever they like. (including coupons!) Can't do that on Tiktok...

They can stay up to date with your happenings.

Your audience can feel more connected to you and your brand.

What is one of the first things you do in the morning? For me, it is check my phone and my email. I know I am not alone. Email is effective in reaching your people for this reason. They will actually see what you send them (personally delivered to them), and that is half the battle. Your email list will naturally consist of your biggest supporters, and is a great way for you to connect with them on a more personal level.

How do I start an email list?

It is not hard to start an email list, you just have to do it. There are tons of free platforms that will get you started. I used to use Mailchimp before I had the squarespace integration. A lot of website hosts include a feature like this as well (usually at an extra cost). They make it easy to set it up and integrate it with your site making it cohesive with the look and feel of your branding. Once you come up with your first template and design, subsequent emails become much easier.

How do I get people to sign up for my email list?

To get people signed up, I suggest an incentive. You want to provide them with a reason to sign up in the first place. A free gift when they sign up can be a good way to get them in the door. This could easily be a printable or digital download of some sort. Keeping the overhead low is key here.

Also, make sure it’s easy to sign up. Include an area on your website that is clear and simple to fill out. Let people know on instagram and other social media platforms you have an awesome monthly newsletter filled with good stuff. Include those incentives for them to sign up in your Pinterest marketing and all other social media platforms you use.

I have a list, now what do i do? What do I even put in an email?

Think about sending out a monthly newsletter. This acts as a good reminder to your people about your business and what you offer. Give your email list coupons, special discounts, first access, behind-the-scenes information, freebies, and sneak peeks. Get them excited to open that email. Get them excited to learn more about you and the person behind the art and business, on a much more exclusive level. Think about what you would like to see in an email? Remember these are your most loyal customers. These are your best clients. Serve them well, and they will tell their friends.


Still not convinced?

What is the first thing you do in the morning? If you are like me, it is check your email. “Turns out 92% of adults in the US have an email address, and 61% of them check it DAILY!” (Quote from Alex Cattoni). That's huge!


Make your own Pyrography Canvas Backpack

 
canvas+backpack.jpg
 

Canvas is another amazing non-wood surface to embellish with pyrography. You will find canvas material in many different forms and adding wood burned touches to any of these canvas materials will add that personalized touch that will step up your canvas game. It is a bit smelly to burn, and you will need to clean your wood burning tool often, but it will look cool and be totally worth it. Be sure to utilize your safety equipment. You and those around you won’t want to be inhaling the fumes from burning on canvas, so be sure to work in a well-ventilated space and have fun with it!

Materials

Step 1: Choose your canvas backpack. Wash and dry before getting started.Step 2: Lay your backpack flat on your table.

Step 1: Choose your canvas backpack. Wash and dry before getting started.

Step 2: Lay your backpack flat on your table.

Step 3: With your water soluble pen, draw lines of varying lengths and arches from the bottom of the pack going up. These can be close together or spread apart, depending on how you envision the end result.

Step 3: With your water soluble pen, draw lines of varying lengths and arches from the bottom of the pack going up. These can be close together or spread apart, depending on how you envision the end result.

Step 4: Add lines of varying lengths to the right and left sides on these initial lines. Mix up the spacing between the lines to add interest.

Step 4: Add lines of varying lengths to the right and left sides on these initial lines. Mix up the spacing between the lines to add interest.

Step 5: Put on safety gear. Canvas can be quite smelly, you don’t want to be breathing the fumes. An outdoor environment with plenty of air flow would be best.

Step 5: Put on safety gear. Canvas can be quite smelly, you don’t want to be breathing the fumes. An outdoor environment with plenty of air flow would be best.

Step 6: Turn on your wood burning tool. The temperature will depend on how quickly you would like to burn. The lower the temperature, the more controlled the burn. Start lower and turn up the temperature as needed. Using a spade or writing nib, burn…

Step 6: Turn on your wood burning tool. The temperature will depend on how quickly you would like to burn. The lower the temperature, the more controlled the burn. Start lower and turn up the temperature as needed. Using a spade or writing nib, burn by tracing over all of your drawn lines with the wood burning tool.

Step 7: Once you’ve traced all the lines, turn off your burning tool and carefully switch to a flow nib, preferably a ball-point. Reheat the burner and start adding the dots to the ends of your lines. To make a dot, simply hold the burner in place b…

Step 7: Once you’ve traced all the lines, turn off your burning tool and carefully switch to a flow nib, preferably a ball-point. Reheat the burner and start adding the dots to the ends of your lines. To make a dot, simply hold the burner in place briefly. Be careful not to hold it too long, or you can burn a hole in your pack. Add burned dot ends until all lines are topped off with them.

Step 8: Rinse off your burned backpack or use a sponge and some water to carefully remove all water-soluble pen lines. Set out to dry.

Step 8: Rinse off your burned backpack or use a sponge and some water to carefully remove all water-soluble pen lines. Set out to dry.

Step 9: Wear your bag proudly, and enjoy the compliments.

Step 9: Wear your bag proudly, and enjoy the compliments.

SHOW OFF YOUR WORK!

Be sure to share your finished pieces on instagram using #thewoodburnbook

 
the wood burn book

More projects in the book!

This essential guide opens with a brief background to the art of wood burning, a list of tools and how to use them, basic techniques that can be used over and over again, and even what to burn (projects, designs and inspiration) and how to be safe doing it.


Make Your Own Poppy Wall Art

3+poppy+woodburn.jpg

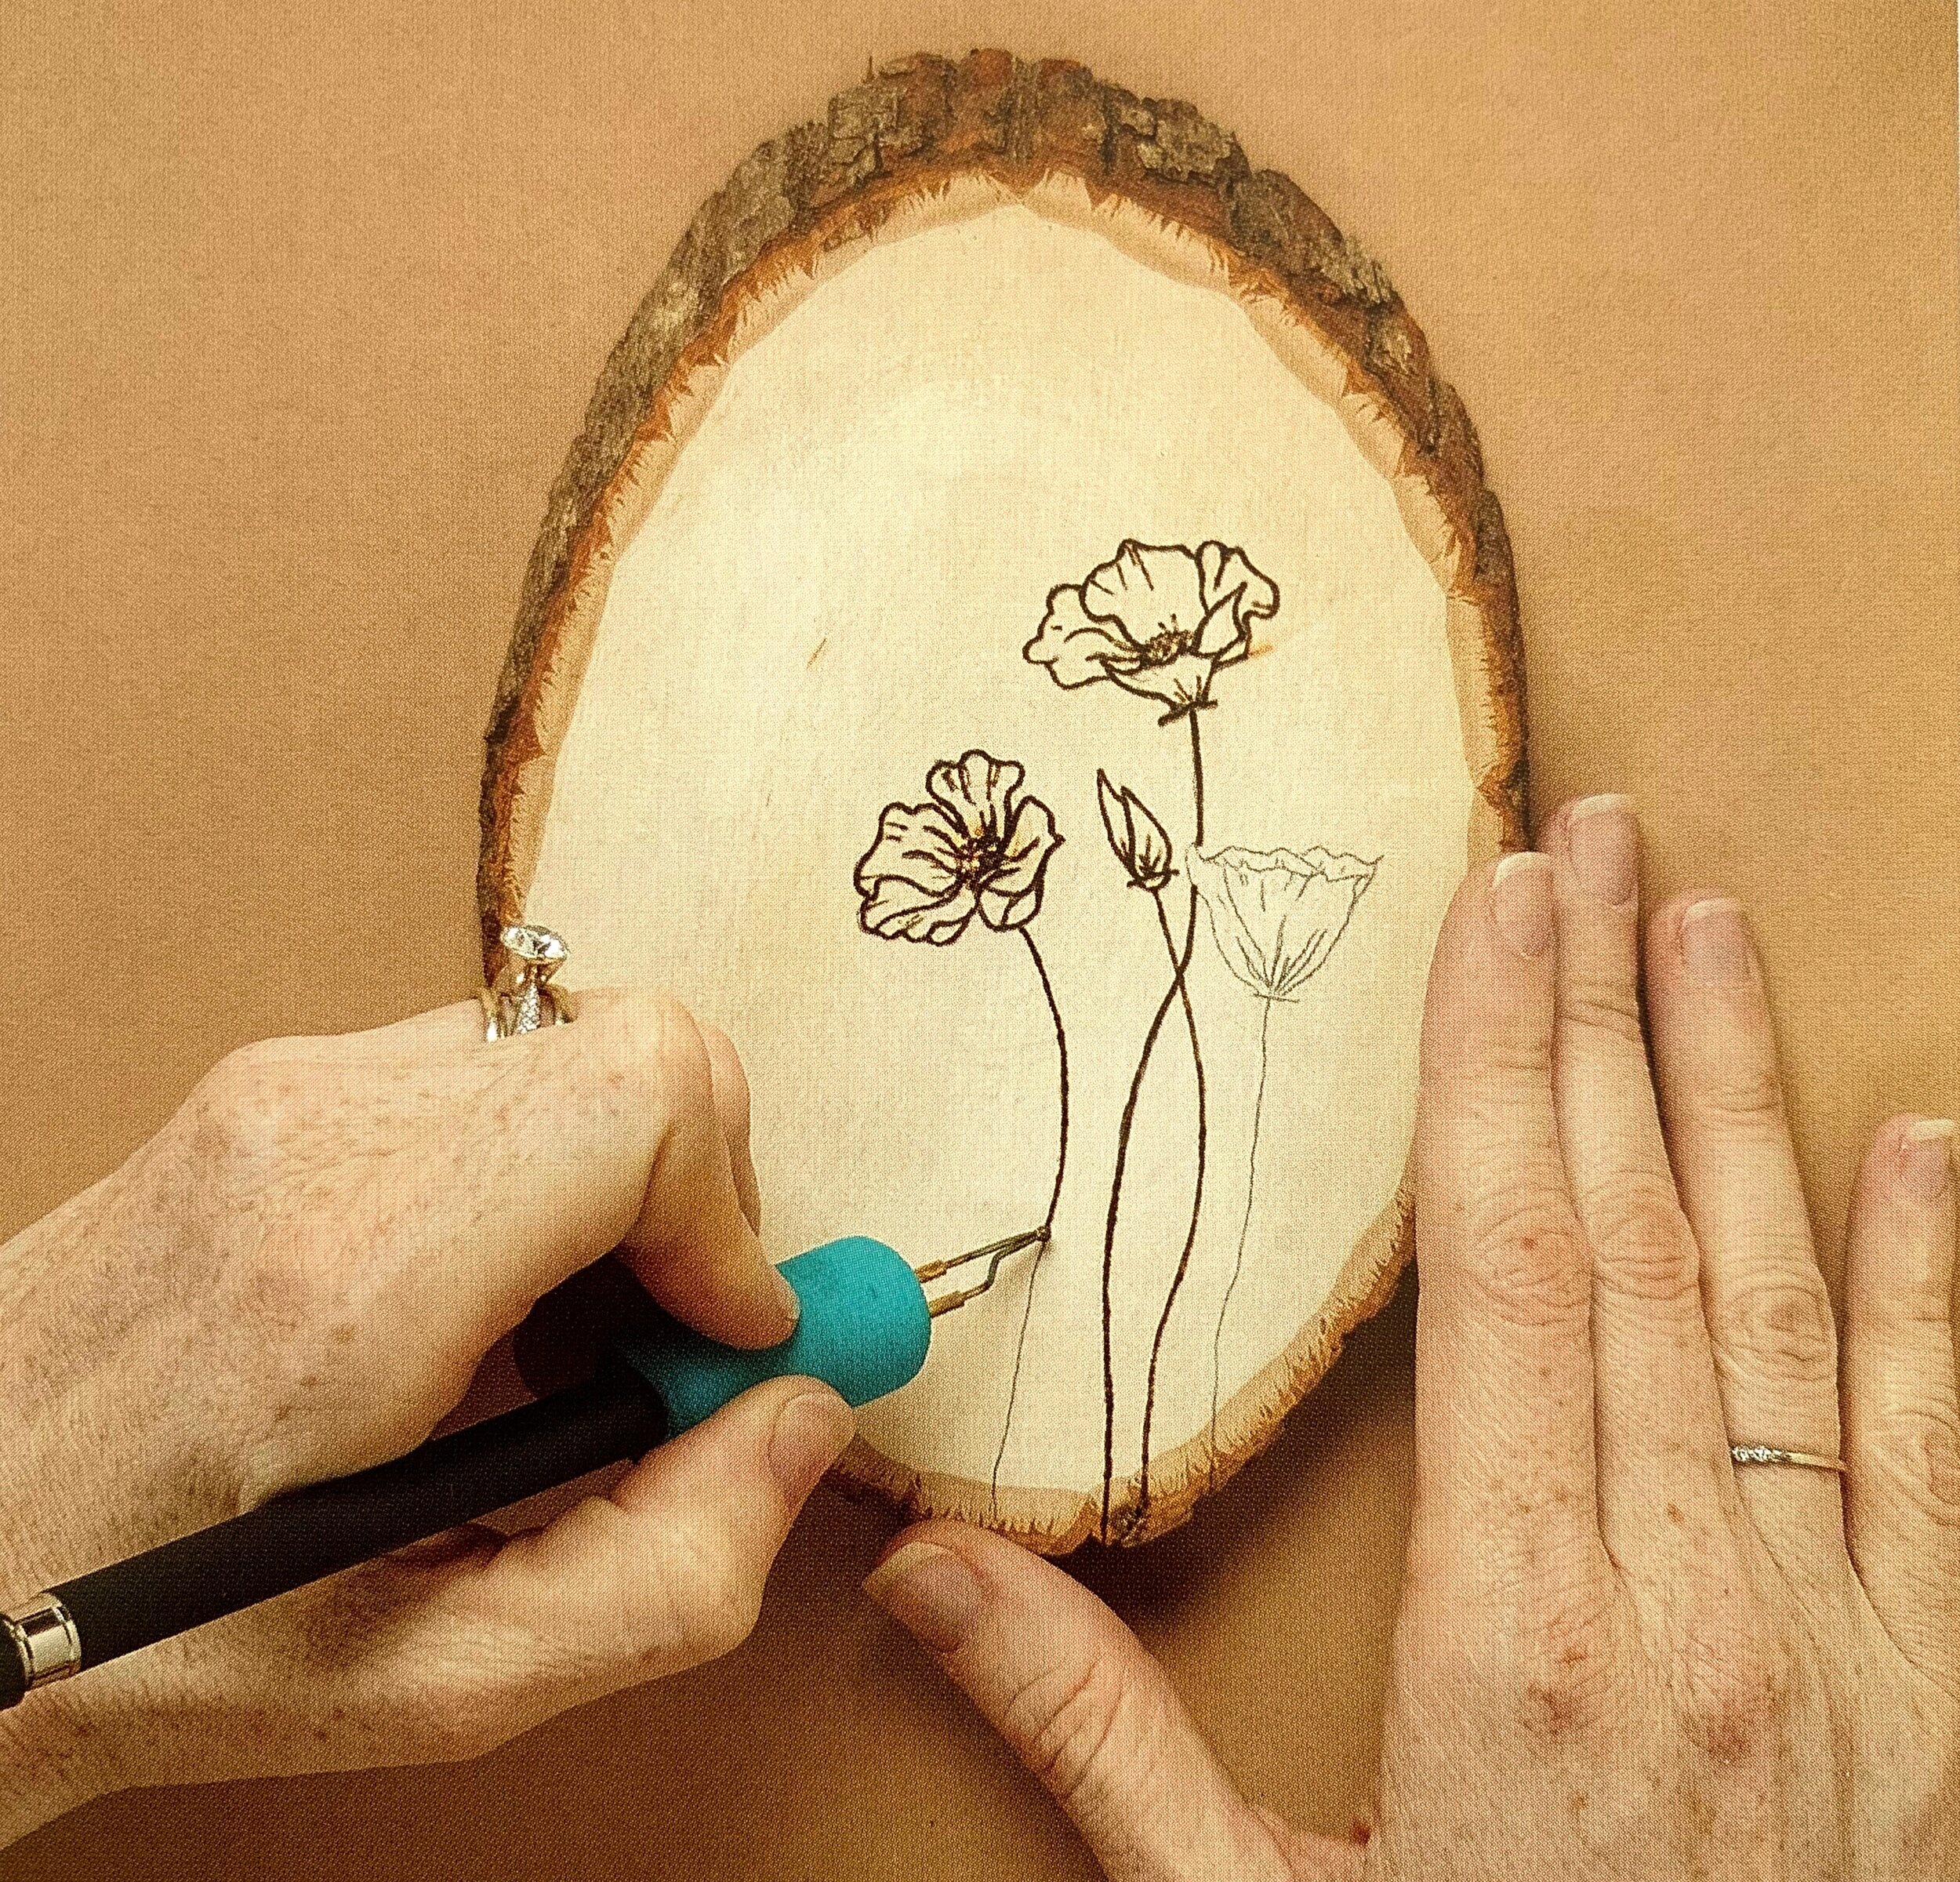
Watercolor is one of my favorite mediums to add to wood. It is quite liberating to add watercolor in this unique and loose way. You can take any simple line drawing and quickly turn it into a beautiful piece of art that will add vibrancy and warmth to any space. You can create a dramatic and playful effect by adding these fun and perfectly imperfect splashes of watercolor. Those splashes of bright color change the whole look of the piece, and really bring it to life.

I chose the California poppy for this particular piece for its bright colors and because I am absolutely obsessed with them. They pop up everywhere, are super vibrant, and just make me happy.

Materials

Step 1: Choose any simple line-drawn floral design. This can be a hand drawn doodle, a drawing from a photograph, or a design in this book. Then choose a wood slice to fit the design.

Step 1: Choose any simple line-drawn floral design. This can be a hand drawn doodle, a drawing from a photograph, or a design in this book. Then choose a wood slice to fit the design.

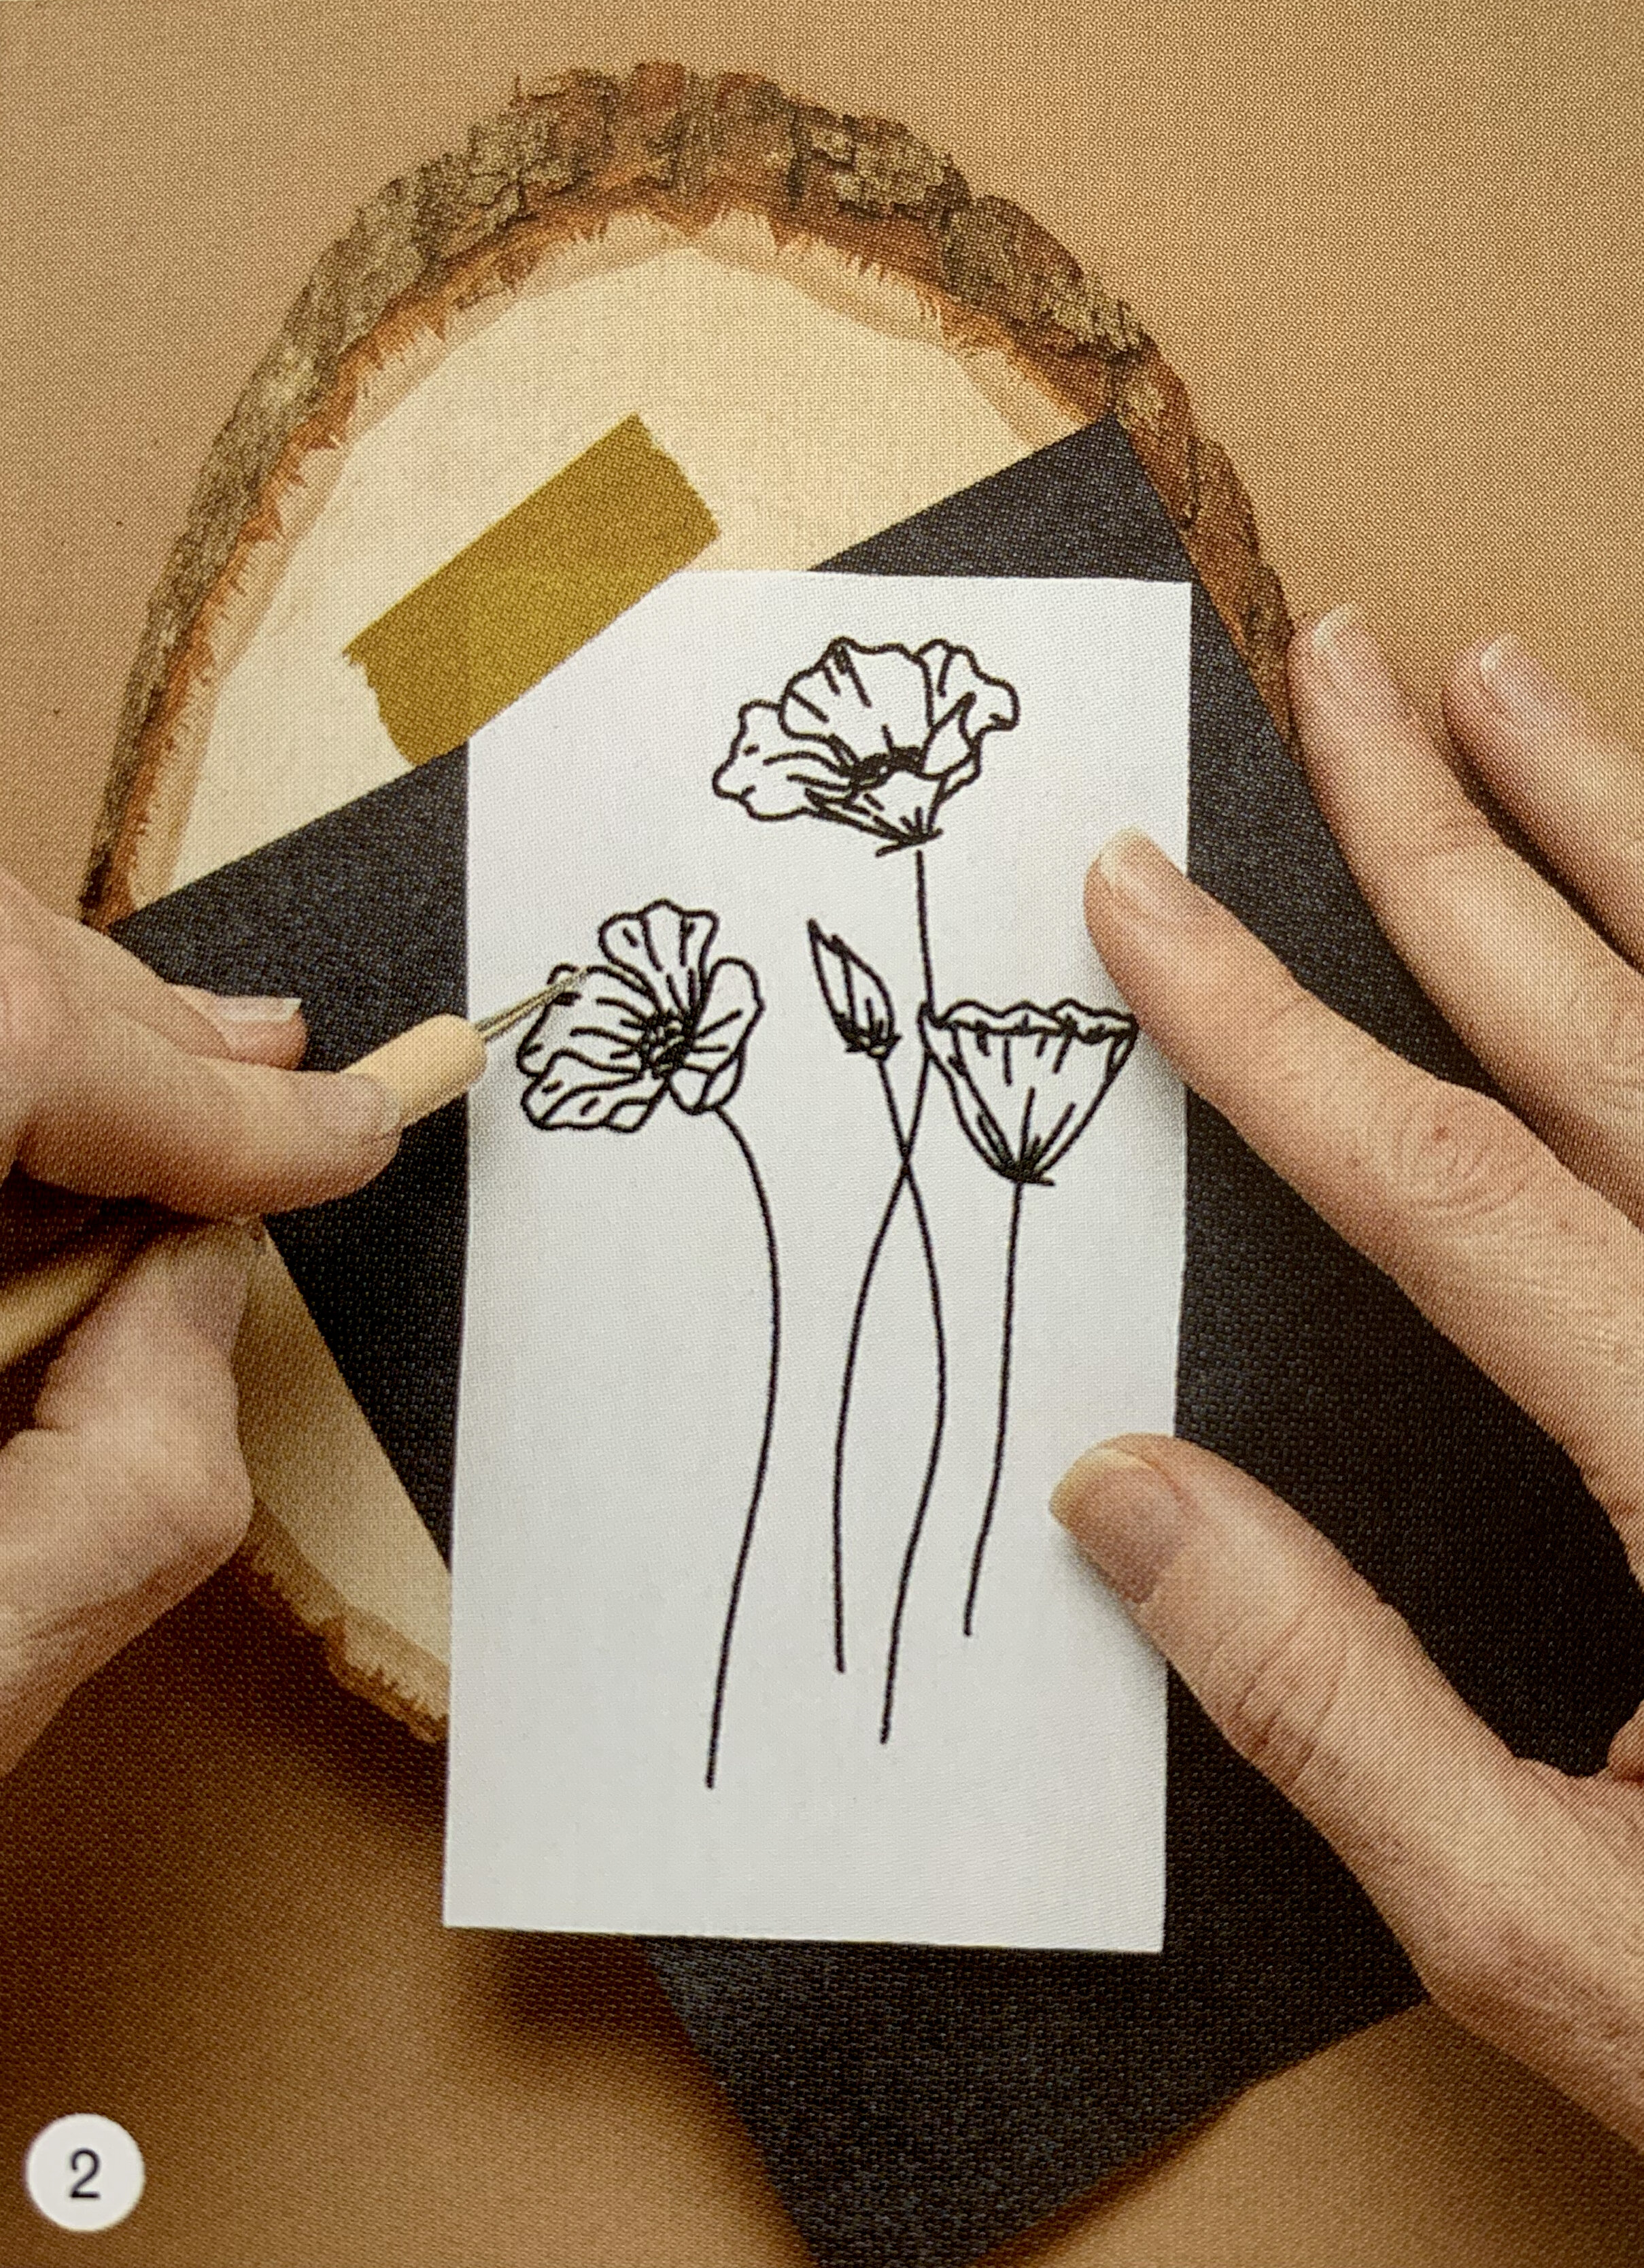
Step 2: Transfer the design to the wood. I am using graphite paper and a slice of basswood with a live edge. Make sure you have transferred the entire design before removing the design.

Step 2: Transfer the design to the wood. I am using graphite paper and a slice of basswood with a live edge. Make sure you have transferred the entire design before removing the design.

Step 3: Choose your nib and burn. For this particular piece I like to use a flow or writing nib. This gives me the freedom to burn smoothly in all directions, without catching an edge of the nib.

Step 3: Choose your nib and burn. For this particular piece I like to use a flow or writing nib. This gives me the freedom to burn smoothly in all directions, without catching an edge of the nib.

Step 4: Remove any remaining transfer lines after the design has been burned in its entirety.

Step 5: Pull out your watercolors, palette, water glass, paper towels, and paintbrushes.

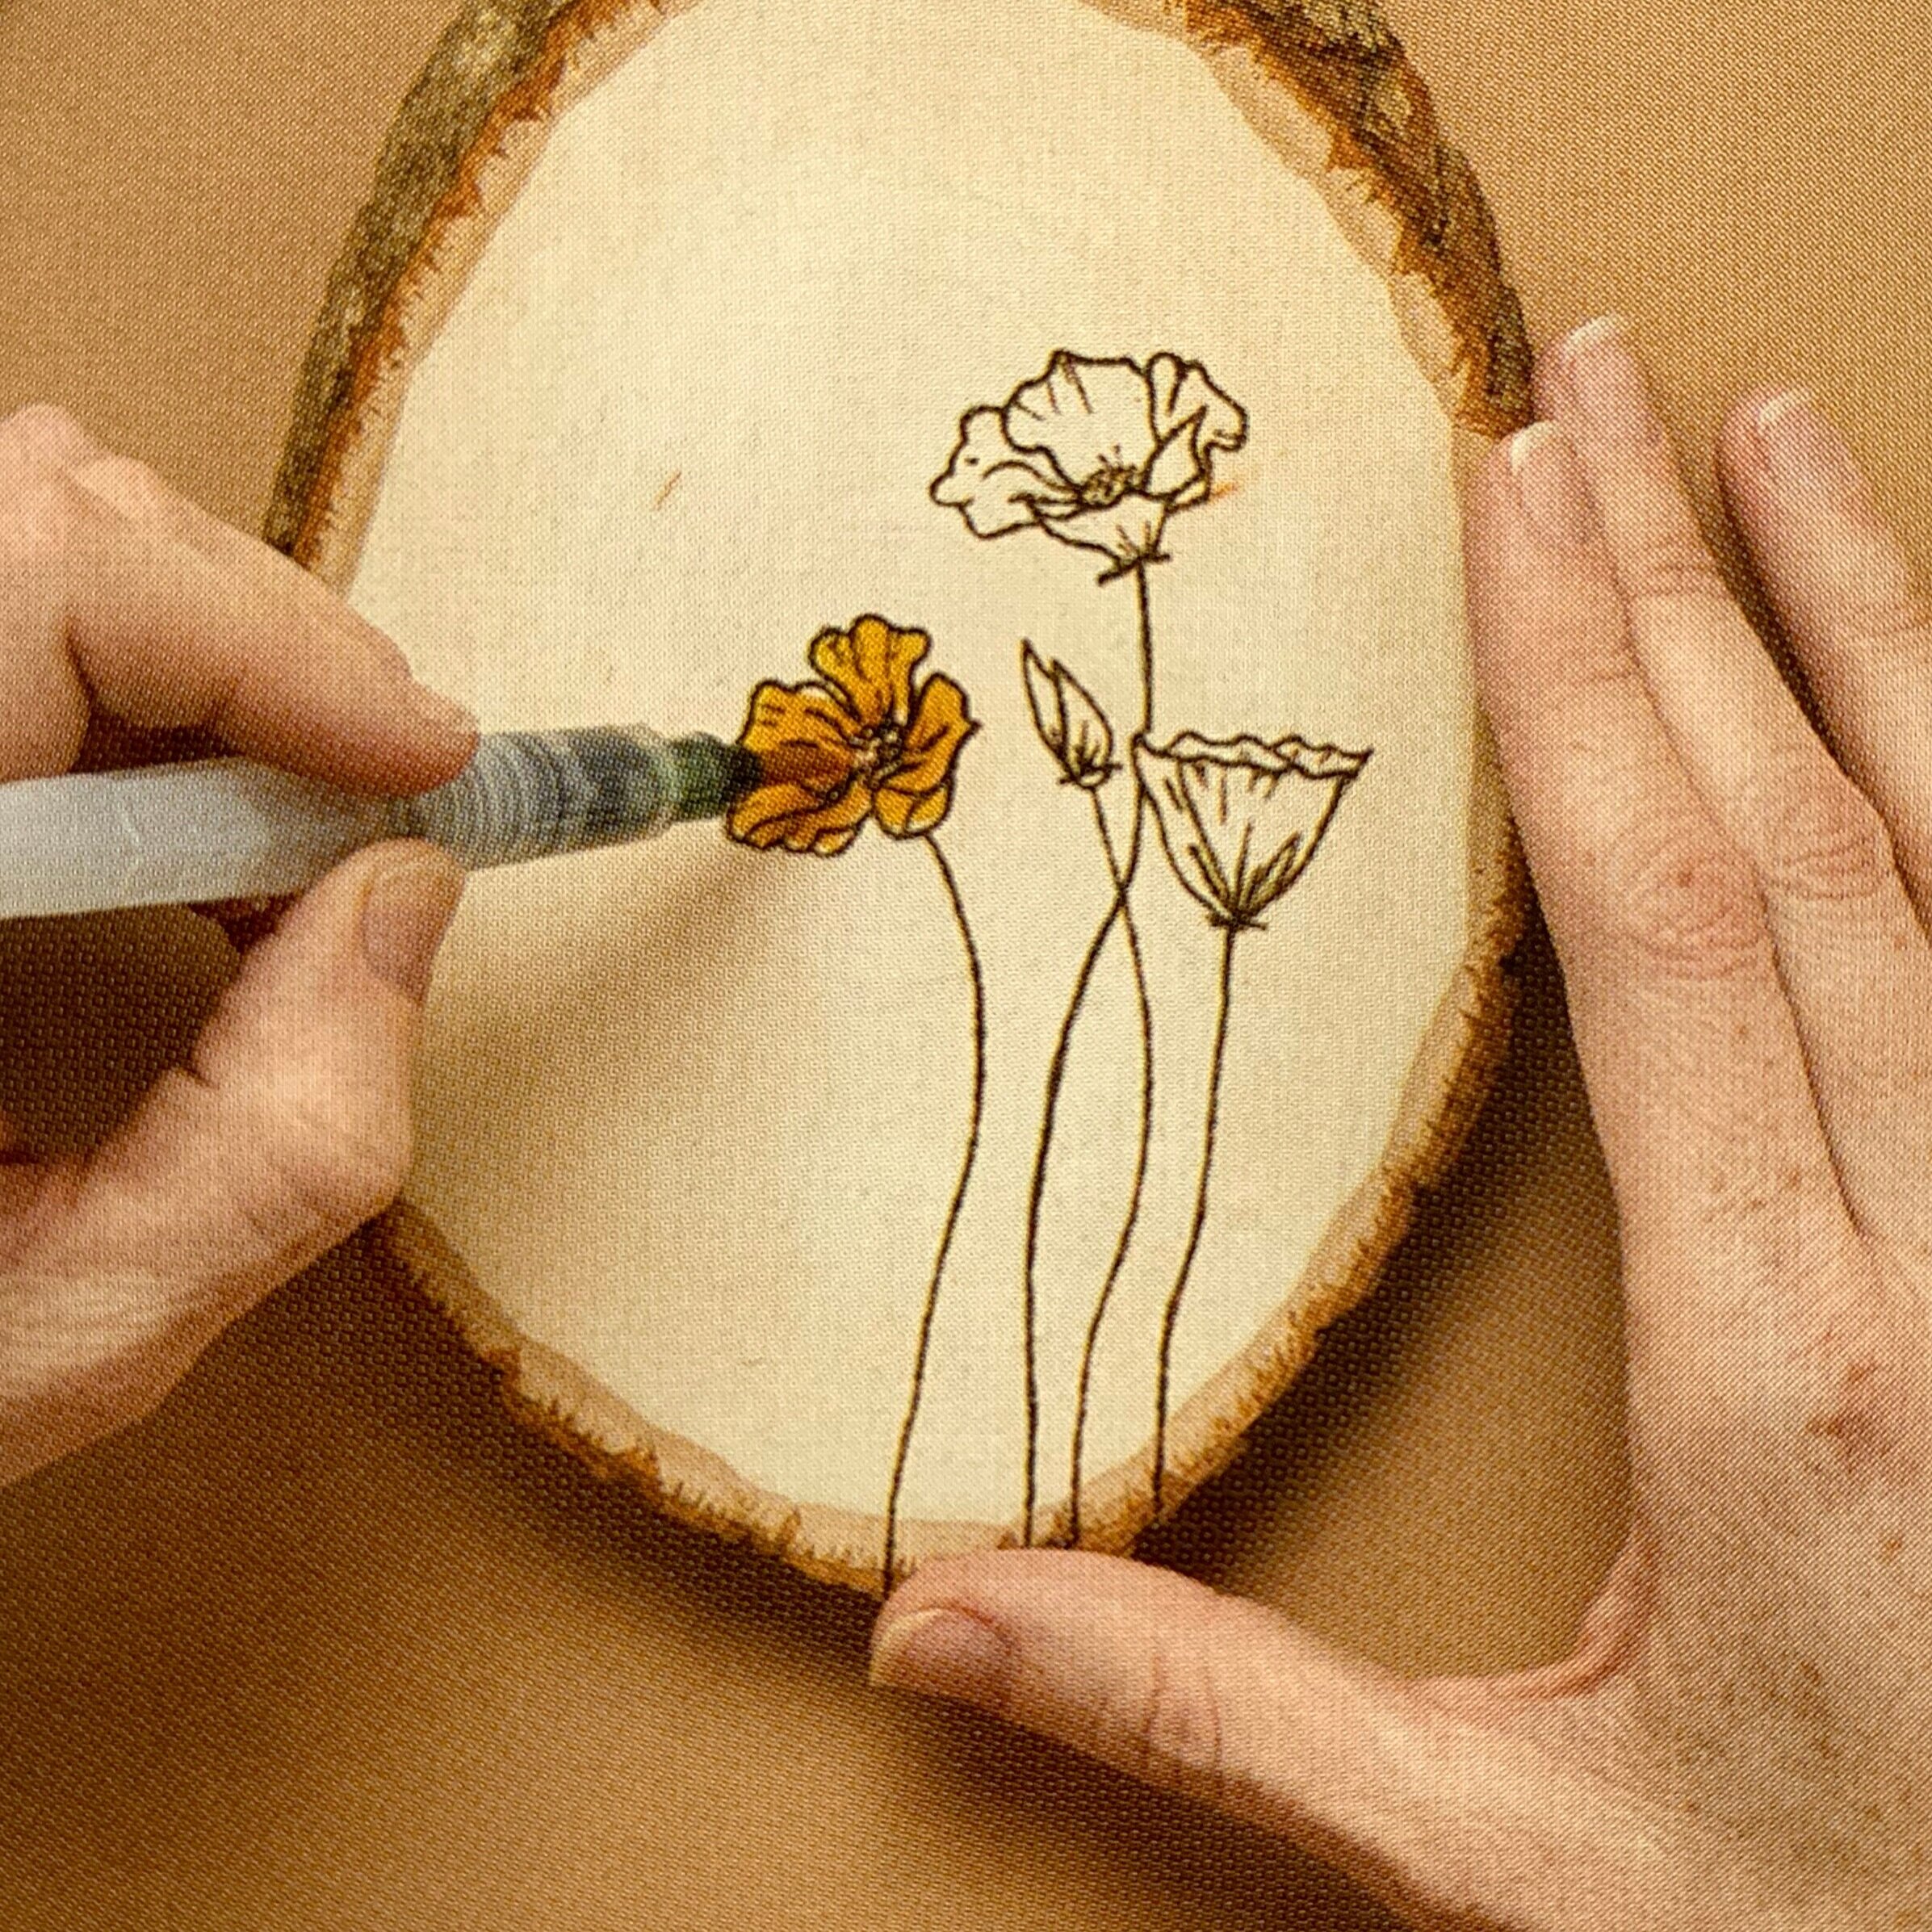
Step 6: Color the flower fully, or at least the parts you want colored. Don’t use too much water or you may split your wood. It’s OK if you go over the lines on this particular piece - you actually should! A loose watercolor look is what we are goin…

Step 6: Color the flower fully, or at least the parts you want colored. Don’t use too much water or you may split your wood. It’s OK if you go over the lines on this particular piece - you actually should! A loose watercolor look is what we are going for. This technique gives the feeling that the flower is extending past the lines you have given it.

Step 7: Add the splashes of paint once you have completed the coloring of the flower. Practice on a scrap piece of paper or on the backside of your piece first. Dip into the same color, hold your brush close to the wood, pull back on the bristles an…

Step 7: Add the splashes of paint once you have completed the coloring of the flower. Practice on a scrap piece of paper or on the backside of your piece first. Dip into the same color, hold your brush close to the wood, pull back on the bristles and let them go. This will create a splashed look. You can go heavy on the splashes, or very subtle, it is entirely up to you.

Step 8: Wait for the piece to dry, then attach a sawtooth picture hanger to the back

Step 8: Wait for the piece to dry, then attach a sawtooth picture hanger to the back

Step 9: Complete your piece with a finish of your choosing. I prefer a spray finish over watercolors, so as to not unintentionally spread the paint on the wood.

Step 9: Complete your piece with a finish of your choosing. I prefer a spray finish over watercolors, so as to not unintentionally spread the paint on the wood.

Step 10: Hang it on your wall, or wrap it up and give it as a gift!

SHOW OFF YOUR WORK!

Be sure to share your finished piece on instagram using #thewoodburnbook

the wood burn book

More projects in the book!

This essential guide opens with a brief background to the art of wood burning, a list of tools and how to use them, basic techniques that can be used over and over again, and even what to burn (projects, designs and inspiration) and how to be safe doing it.

Make Mini Fridge Magnets

IMG_2110.jpg

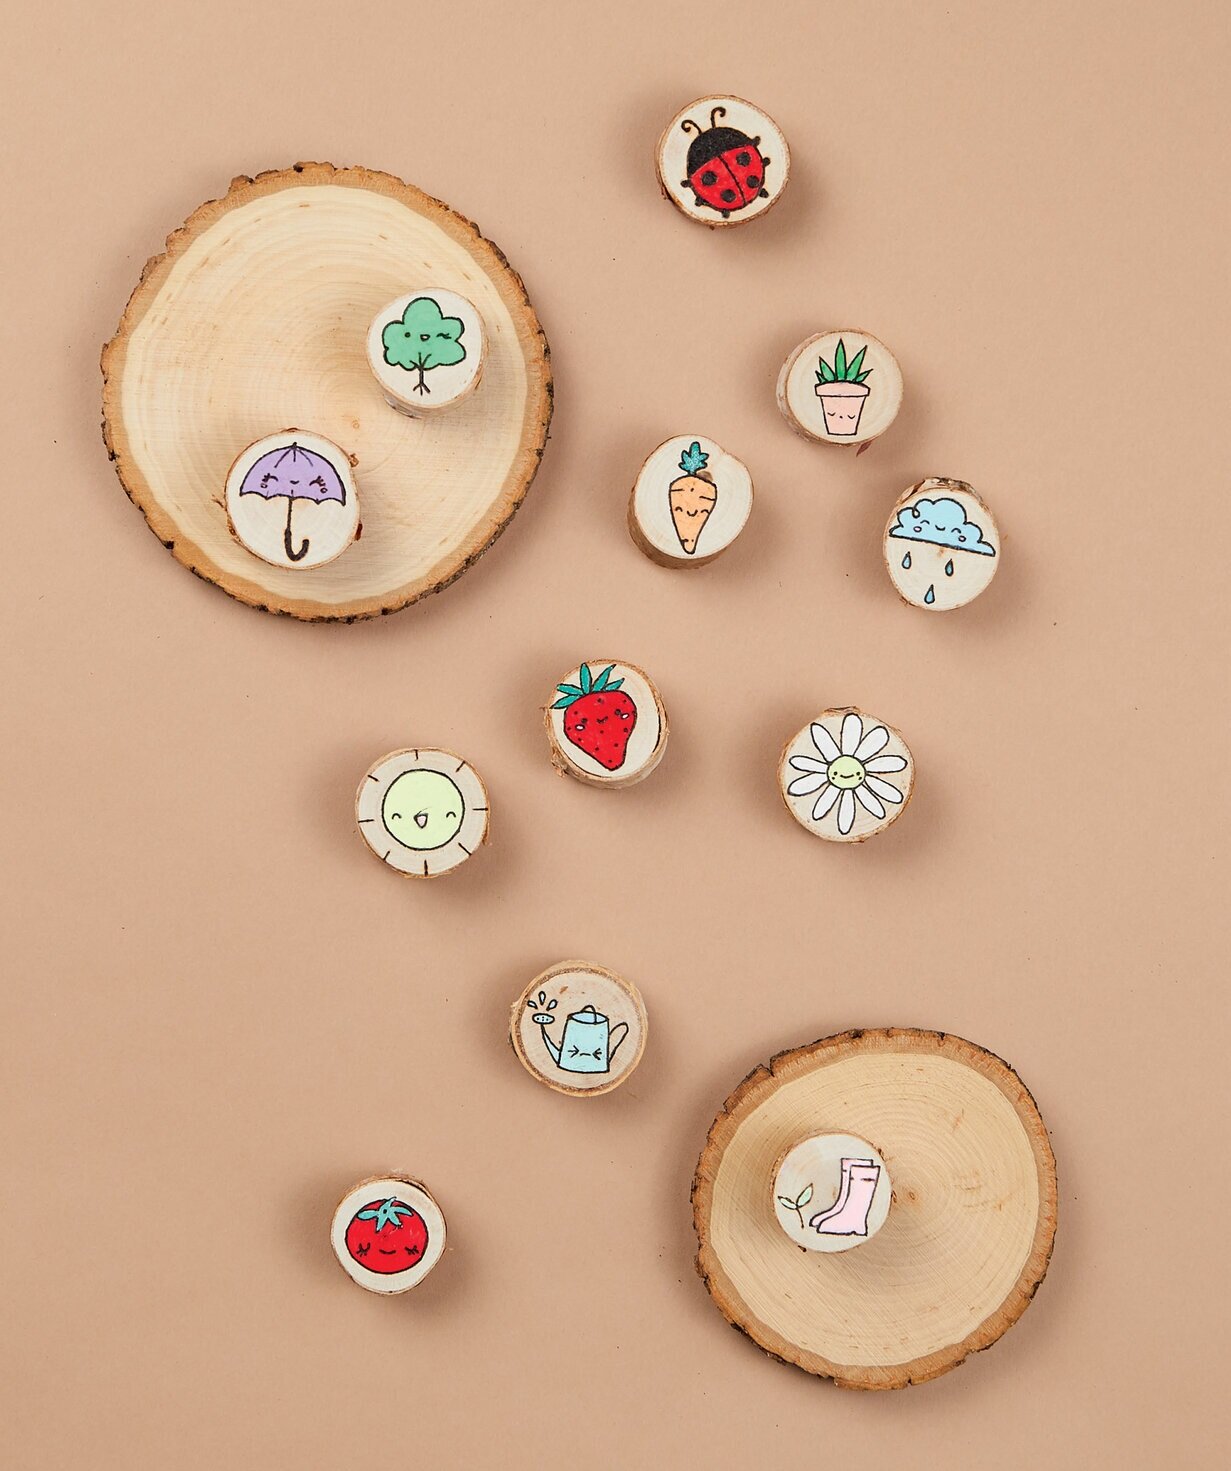
Gel pens are great for using on wood burned projects because they are easily accessible, not messy, come in so many colors, metallics and neons, and are easy to apply to small areas. These fun little gel pen magnets are just so perfect for the adorable designs by Jess from @jeshypark.

These magnets are both useful and whimsical, and who doesn’t love that?! They are super simple to make but will surely add character to any refrigerator.

Materials

Step 1. Choose your designs, size them, print them.

Step 1. Choose your designs, size them, print them.

Step 2. Sand your tiny wood slices smooth. I am using mini birch slices. Basswood is also a popular wood choice.

Step 2. Sand your tiny wood slices smooth. I am using mini birch slices. Basswood is also a popular wood choice.

Step 3. Cut and place the designs on the wood slices.

Step 3. Cut and place the designs on the wood slices.

Step 4: Choose a transfer method. A variety of these are discussed in the book. I suggest a graphite, blue Chaco, or pencil on paper methods. Here I am using the pencil on paper method.

Step 4: Choose a transfer method. A variety of these are discussed in the book. I suggest a graphite, blue Chaco, or pencil on paper methods. Here I am using the pencil on paper method.

Step 5: Tape your tiny wood pieces to a larger wood slice from the backside.Taping them down will hold them in place and allow you to easily turn them while you transfer and burn without worrying about getting burned. I learned this trick from @nort…

Step 5: Tape your tiny wood pieces to a larger wood slice from the backside.

Taping them down will hold them in place and allow you to easily turn them while you transfer and burn without worrying about getting burned. I learned this trick from @northstar_pyrogrpahy.

Step 6: Transfer the design. Remember, the more accurate the transfer, the cleaner the burn will be

Step 6: Transfer the design. Remember, the more accurate the transfer, the cleaner the burn will be

Step 7: Warm up your burner with your nib of choice securely attached. 

* Be sure to TAKE YOUR HEALTH & SAFETY SERIOUSLY. Check out the Safety Blog outlining all the steps you can take to burn safely, download your FREE safety guide and always follow the guidelines listed by the manufacturer.

Test your temperature on the back of one of your wood slices or a scrap piece of the same type of wood before getting started.

Step 8: Follow your transfer lines. Go slowly and be careful. Keep your fingers out of the way.Consider using a different wood slice or object of equal thickness as a working surface on which to rest your hand.This will allow you to burn more carefu…

Step 8: Follow your transfer lines. Go slowly and be careful. Keep your fingers out of the way.

Consider using a different wood slice or object of equal thickness as a working surface on which to rest your hand.

This will allow you to burn more carefully and precisely with a steadier hand, which is especially important when working on something small.

Step 9: Remove any remaining transfer markings.Step 10: Embellish your tiny wood burned designs with gel pens. There is no wrong way to do it, and I encourage you to go for it! Use metallic, neon, or monochrome colors. Color the whole thing, or just…

Step 9: Remove any remaining transfer markings.

Step 10: Embellish your tiny wood burned designs with gel pens. There is no wrong way to do it, and I encourage you to go for it! Use metallic, neon, or monochrome colors. Color the whole thing, or just add accents. It is completely up to you!

Step 11: Once you are happy with the look, add a finish to keep them looking great for a long time. Allow to fully dry.

Step 12: Pull out magnets, E6000 glue, and cotton swabs. Flip the tiny burned slices over so the backside is facing up.

Step 13: Get a good amount of E6000 glue on the cotton swab and rub it on one side of a magnet.

Quickly place and slightly squish the magnet onto the backside of the wood burned piece.

pyrography projects

Check on them after a few minutes to re-center any of the magnets which may have shifted position. Allow the glue to dry overnight.

*Be sure to work in a well-ventilated space because the glue can be quite stinky, and follow the guidelines listed by the manufacturer

 
pyrography magnet collection
 

Step 14: Once dry, your adorable handmade magnets are ready for use!

Show off your work!

I cant wait to see how you take these designs and add your own twist! Be sure to share your finished pieces on instagram using #thewoodburnbook

the wood burn book

More projects in the book!

This essential guide opens with a brief background to the art of wood burning, a list of tools and how to use them, basic techniques that can be used over and over again, and even what to burn (projects, designs and inspiration) and how to be safe doing it.


The Wood Burn Book: Finishes Edit

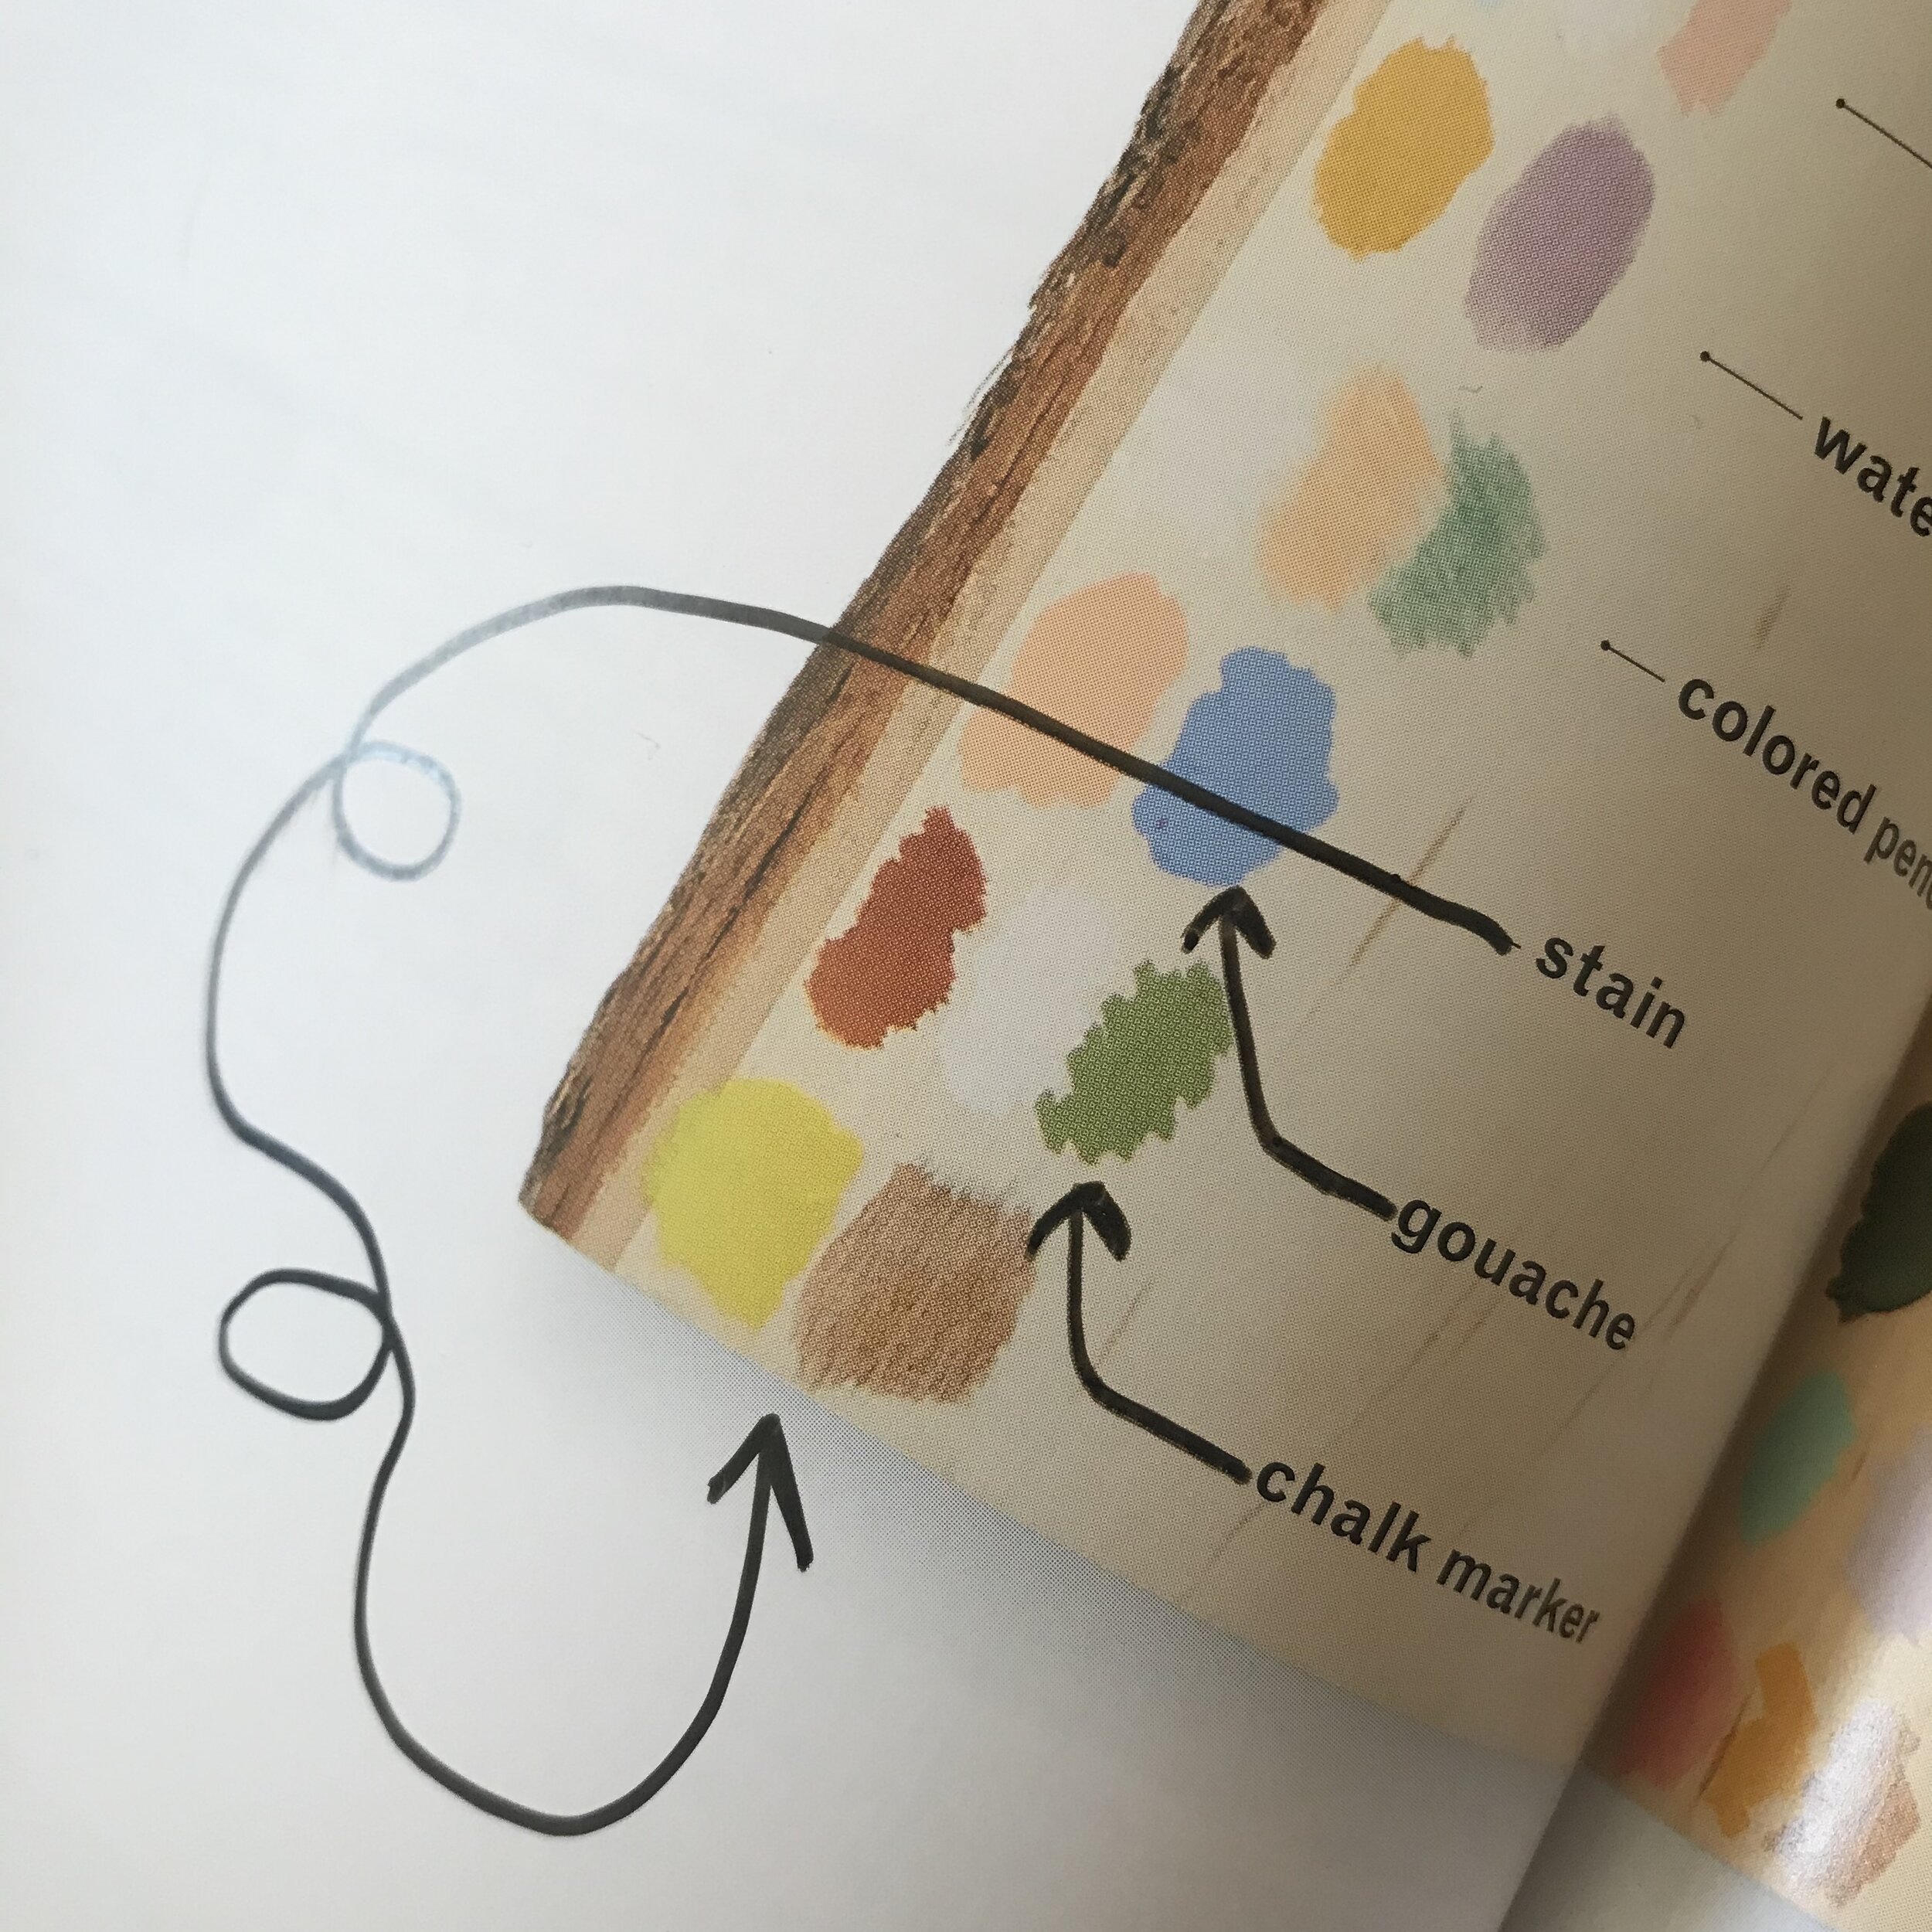
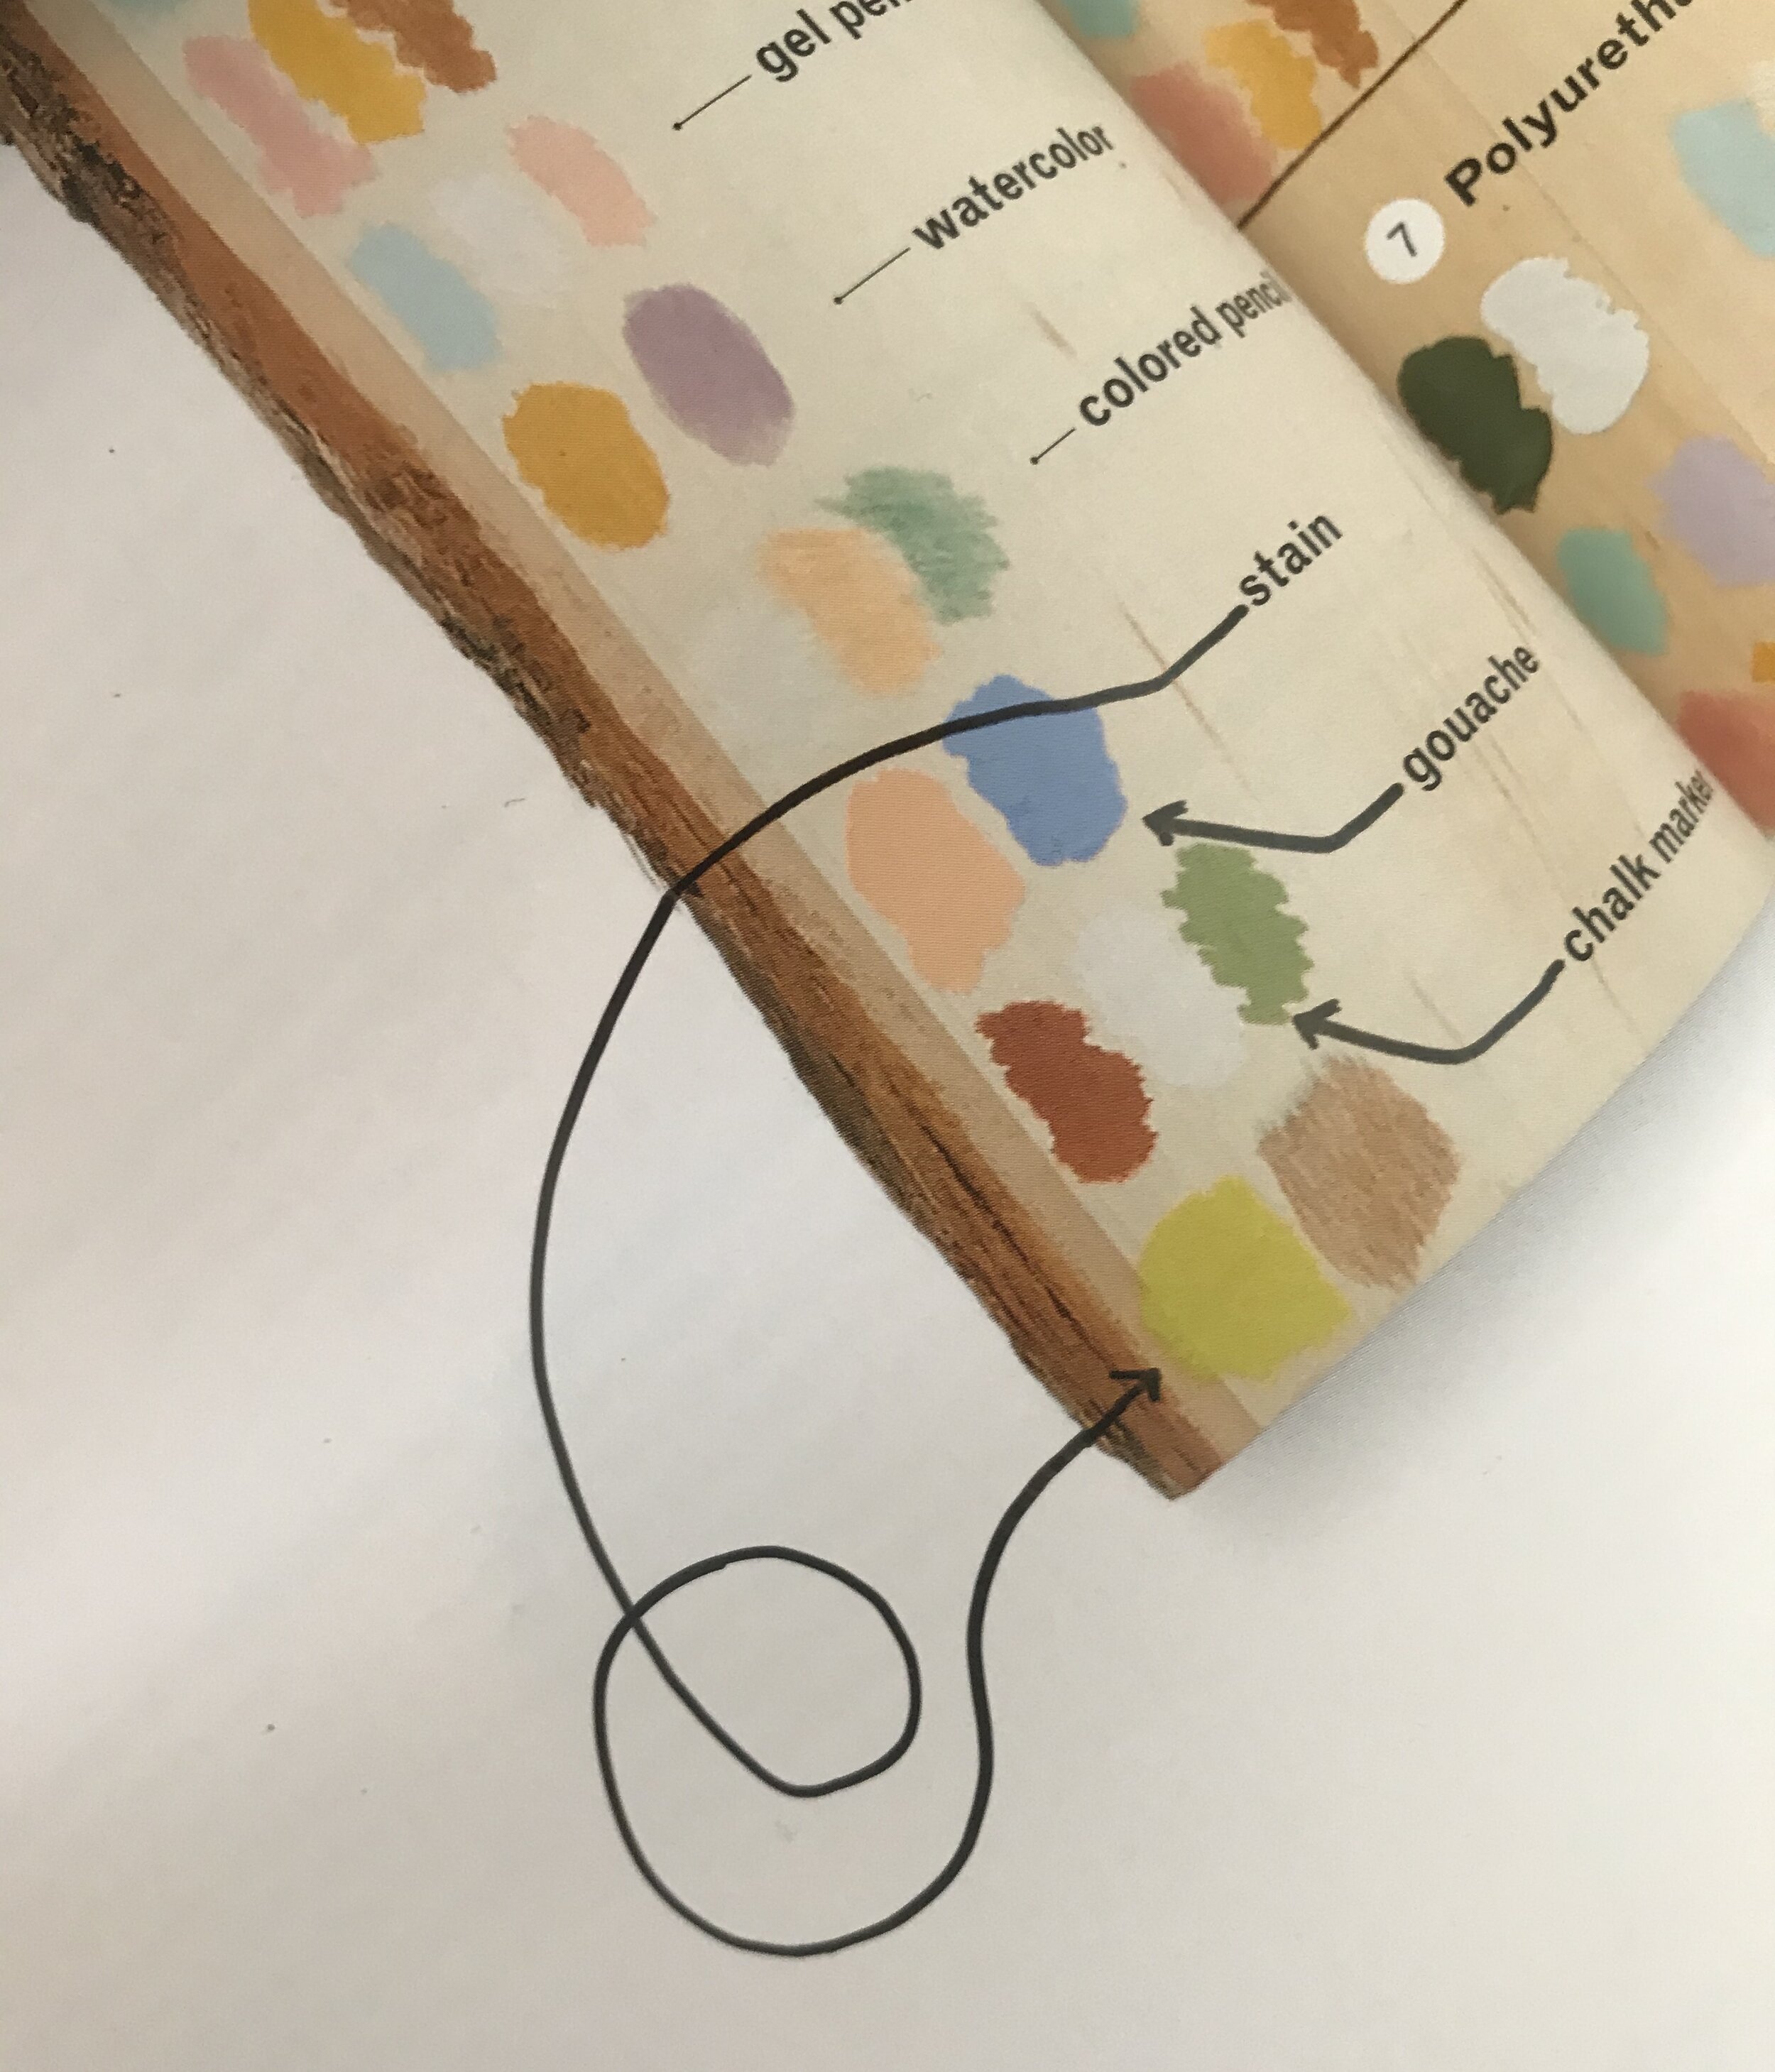
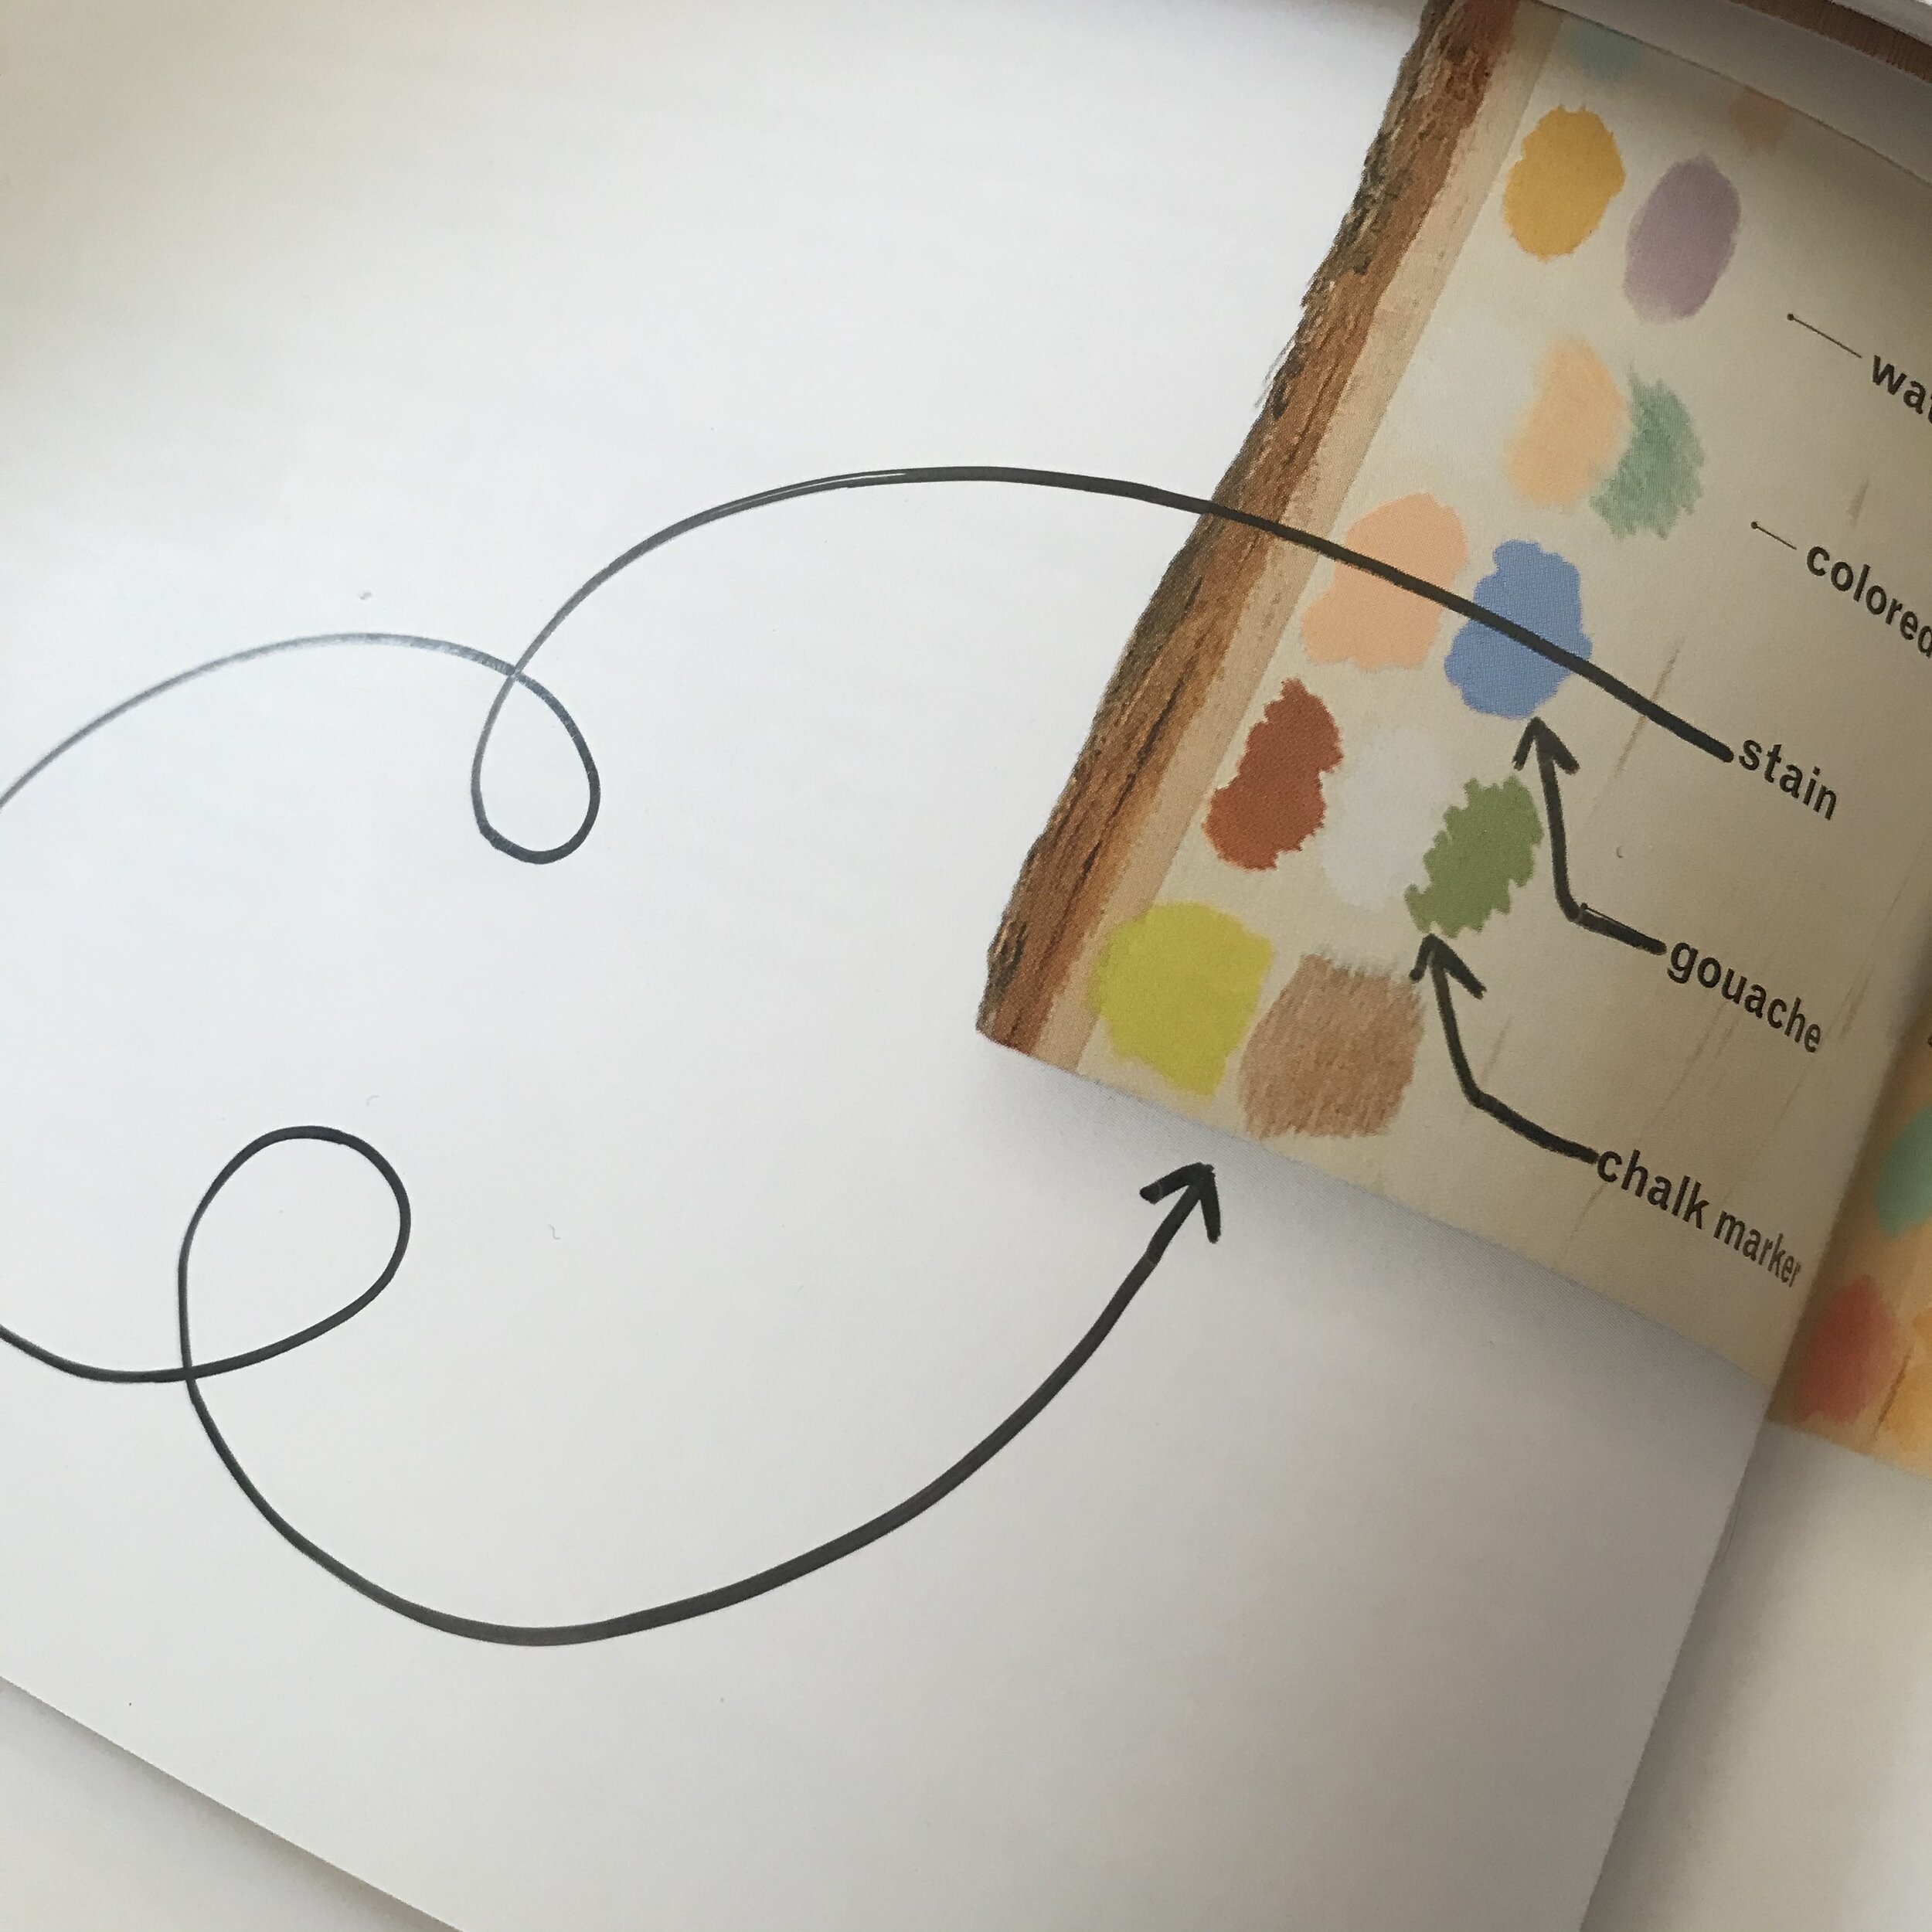
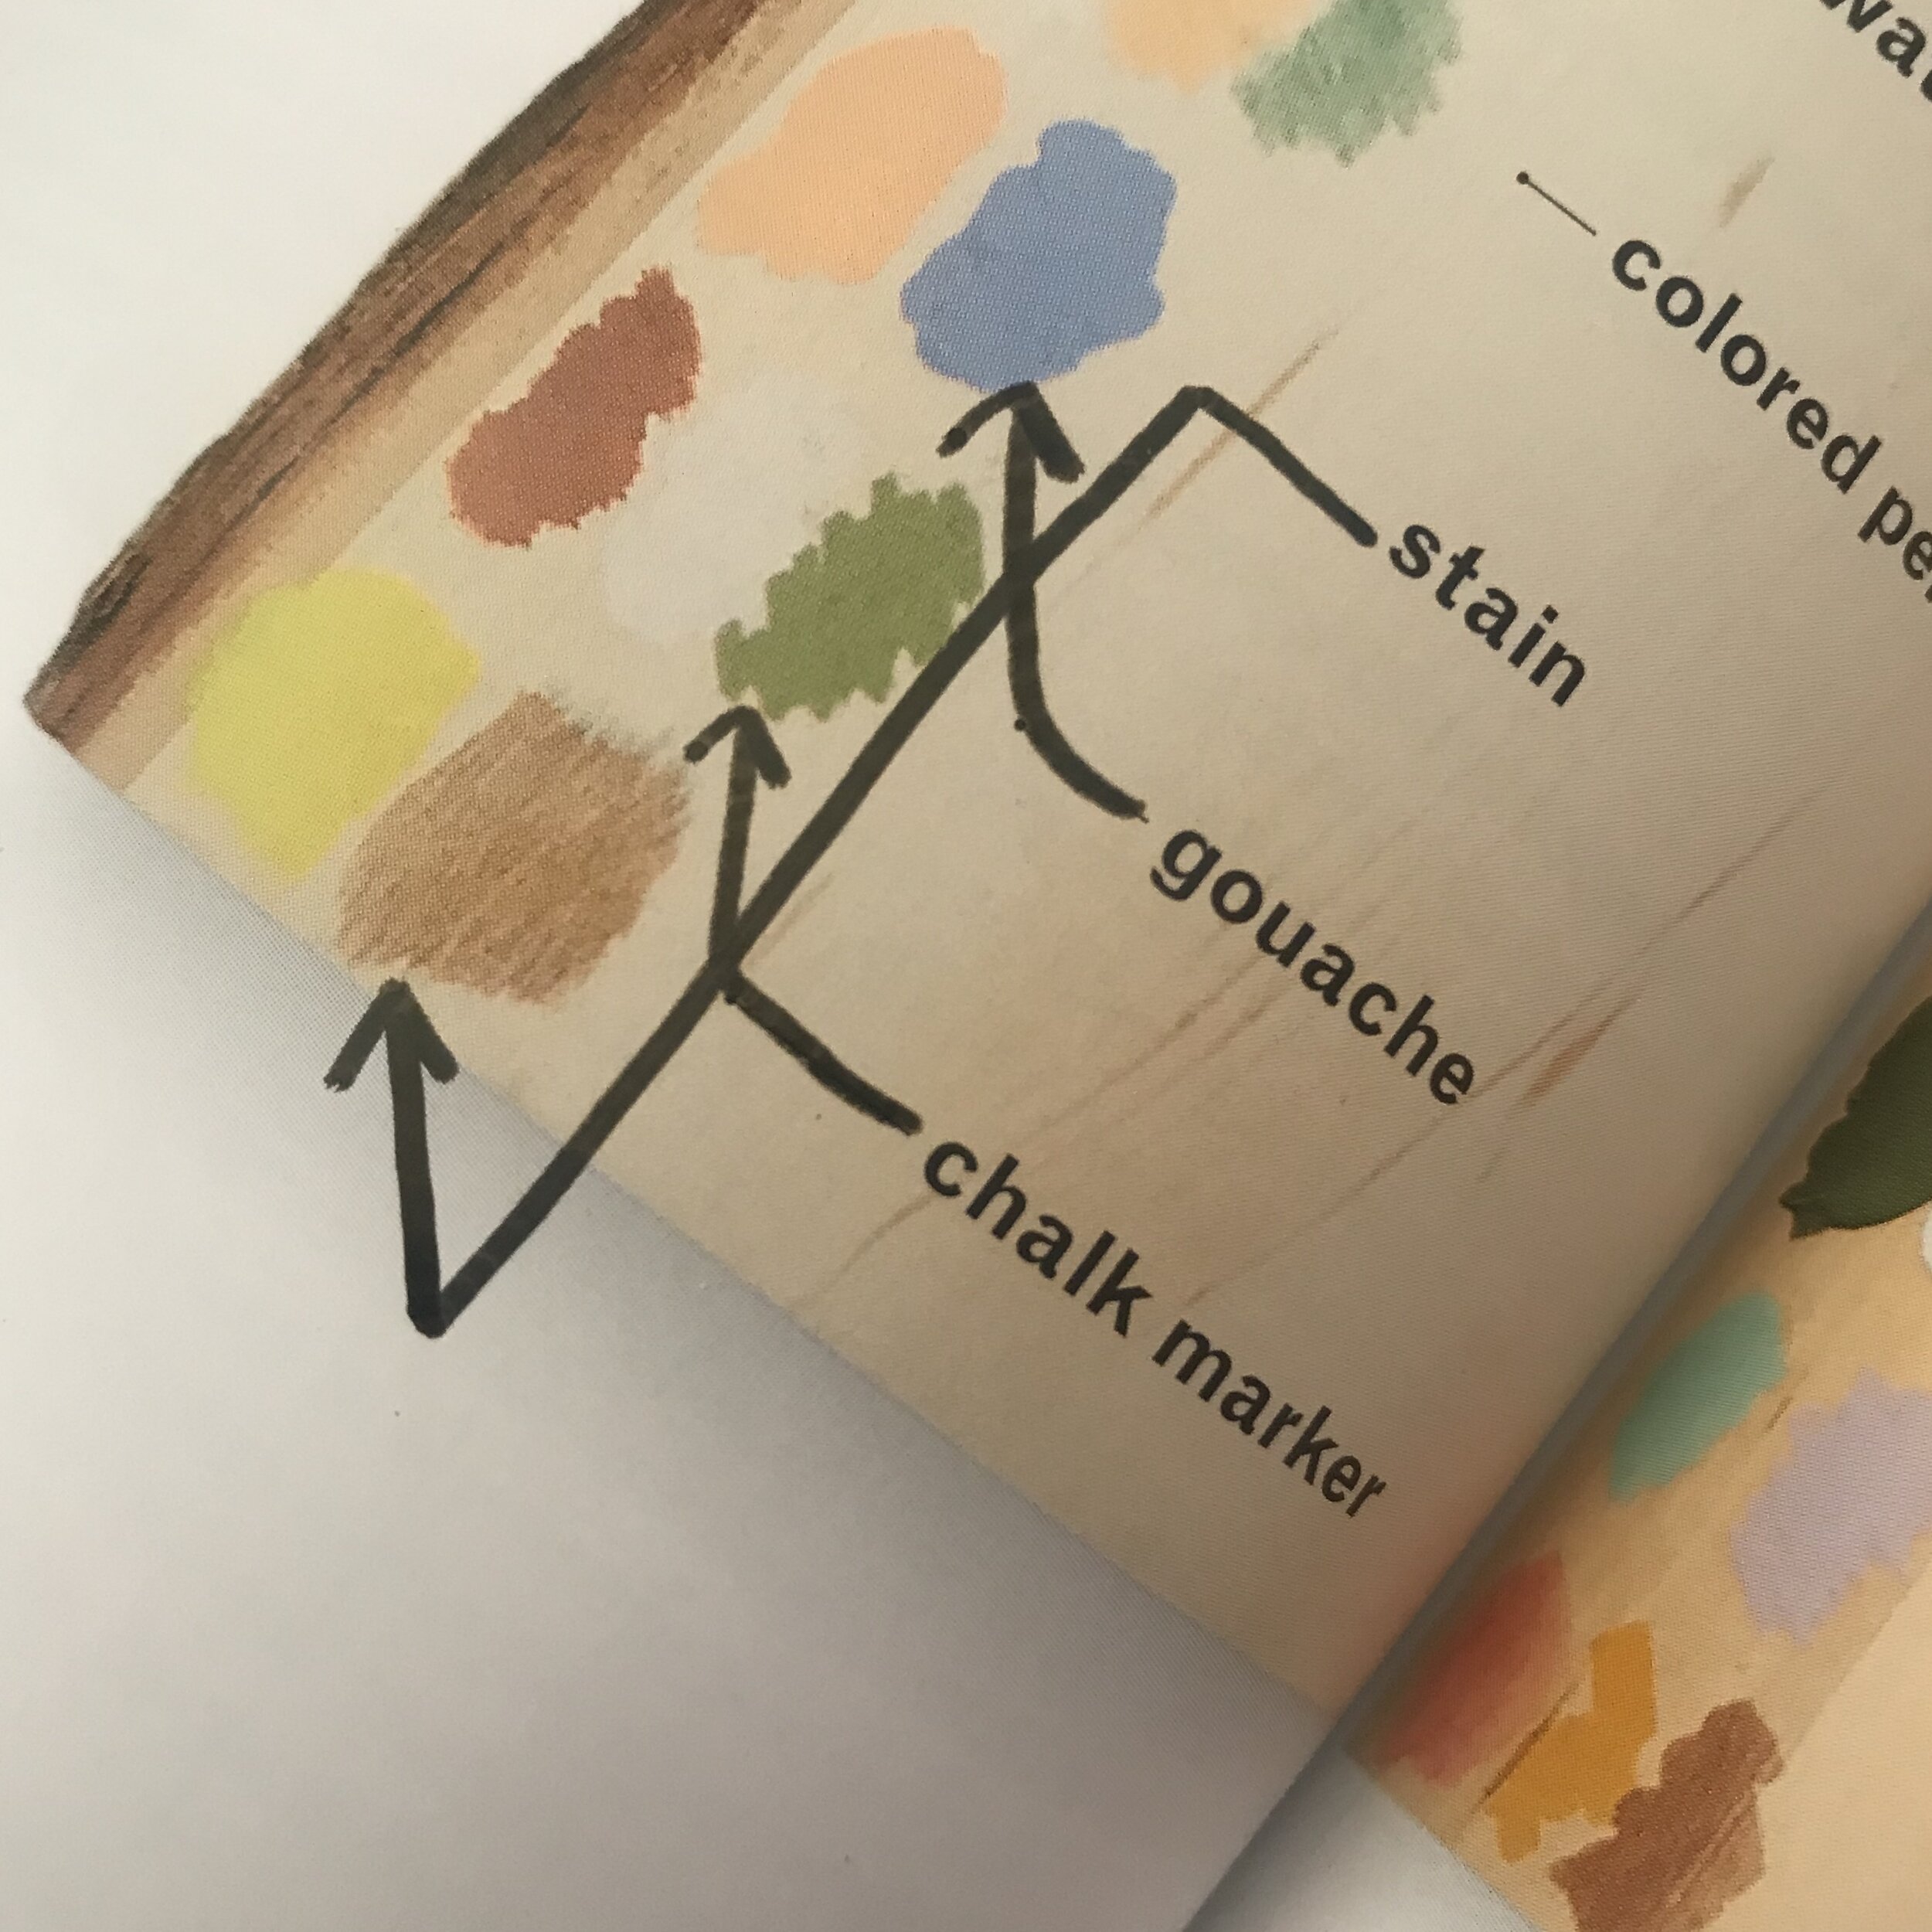
I have been told over and over again that every first edition book will have mistakes. Well, this is ours. On page 52 of The Wood Burn Book, you will see this pretty board of finishes over colors and burn. This is to visually demonstrate how the color will react to that particular finish. Well, in the 1st edition printing of the book, the last 3 color option in the key are mislabeled. What you see here is correct, and it is already changed for the next printing.

Screen Shot 2020-08-27 at 4.34.16 PM.png

This sort of thing unfortunately happens, and I can’t even begin to tell you how heart breaking it is for me. I originally wanted to be able to burn the names of the colors right into wood as I made it, but what I learned is that when a book is planning on being translated into multiple languages, the photos can’t have a lot of words in them. Fun fact: There is actually a list, called a “co-edition” list, that has acceptable words that are approved to use in a photograph. This made coming up with projects infinitely more difficult, because I could only use certain words. I wish I could share the “co-edition” list with you, because it is hilarious! Absolutely not what you would expect. There are even some names on the list that are acceptable to use, The one that I remember most was, Kylie. I thought that was so interesting. I was expecting John or Smith. The entire list was like that. I am so curious about how it was made and who chose the words.

Anyways…..

In the process of making the book, the designer takes all of my words, photos and direction and turns it into a book. I never met or spoke with my designer. I gave my edits to my editor, who gave them to the art director, who then gave them to the designer. You get the point. The entire Finishes section gave us a lot of trouble with formatting and last minute photo changes, and page rearranging, and unfortunately the mislabeling happened, and I didn’t spot it until after the books had already been physically printed. So…. you early buyers get a fun, limited edition, first printing! Like my spin on things?

Here are a couple fun ways that I have altered/edited my copies. Somehow, turning it into a doodle made me feel better about it. Feel free to send me a photo of your doodle edit, or post about it and tag me. I will send my favorite doodle an original art piece from the book before the end of the year.

Check out this blog post for more tips and tricks to finishing (or not finishing) your wood pieces.

Learn to Burn Live Class at Michaels!

Want to learn to burn? Join Rachel Strauss of @woodburncorner and Walnut Hollow in this FREE crash course on wood burning. You will walk away with all the basics under your belt, and the confidence to give this incredibly relaxing art form a try! Rachel will cover essential tools, safety, types of woods, burners and nibs, how to prep your surfaces, and ways to add color in wood burning. Rachel will also walk you through, step-by-step, the process from start to *literally* finish, giving her best tips/tricks along the way so you can feel confident to dive in and find success quickly. She will demonstrate how anyone can make a loose watercolor and wood burned art piece just like this. Let's have some fun. Happy burning!

 
Rachel%2BStrauss%2B-%2BWood%2BBurn%2BCorner.jpg
 

AT A GLANCE:

FREE

Offered in English

Recommended Age: 13+

Skill Level: Beginner

Next class will be announced on our ONLINE CLASSES page.


Interview with Mallory from My Art of Gold

Name: Mallory Romportl

Burning since: 2016

Location: Minnesota

@myartofgold and etsy

unnamed.jpg

Favorite piece of advice for new pyrographers? 

Slow and steady will make for a beautiful burn, it requires patience and lots of practice. And SAFETY first, wearing a mask will save you many headaches and of course your lungs too! 

How much time do you spend wood burning versus the rest of your business? 

I probably spend 50/50 on both. To be honest, you’ll probably find me burning more often then taking care of the business side of things. My husband is a wonderful helper when it comes to the financial and logistics part of the business. 

What inspires you?

My faith and nature are huge inspirations for me. When I’m out hiking or at a park, I may find a certain type of flower and think to myself ‘that would make a beautiful piece to burn.’ 

I also love burning bible verses or encouraging quotes especially now because I think everyone could use a little hope. 

 
5.jpg
 

Your faith is a big part of who you are and you bring it into your art. Was that always part of the plan?

I knew that I wanted this business to be Christ- centered when I started and my faith is a huge part of my daily life. I believe every artist should include who they are into their work and since my faith is so important to me, I love to share it with others as well. I understand it’s not everyone’s cup of tea and I totally get it, I’m just thankful that it can be a part of my creative journey as well. 


Deserted Island, with power question. You can choose ONE:

Burner: Razertip SK burner 

Nib: Ball point because I love how versatile it is!

Type of wood: Walnut hollow Basswood

Non-essential tool (but basically essential to you): a ruler or straight edge!

What are your favorite nibs to use? 

Ball point tip is my absolute favorite because I can do so much with it and it’s the easiest tip for me to letter with. I also love a good universal shading tip to achieve those shading details on more complicated pieces. 

4.jpg
3.jpg

What is your transfer method of choice? 

If I do transfer, I use graphite paper and an embossing tool to trace my design onto the wood piece. 


What are some of your other favorite tools?

A ruler or some sort of straight edge is always sitting at my side and my Razertip burner is definitely my go-to burner. Also, Walnut Hollow basswood is the best wood for my projects!

 
2.jpg
 

Any storage solutions that you have found handy? 

We live in a pretty small place so storage options are pretty limited but we always keep the Walnut Hollow wood in their boxes and try to consolidate them until I’m ready to pull them out to use them. As soon as a piece is finished, I will wrap it in tissue paper for a layer of protection and safely store them into a basket or box. 

Do you have a dream collaboration you would like to do with either a company or another artist? 

I would love to collaborate with Razertip because I believe in their product, I’ve been using their burner for almost 4 years now and I would consider it an honor to work with them! I also have a couple of acrylics/ gouache artists such as Julie Marriot @juliemarriotart because I adore her style, it’s so bright and vibrant! 


Can you give us any lettering advice? How do we get to the point where we can just put burner to wood? 

I have had tons of practice with lettering and I first started with a brush pen on paper. Sounds crazy but I really suck and brush lettering. However I found that the more I practiced with a brush, the easier it was to simply burn it onto wood. There are also many lettering artists and Skillshare classes that helped me find my own style and work on different fonts. 

Lettering artists that I have learned from:

Shelly Kim: @lettersbyshells

Amanda Arneill: @amandaarneill

Riley Stark: @oak.lettering.co

What goals do you have for My Art of Gold? 

As of now, I honestly don’t have too many goals for my business. My family just grew to a family of 4 when we welcomed our second baby boy and they are definitely priority. So my business may have to take a back seat for a bit and I’m completely okay with that. 

What tips do you have for people who are trying to increase their Instagram following? 

Process videos! People love to see real time and time lapse videos of your process. Videos also seem to catch more attention than a photo for some reason. 

Watch the recorded live video:


Burnt March 2020

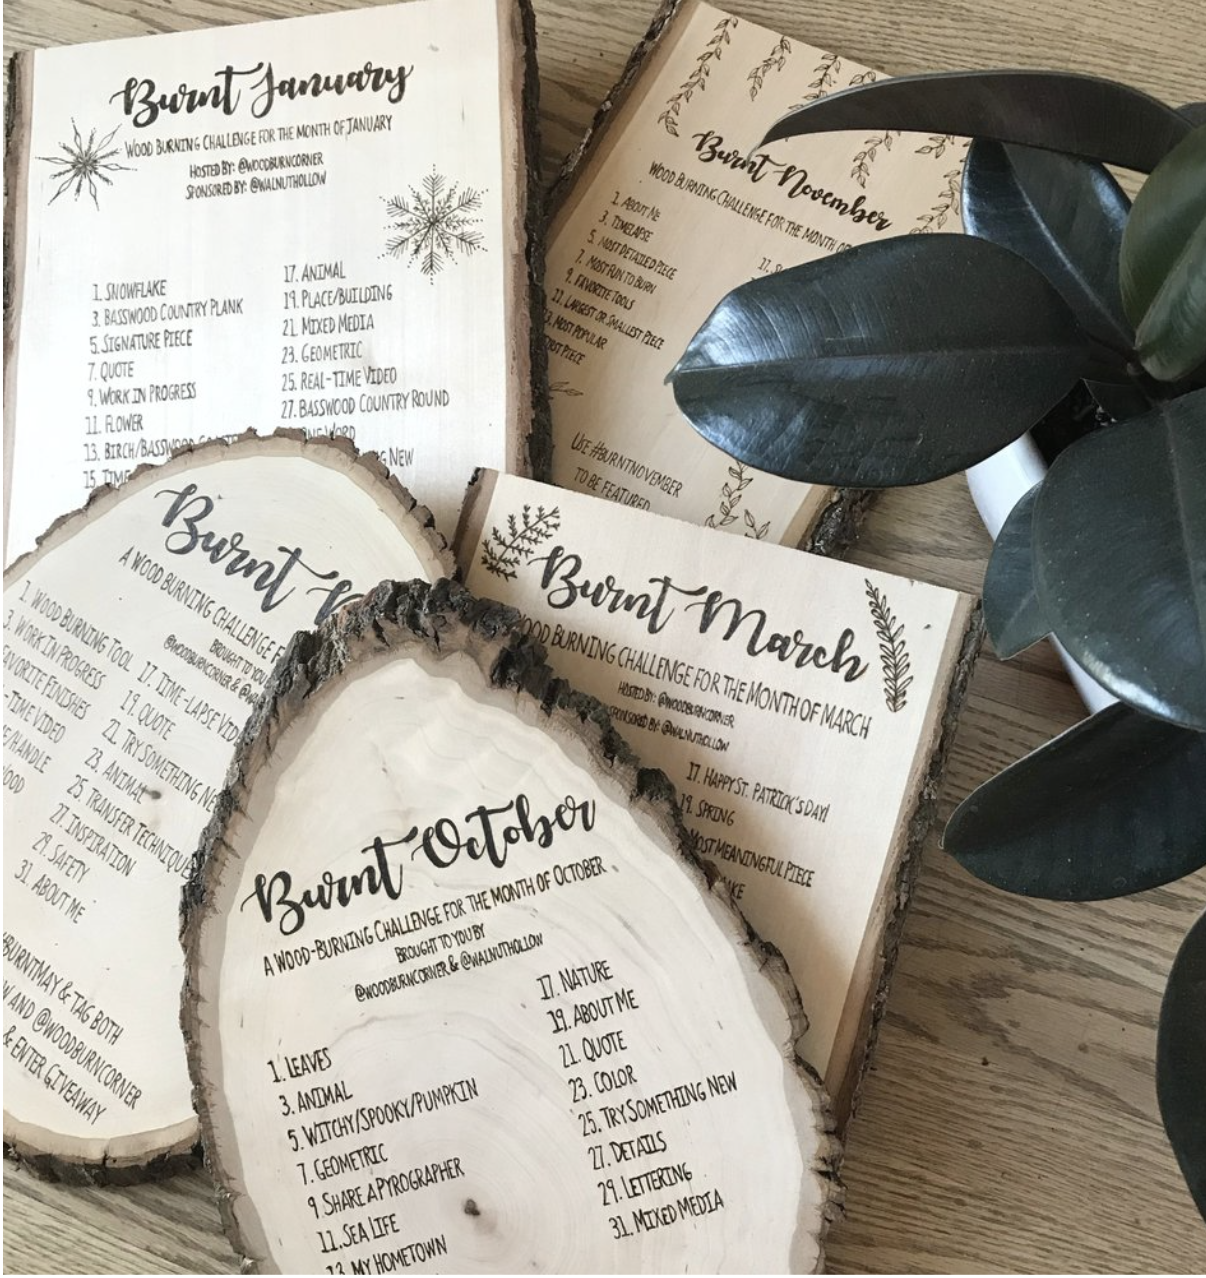
These Burnt Month Challenges all started with #BurntNovember back in 2017! They are every-other-day challenges for the wood burning community on Instagram. The community uses the given prompts to inspire pieces of art. It always astounds me how many amazing and unique pieces of art can come out of one word.

Scroll down to see the featured artists for March 2020! #BurntMarch was sponsored by Walnut Hollow.


Thank you to all of you for joining in the fun. Can’t wait for the next one!

Check out past Burnt Challenges here!

Want to join future Burnt Month challenges?

SIGN UP FOR OUR Burn Club NEWSLETTER TO SEE WHEN THE NEXT CHALLENGE IS HAPPENING.

OR FOLLOW US ON INSTAGRAM AND STAY TUNED FOR THE ANNOUNCEMENT!

These challenges are a great way to hone your skills, grow your following, try new things, and meet your fellow wood burning artists. #communityovercompetition


How to Start Your Own Wood Burning Business

Are you a pyrographer who wants to turn your hobby into a thriving business? Have you dreamt of starting your own creative business, but don’t know where to start?

Knowing where to put your energy and effort in business can save you time, money, and a whole lot of headache.

My name is Rachel Strauss, and I am a wood burning artist, teacher, entrepreneur, business coach, and community leader.

I personally believe in coaching. I have seen people that I have worked with find incredible success in their businesses over the past year. I have also seen first hand what coaching has done for my own personal business. I know it works, and a big part of the reason why is because we are in it together. Your success is my success.

If you are still reading this, it means you are serious about this. It means you want to see your business succeed. Here is your nudge.


COMING SOON

insta post_ WB + B Toolkit.png

Get another kick start to your business by diving into the Complete Wood Burning + Business Toolkit. This Toolkit is self-guided so you can work at your own pace, on your own time, at your own speed, and in your own order. There are many ways to digest the information including audio lessons (transcripts included), written lessons, exercises, video and picture tutorials, as well as PDF printables.

This isn't just a course. It is a toolkit that you can come back to time and time again, anytime you want and complete at any order and pace you want. The Toolkit will be updated, free of charge, and you will always have access to it. As we learn and grow, so will the Toolkit.

This is your one-stop-shop for everything you need to give your business a massive boost!


Interview with Hannah from Walnut Hollow

Company Name: Walnut Hollow

Name and Role: Hannah Bartelt, Marketing and Social Media Specialist

Location: Dodgeville, Wisconsin

Find us on: Instagram, Facebook, Pinterest, Website  and Blog

walnut hollow.png

Can you tell us a brief history of Walnut Hollow? How/when did it start? 

The start of Walnut Hollow is one of my favorite stories to tell - and the details are the best part. My grandpa, Dave Ladd, has always been passionate about nature and woodland conservation. He planted trees all around the family land to track their growth, environment, and health from seedling to mature tree. Once the trees were mature, he would harvest them and begin the process again. He gave his wife, Nancy, my grandma, some of the slices from a mature tree that he had harvested. She has always been a passionate crafter and she used the wood slices as a base for a decoupage project - the rest is history.

Screen Shot 2020-07-25 at 10.19.49 AM.png

My grandpa began to market the idea of Walnut Country Rounds® throughout the community and they were so well received he started to attend trade shows around the country. He did not have the funds to have a booth at the shows, so he would track down the buyers and invite them to come back to his hotel for a meeting. He would serve cheese and crackers...because, well, Wisconsin! He came home from his first trade show with enough orders to jump right into planning, production, and distribution. Walnut Hollow was officially founded in 1972. You can watch this video to see some old photos and get the concise rundown of who we are as a company!

How many family members currently work at Walnut Hollow and how many have worked there over the years? 

There are currently 5 family members working here full-time, including myself. Since my grandpa’s retirement several years ago, my mom is now the President + CEO. My uncle is the CFO and his wife is our Human Resources and Accounting Specialist. My second cousin is the Plant Manager. Every person in my immediate and extended family has worked here at some point! My mom, uncle, second cousin, and many other employees have been here from the beginning - 35+ years.

Walnut Hollow is a company that prides itself on sustainability as well as being made in the USA. Can you tell me a bit about your zero waste processing system?  

Sustainability and conservation is literally how Walnut Hollow started, and it has been a priority ever since then. We implement sustainable practices throughout our entire company, but we do have some major initiatives we pride ourselves on: 

  • In 2015, David Ladd was inducted into the Wisconsin Conservation Hall of Fame for contributing to conservation programs, projects, public understanding, and conservation ethics for Wisconsin and the nation. 

  • The Ladd family has planted more than 300,000 trees and shrubs on personal property in the surrounding area.

  • When possible, raw material is harvested from Midwesst plantation and managed woodlands for the manufacture of wood surfaces.

  • Walnut Hollow has a unique sawdust recovery system whereby sawdust and chips from the manufacturing process are vacuumed at each work station to a central silo storage system. As a result, the manufacturing operation is not detrimental to the health of employees or the environment.

  • Wood waste and sawdust are recycled and sold as livestock bedding. No wood waste ends up in landfills.


Can you give us a rundown of some WH products? What kinds of wood and tools do you offer? 

We offer 2 main product lines: wood surfaces and wood burning tools. We also sell clock making supplies, crafting tools, and wood carving supplies.  I’ll keep this brief, but you can learn more about our offerings on our website! 

Our wood surfaces are probably what we are most well-known for. Our signature product lines, Basswood Country Rounds and Planks are the same product we brought to market over 40 years ago; however, they are now made of basswood (vs. walnut). Basswood is ideal for wood burning which is how we started our wood burning tools line. My uncle Scott was an extremely talented and creative teenager and started working on design concepts with my grandpa. He started attending trade shows when he was 16 years old and hosted demonstrations at the Walnut Hollow booth. All of the traditional tools and points that we sell today are almost exact replicas of the products that Scott designed years ago - with just a few innovations to match current technology. 

For more information about our wood surfaces - check out this video!


How are your wood surfaces prepared?

All of the wood we use is the highest possible quality and furniture grade lumber. Our wood material arrives to our production plant either in full log form or large planed surfaces. The logs are cut, kiln dried, sanded, and packaged. The planed pieces go through the same drying process, but are usually glued together to create plaques, then sanded and packaged. Every single wood piece is naturally untreated and kiln dried to keep bark intact, lower the risk of cracking, and to remove all moisture.


What is the best storage solution to keep our wood in tip-top shape? 

I always recommend keeping your wood surfaces in a place that will not be prone to collecting moisture and will not be direct sunlight. A closet or closed storage cabinet would be ideal. This will ensure the wood is not exposed to moisture or sunlight, which can cause discolouration.


How do you recommend that pyrographers clean WH wood burning tools? Does it depend on the type of burner? 

It seems like everyone kind of has their own preference when talking about this topic. I usually suggest using a fine grit sandpaper to gently rub off any residue from the points. This is the easiest way, in my opinion! I know a lot of people use a damp sponge to clean their points. This is effective and easy as well. When using the sandpaper method, just be sure to swipe very lightly across the sandpaper. You can use this technique with all of our points, but I would be extra gentle with the delicate wire tip points.


You mentioned there are more nib options coming for the Creative Woodburner! How many, and when can we hope to see them? Any chance we can twist your arm a bit more into telling us more about the shapes/types of nibs?

So excited about this question!! We will be releasing 4 new points that will be compatible with the wire point Creative Woodburner! You will be able to find them at Hobby Lobby and Michaels! I believe they will be available at Hobby Lobby first, but both stores will have them set by mid-September! You’ll have to wait until then for the official announcement and reveal, but think more shading points, a stamping point, and more precision! Stay tuned - we will announce on social when they are available!


Wood Burn Corner has been so lucky to get to do a bunch of different collaborations with Walnut Hollow. The Creative Woodburner packaging, many many challenges, sponsorship at the Burn Club Retreat, scholarships, WH traveling wood piece, and so many other things I am probably forgetting. What do you think has been some of the best things we have worked on together, and why? 

I have loved every project and campaign we have worked on but I think my favourite was the WH Traveling Wood piece. It was so fun seeing that piece evolve and travel around the country. I was the last recipient of the piece and I have it proudly displayed at my desk!


What are some of the most unique or interesting ways you have seen WH products used?

Seeing our products in the wild is one of my favorite things - it never gets old! We have been featured in a lot of craft and DIY magazines over the years which is always fun to see. Martha Stewart Living featured Ryan Reynolds and Blake Lively’s wedding a few years ago and they used some of our plaques as table decorations! We see our barked products a lot on Shark Tank - many of the entrepreneurs use them in their displays. I think the most recent sighting was on Netflix’s Tiger King series. Did you see it?? So random!! I also love seeing new things on Instagram from our community and different techniques that are used during our Burnt Month campaigns!

774728_462896910424957_1452900047_o.jpg
774179_462896907091624_1529046457_o.jpg
20200327_220757.jpg

What can wood burning artists do to increase their chances at getting featured on @walnuthollow? 

We cannot feature you if we don’t see your posts! So make sure your profile is public and use #walnuthollow. You can also tag us in the actual photo (not the comments - those get lost in our notifications!). I have not been posting a lot lately, but I do go through and checkout the posts we are tagged in - love seeing how everyone uses our products!


Do you forsee opening Walnut Hollow for tours in the future? 

We do not have plans to start doing tours. It is really difficult to make this possible due to overall production safety. Keeping our employees safe is very important and bringing in extra traffic to an already busy building would be really tough. We will keep this in mind though, and maybe will be able to share more about production virtually instead!


Will there be another WH Traveling Wood Piece? 

I would love to do another WH Traveling Piece! Let’s do it!


What goals do you have for the future of Walnut Hollow?

Right now we are focused on continuing to provide the highest quality products to our customers. Innovation is also very important to our future. We are always exploring new wood surface developments and new tool concepts. I don’t think I can share any concrete goals without spoiling anything :) 

Watch Hannah’s recorded live interview:


We All Start Somewhere

 
how to start wood burning
 

Everyone has to start somewhere.  A lot of people, when they first pick up a wood burning tool quickly fall in love with it, but are stuck with what to burn next. They may not have the artistic skills to draw their own art yet, but love the creative process of wood burning.

This is where and when utilizing transfer techniques (how to transfer using heat or without heat) comes in handy. Now, when choosing an image to transfer, it is really REALLY REALLY important that you have permission to use said image, and I mean express permission. Copying is never ok.

There are plenty of free resources for images. You can check out: Pixabay, Unsplash, or Pexels - these websites host millions of royalty free images for your artistic use. If you are looking for some simple, line drawn templates, feel free to check out the free poppy pattern, the radial symmetry poppy template or The Wood Burn Community Book of Templates filled with over 50 designs to choose from, and there are many more project ideas and templates in my first book, The Wood Burn Book. You can also bookmark the blog post on 160 Things to Burn Next if you are ever in need of some inspiration or visit my Pinterest boards: Items and Ideas to Burn On or Pyro Projects To Try. Make sure to follow me on Pinterest for more ideas added on the regular.

Where it all began…

My first post to Instagram, and it still only has 9 likes.

My first post to Instagram, and it still only has 9 likes.

When I first started, I did not consider myself an artist. I burned words from free fonts. It wasn’t super artistic, but it did take some skill. Sizing, placement, font choices, steady transfer, and burning hand, etc. I had to learn how to do all those things. Heck, I used to transfer with an exacto knife, because I hadn’t learned any transfer techniques, yet. It was trial and error.

I enjoyed burning for fun, and for friends. It was an inexpensive, rewarding, and fun side gig to my full time job as Mom of three (aged 3 and under at the time). When I joined Instagram in 2016, I found myself wanting to burn beyond just words. I kept wondering what different artists’ work would look like burned rather than painted or drawn. I was still building up my own drawing skills, and confidence.

So, I would message that artist and ask if they would want to see their art burned. Almost every time it would end in a collaboration. I met so many incredible artists and made so many friends by doing this. I also gained skill through practice. I bought art, pyrography, and drawing books and would practice. I would also make wood burned logos for small businesses for free as a giveaway. This was another skill building, following building, and friend/community building exercise.

I started the Burnt Challenges, so that I could push myself and my craft further and also meet and mingle with other pyrographers. I studied, and tried a dozen transfer techniques, and still utilize transfer techniques for almost every single burn I create, because I want to be able to recreate it, I want consistency, and a really good, clean burn.

Eventually, over time, I got to the point where I felt comfortable making my art from scratch almost 100% of the time, although, I still love a good collaboration. My iPad Pro and Procreate app also helped with this. (If you have one, you know, and if you don’t yet, I highly recommend saving up for one. They are game-changers!). When mistakes can easily be re-done, and lines can be smoothed and perfected in the design phase, it made it a whole lot less scary for me to make mistakes.

This is why I teach that if you can trace, you can burn. The method I found that works best for me, and the method I teach means that by the time I pick up my burner, all I am doing is following my lines.

Another thing that made a WORLD of difference in my growth was connecting with so many pyrographers around the globe who, like me, were willing to share tips/tricks/tools/techniques. Embracing community over competition, and having a community that embraces it, too, means everyone grows faster and easier. “A rising tide lifts ALL boats.”

I am still constantly learning, and pushing myself and my craft. Will I ever get to the point with my pyrography where I am making photorealistic pieces? Most likely not, because that is just not my goal. I don’t have the patience nor the desire to make them, but man, I do respect the heck out of those that do! There is no denying the skill of those pyros out there who can create photorealistic pieces.

The lesson to take with you

Here’s the thing that I hope people take in, though; I could easily look at their art and say to myself that what I make isn’t art in comparison. That what I do doesn’t count because it’s not good enough, and some people I am sure believe this. I could choose to have that competitive, comparison, limiting, scarcity mindset OR I can CHOOSE to have the mindset that their art does not take away from mine, nor does mine take away from theirs. Art is meant for people to enjoy, and I think there is more than enough space for every type of artist. Your art, whether it be burned fonts (royalty free, of course) or photorealism, is valid. REPEAT: YOUR ART IS VALID

Community over competition

The reason why choosing community over competition is so easy for me is because I believe whole heartedly that on this great big Earth of ours, there is more than enough space for all of us, and it is a whole lot more fun to be a community, and help each other out, rather than see each other as competition. It wasn’t always easy, and certainly wasn’t friendly when I first started on Instagram in the pyrography space, but any time I would feel that pang of comparison, or competition, I would lean in harder to community, and it quickly became clear how much better it was and felt all around to lift each other up and support one another. When I could be happy for their successes.

My goals with my pyrography is to make art that makes me happy, encourage others to pick up the pyro pen, raise awareness of pyrography and its mental health benefits, help people in any and every way I can, inspire creativity, and bring the community together. 

I want to give people permission to pick up the tool in the first place. I strongly believe that anytime someone takes the time to be creative and create something, they are making art, and I wish more artists would own that title.

We all know that art is therapeutic, this has been proven time and time again. The amount of goodness that wood burning has brought to my personal life and mental health over the years is staggering. I truly believe that allowing yourself to be creative is so important, so whatever stage you are at in your pyrography journey, know that I am right there with you encouraging you every step of the way. 

Much love, my fellow Pyros and happy burning,

Rachel 


Lettering Tips and Tricks for Wood Burning

In the short video below these written instructions, I cover some quick tips and tricks to make for cleaner lines with lettering when it comes to wood burning on wood.

Please ensure you always follow the safety precautions outlined by the wood burning tool company and read our blog post for more tips and tricks on staying safe while burning (including a free downloadable version that can serve as a great reminder): Safety in Wood Burning

IMG_4705.PNG
  1. Start with a clean desk, and unfinished, dry, and sanded smooth wood. A smooth surface will make for a cleaner burn.

  2. Make a clean transfer. I like to use the heat transfer technique for lettering, so that I have a perfect transfer. Be sure to flip your text or print in reverse first. If you are drawing directly on the surface, use a very light hand. Also check out how to transfer your image without using heat.

  3. Make sure your nib is nice and clean, and scrape it off throughout the burning process. Test your temp before you start. Check out the blog post on tool care and maintenance to see how I keep my tools clean and ready to burn.

  4. Start in the middle of the word. That way if you are burning a little hot, it won’t show as much as the beginning of the word.

  5. Then start with your outlines. Get a clean outline of your words first, which then allows you to go back in and fill in without fear of going outside the lines or mistake.

  6. Slow and steady, as usual. Pull don’t push. Let the burner glide on the surface. For more tips and tricks on burning, check out this blog post and scroll to the bottom to get some super helpful pieces of advice to help you burn smoother.


Looking for designs and templates to practice burning with?

woodturning-patterns

Check out our Community Template Books

or The Templates Shop where you can find individual designs and royalty free template patterns too!


Are you new to wood burning and looking for a tool?

I recommend the Walnut Hollow Versa Tool as a starting point. Get it and all your supplies for this project in The Wood Burn Box or check this blog post to learn which tool is best for you!)

What lettering tips do you have? What have you found helpful? Please share in the comments.

Pyrography on Odd Objects

Alternative Surfaces to Burn on.png

Will it burn? Pyrography is such a versatile art! You can burn on almost everything.

I have been working on a little passion project over on TikTok of experimenting with pyrography on all kinds of odd things. It has been so much fun.

IMG_2911.jpg

I usually involve my kids in the process of filming, design, editing, etc… They have been having as much fun as I have been having at using my wood burning tool in new and weird ways.

So far, we have been burning on a lot of different food items, and it has been so interesting to see what burns well, and what does not. I have plans to try burning on so many different objects, so stay tuned for all the weird and the fun.


List of what I’ve burned on:

  • a hundred dollar bill

  • paper

  • antler

  • lime

  • pasta

  • mango

  • tortilla

  • radish

  • canvas

  • onion

  • lasagna

  • leather

  • cantaloupe

  • watermelon

  • orange

  • carrot

  • toast

  • potato

  • egg

  • apple

  • pasta

  • denim

For me, making a lasagna with Garfield’s image burned into it has been my favorite. I have also burned Shrek’s face into a tortilla, and burned on mango! Check it out.

I know I am not alone in my experiments. I have seen pyrographers burn on all sorts of odd objects. Who said the wood burning tool was just for wood, anyway?

What have you tried to burn on? What has been your favorite?

As always, safety is important. Protect yourself and those around you when experimenting, and use your best judgement when choosing things to burn. I do my experiments outdoors, with a mask and fan.

Check out this blog post on Common Wood Types to Avoid Burning on!

and Feel free to download our free guide to safety, here.

For more ideas on fun random things to burn on, follow my Pinterest board: Alternative Surfaces To Burn On.


How to Collaborate Effectively

collaborating.jpg

Let’s talk about collaboration. Collaborating can be an excellent way to grow your audience and get your work in front of fresh eyes. It is an excellent marketing tool and an excellent way to make some great friends too.

Collaboration can look like a unique one-of-a-kind piece that you create with a fellow pyrographer, or a mixed media piece with artists from other fields, or a collaborative effort with companies. I have found success with all three. Click here to check out my collaboration pieces I have completed with other artists as well as companies I have partnered with.

When you get other people and other accounts talking about your work, it will grow your feed much faster than if you are the only one talking about it, and this is why I believe that collaboration is so fantastic, and why I attribute my past collaborations to a lot of my successes.

Collaborations can be scary and difficult to navigate, but I have some suggestions for you.

  1. It needs to be a win-win-win situation. Be sure to set it up that way so that it is worth it for the person you are collaborating with for them and for their audience. It needs to make sense for all parties involved. If you are approaching someone with an idea, make sure you are clear on what it is you are asking of them and what it is you will be doing/providing.

  2. Lay out all the details and agree to them before you continue forward. How are you dividing up expenses and profits? Where are you posting it? For how long? This should all be discussed before anything is made.

  3. Communication is key. Have a backup form of communication if possible. If you are: running behind, have questions or concerns, don’t like something, or have an idea, I encourage you to speak up. Communicate your concerns and ideas with your collaboration partner. It will allow everything to run smoother.

  4. Keep their aesthetic in mind when you are deciding if they are a right fit, and when you are coming up with your design/idea.

  5. Workout your marketing strategy ahead of time. How many times will you post? How will you talk about it? Will you do a joint LIVE?

  6. Follow through. Nothing is more frustrating than working on a group project with someone who is not pulling their weight.

But HOW?

Series/Collection Sale: Sell a collaborative collection on one person’s site, while the both of you promote it. Collaborative collections are fantastic, because you put in all the work for a collaboration and only have to ship one time, but create several pieces.

  • Use whoever’s platform is larger to hold the sale whenever possible.

Giveaways: These are fantastic. This is a great way to motivate followers to follow the other members of the collaboration. Make sure the item(s), the rules, the photo, and the text are all very clear.

  • Have people entering interact beyond tagging friends. Ask them a question, connect with them. It will feel more genuine for everyone, because it will be. Ask them to share about it too, to spread the word.

Auctions/bidding: Doing a blind/silent auction is also a great way to have a successful collaboration. You can also raise money for charity/cause. This raises awareness of the charity, but also of you, your art, and your values as a small business.

  • A piece of mine that sold for the highest amount was from a blind auction sale. Don’t discount them, but do know that you need to promote them a lot; well before, and during the auction.

Promoting Products: Collaborating with companies can be a great way to make some extra money, get some great products, and extra exposure.

  • Know what is expected of you. Read any contracts, and be carful of exclusivity. Only choose brands that make sense for your brand. Do your research.

I hope you consider bringing collaborations into your business as a regular practice. I think you will find the many benefits that that can come from them.


Let’s work together!

Are you a business or an artist that would like to collaborate with Wood Burn Corner or with the wood burning community? We would love to hear from you!


Burnt Challenges

Screen Shot 2020-12-08 at 11.10.11 AM.png

It all started with #BurntNovember back in 2017 (view past challenges here).

It’s a call to all artists to create a piece of artwork based on a specific word/prompt. The challenges are living in the wood burning community on Instagram.

There have been three types of Burnt Challenges: Burnt Month, Burnt Day, and Burnt Week. These challenges are a great way to hone your skill, get creative, grow your following, try new things, and meet your fellow wood burning artists: #communityovercompetition


Burnt Months

Screen Shot 2020-07-07 at 12.36.00 PM.png

Burnt Month challenges are an every-other-day challenge that run for the entire month. Every prompt you participate in counts as an entry to be featured (on our blog, on Instagram and Pinterest) and enters you to win pyrography goodies and prizes!

All you have to do is follow the prompt for the corresponding day of the month, and post your piece on your Instagram account.

It’s always really cool to see peoples interpretations of each prompt as well as each persons unique style, technique and art coming through!

Check out past Burnt Month challenges:


Burnt weeks

Screen Shot 2020-07-16 at 7.35.38 PM.png

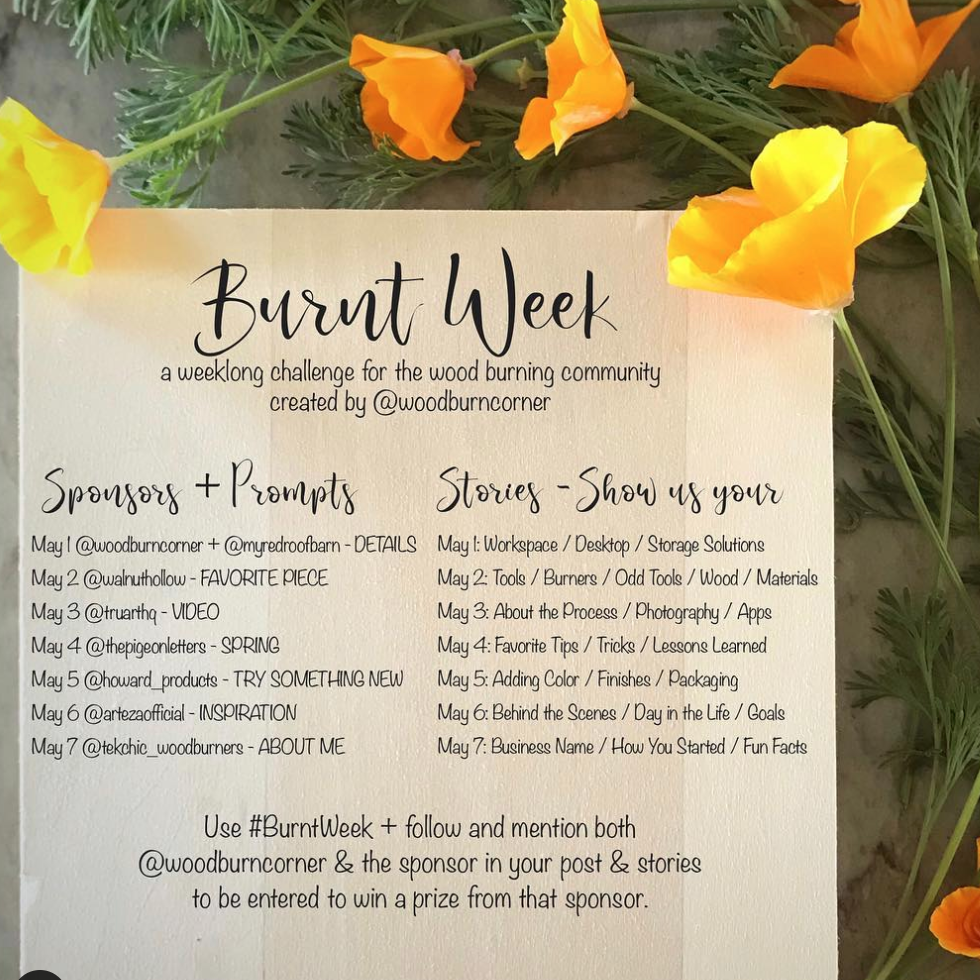
Burnt Week was held back in May 2019 and was a weeklong challenge. Each day there was a new prompt, sponsored by an amazing business. The Burn Club Retreat, Walnut Hollow, Truart, The Pigeon Letters, Howard, Arteza, and Tekchic sponsored last years challenge. Hoping to do another weeklong event in 2021 complete with prizes, just like last year.

Check out past Burnt Month challenges:


Burnt Days

Announced on Mondays on Instagram, we provide you with a prompt. You have the entire week to complete the challenge. These challenges will also be announced earlier in Burn Club and Burn Club+ so join in on the fun by joining us there!

Check out past Burnt Days by following #BurntDay

Screen Shot 2020-11-10 at 9.33.32 AM.png

Sign up for our newsletter to see when the next challenge is and join Burn Club+ to get your prompts early!

or follow us on instagram and stay tuned for the announcement!


Want to join out Burnt Challenge Pinterest Board?

Click Here to go to the board and send us a request. You can post your burnt challenge artwork there and see other art that was part of these challenges!

wood burning inspiration