wood2

Featured WBC Takeover Artist: Ala'a Dandan of adoodburning

Ala'a Dandan of adwoodburning

20190906_102753 (2) - Alaa Dandan.jpg

“I grew up learning about a nine-planet solar system. Pluto, former planet, currently dwarf planet 134340 has been through a lot. Like Pluto, I struggle with my identity. As a second generation Middle Eastern-American, I often find myself in an awkward cultural mesh in which my identity is obscured. Born and raised in the United States, my cultural identity is often erased and forgotten, just like Pluto. What was once a planet belonging to the system of the sun, is now but a number (134340), as I am merely a statistic. *This wood burning was inspired by @bts.bighitofficial song 134340 from the 2018 Love Yourself: Tear album. Please give it a listen. ‘You erased me, you forgot me’.'”

Follow Ala’a on Instagram

wood burning- Alaa Dandan.JPG
wood burned - Alaa Dandan.JPG
pyro - Alaa Dandan.JPG
IMG_1717 - Alaa Dandan.JPG


Featured WBC Takeover Artist: Krishna Mistry of Krishnas Canvas

Krishna Mistry of Krishnas Canvas

DF89EDF6-1ADE-4EFB-98CF-01872F91B945 - Krishna Mistry.jpeg

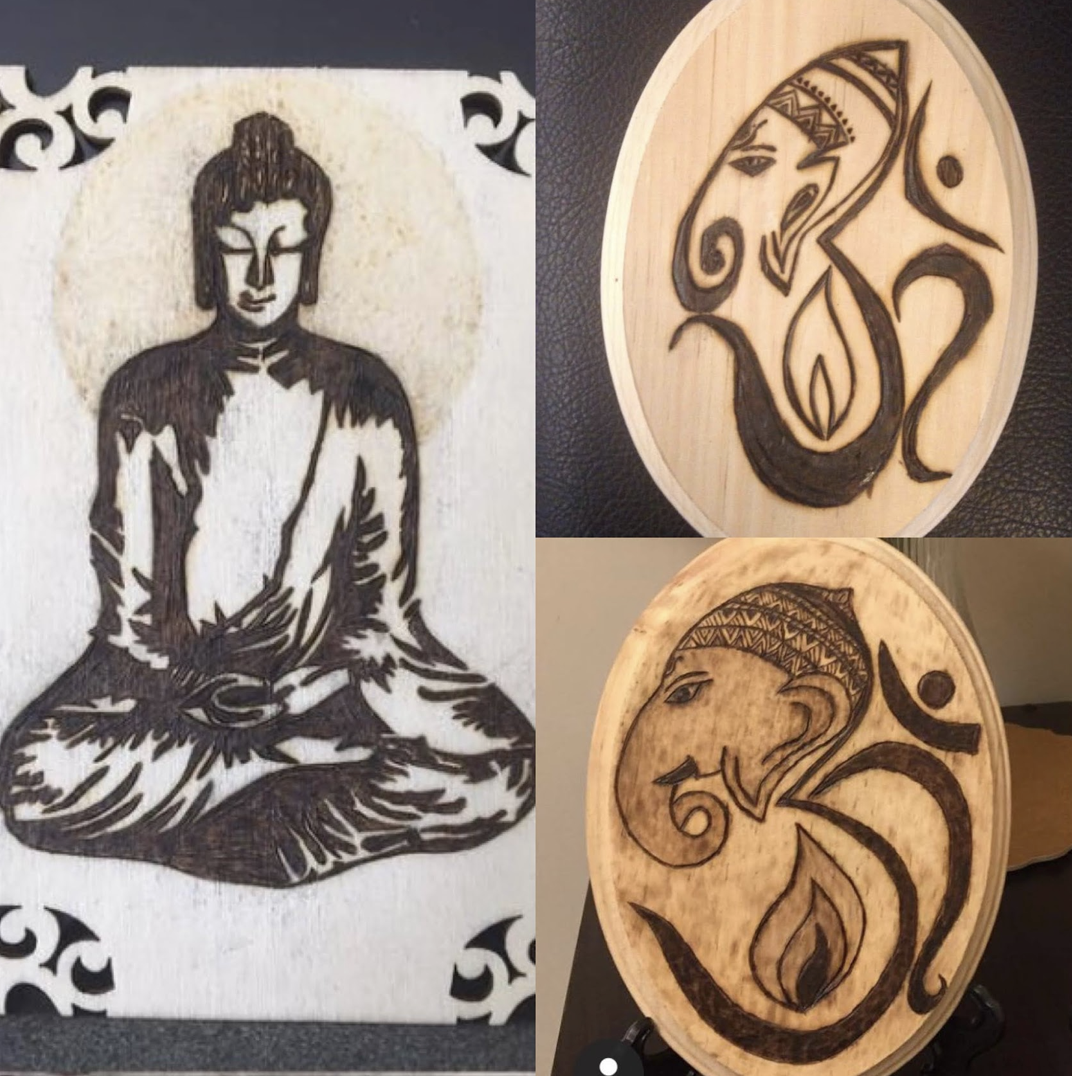
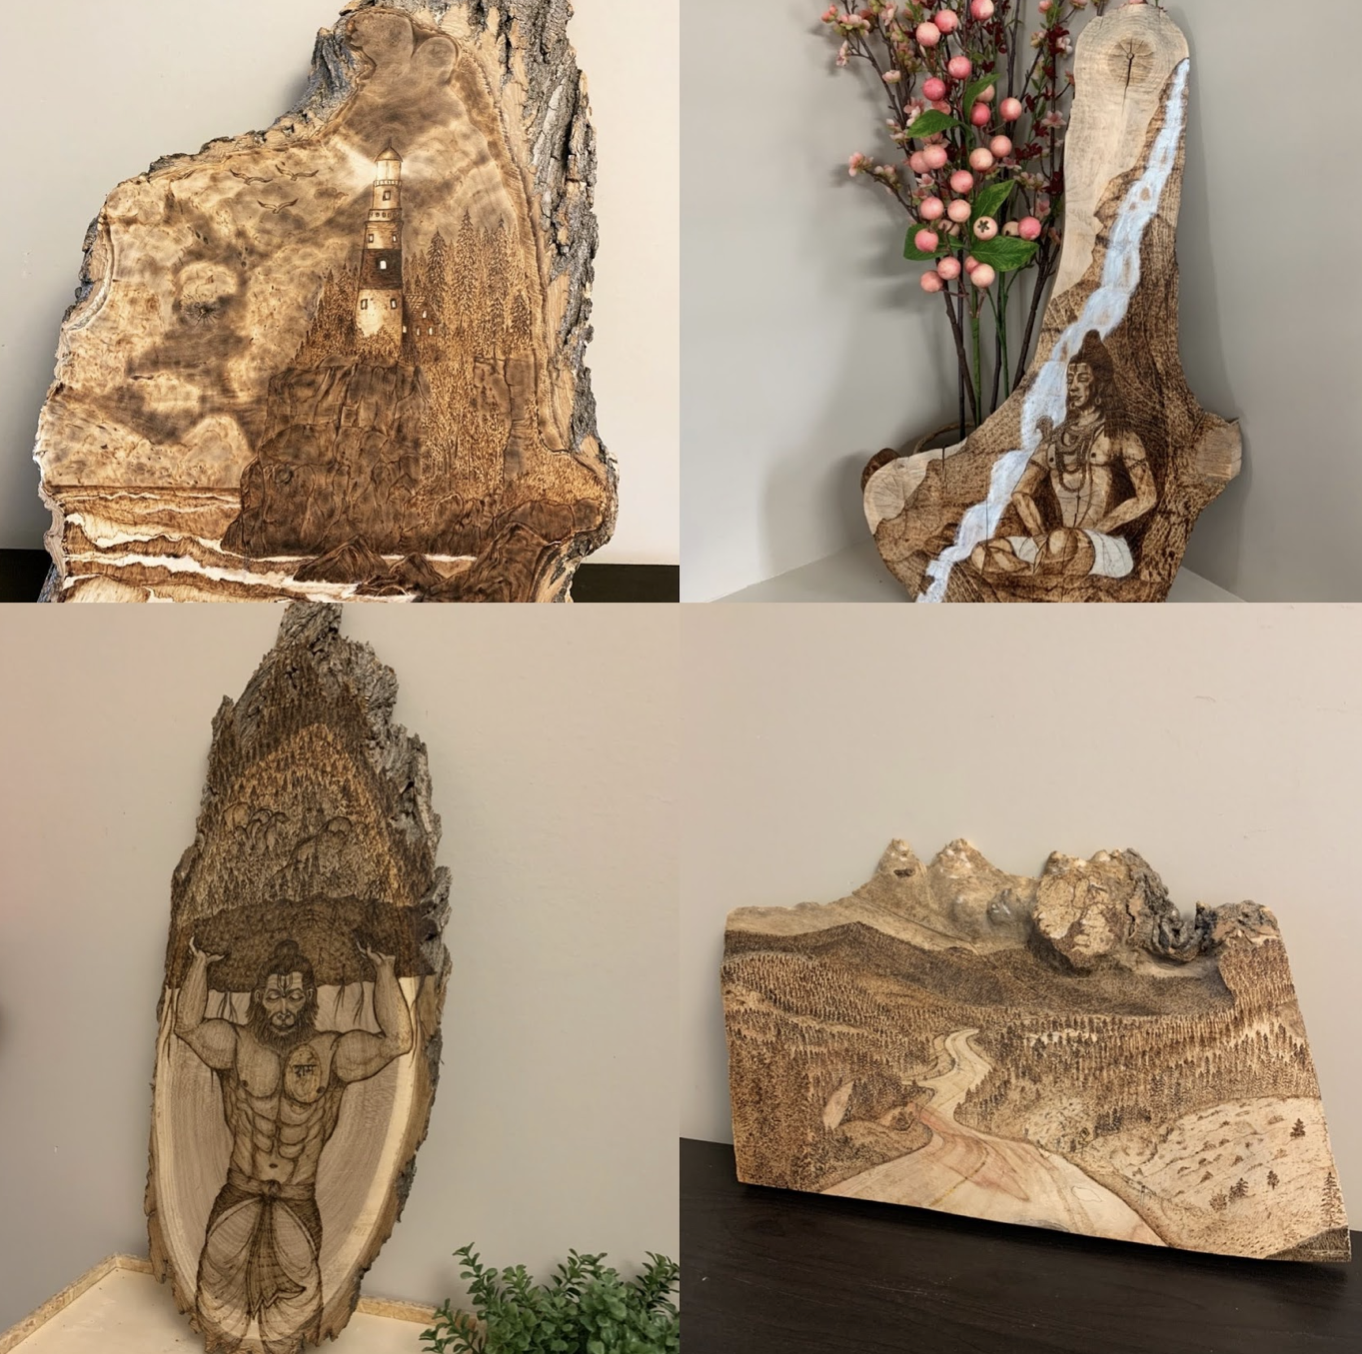
“Hello! I am Krishna from @KrishnasCanvas and I am a pyrography artist! I have been an artist all my life dabbling in so many art forms but I recently found my love of wood-burning in the past year. I wood-burn a lot of nature landscapes, pet portraits, animals, mandalas, and calligraphy pieces, but I am open to making so much more. I also love taking custom requests to make the unique piece that someone is looking for!

Check out my Instagram and Facebook to see more of my work and art process videos! I take custom requests through DMs!”

Follow Sarah on Instagram, Facebook and Etsy

wood burning - Krishna Mistry.png
pyrography - Krishna Mistry.png
wood burning - Krishna Mistry.png
pyrography - Krishna Mistry.jpeg
wood burned - Krishna Mistry.jpeg
pyrgraphy - Krishna Mistry.png


Featured WBC Takeover Artist: Sarah Barnhart of My Dad And Me Every Day Ornaments

Sarah Barnhart of My Dad And Me Every Day Ornaments

B44BEC44-15E0-47C4-A47E-A702586D3753%2B-%2BSarah%2BBarnhart.jpg

“Hi, l’m Sarah B {she/her} I am a single mama to a beautiful and incredibly smart child, a maker of things with my dad @mydadandmeeverydayornaments, a movement teacher and student @goodbodyfeel and the founder of @mixedinhamilton, a space for mixed folks to share their unique perspectives and stories. As a Black biracial, queer woman, and mother, my intersecting identities inform my drive to do what I can to advocate for marginalized communities, amplify voices and create a bridge of knowledge and understanding on all of my platforms. I hope to carry some of the weight held for too long by so many, to take small steps towards making the world a better place.

My Dad and Me Everyday Ornaments, makes handmade, wood burned everyday ornaments and home decor. We created a project called Real Talk Blocks in collaboration with @prettygrit in Hamilton to address the importance of starting challenging conversations about racism, privilege and oppression present in systems of white supremacy, how we may be upholding these systems and ways in which we can start doing the life long work of dismantling these systems to help create a more equitable future. The idea that these conversations need to start at home and in our communities and from there can ripple out into the world to create lasting change. It may not be easy but it is necessary.

We are not professional anti-racist educators but we recognize the need for systemic change and the potential barriers standing in the way of these changes. Real Talk Blocks come with reflection questions included to get the tough conversations started.

Available online and in store at Pretty Grit Partial proceeds go to support the work at the {@hamiltoncivic} Hamilton Centre for Civic Inclusion.”

Follow Sarah on Instagram and www.mydadand.me

wood burned - Sarah Barnhart.JPG
9BF78140-C00E-49F3-904E-A63FE1AA3238 - Sarah Barnhart.JPG
wood burned - Sarah Barnhart.jpg
IMG_420D3919F65B-1 - Sarah Barnhart.jpeg
pyro - Sarah Barnhart.JPG
IMG_3184 - Sarah Barnhart.JPG


Featured WBC Takeover Artist: Maria Aranes of Remnants of Nature

Maria Aranes of Remnants of Nature

RemnantsofNature_headshot - Remnants of Nature.JPG

“Hi, Maria here of @remnantsofnature. A quick THANK YOU to @woodburncorner for featuring BIPOC artists this week and selecting me to be one of them. And thank you @burnt_toast.etc for bringing this opportunity to my attention. That’s one thing I truly appreciate about IG, the true sense of community, especially amongst pyrographers. To be honest, when I first joined IG I was a little hesitant to reach out to other pyrographers because I’m a mixed media artist and incorporate pyrography into my work but my passion is moss art. As a result, I just wasn’t sure where or if I fit in amongst them and honestly, they’ve been so welcoming and supportive of my artistic journey.

Last year, I was able to see how the art community truly comes together when I was organizing an online fundraiser to support the #BLM movement and with only 2 weeks of preparation, various artists and I were able to raise $1,500 for various #BLM organizations. It truly moved my heart knowing there are others who want to make a difference for positive change and demonstrate allyship in the art community.

And that’s my main motivation for taking the opportunity to speak on @woodburncorner’s platform- to show other BIPOC artists, especially Filipino-Americans even though at times you may not feel like you “fit in” it’s important to be true to yourself, follow your heart and continue to persevere when pursuing your dreams. Your voice matters, your art matters, there is a community that wants to know you and see your work. In the art community, I rarely see BIPOC artists, let alone Fil-Am artists, so hopefully this inspires those out there to create and share their talents with the world.

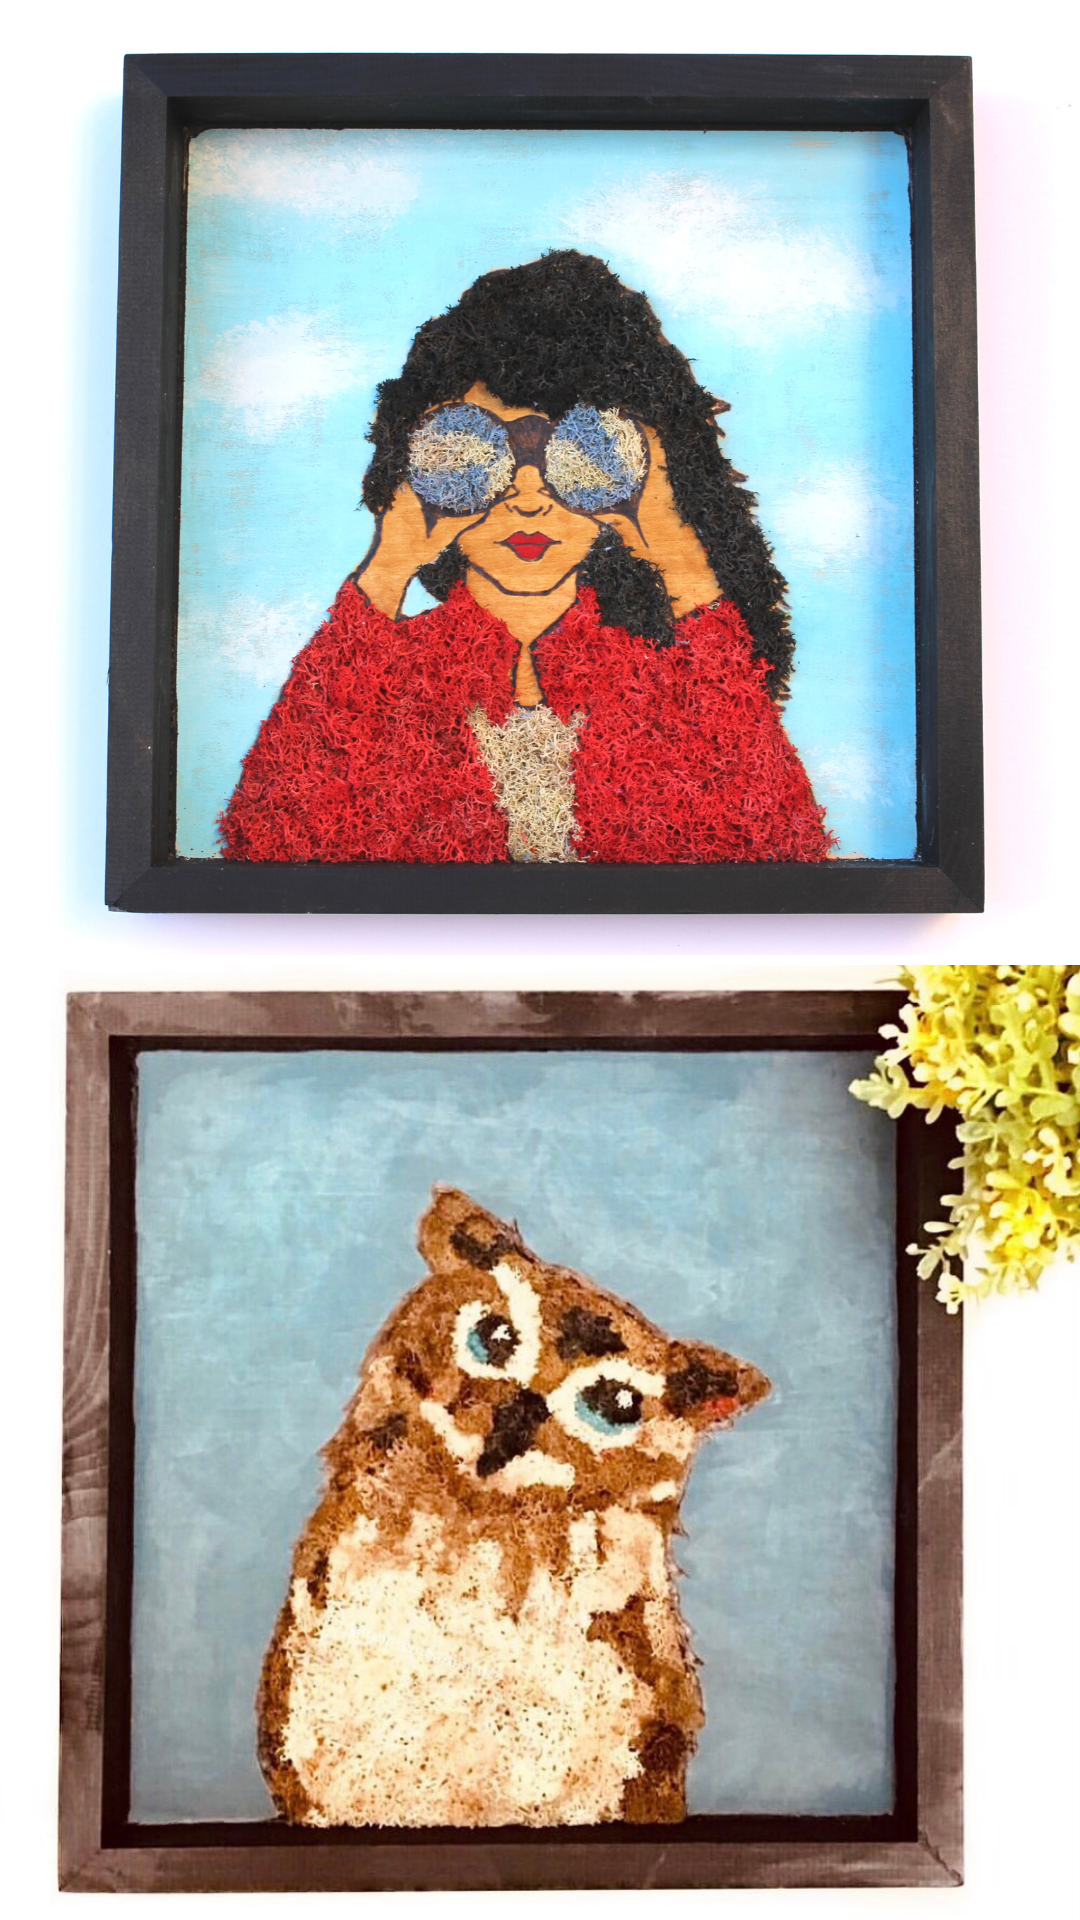
With that said, what do I create as an artist? I make nature look haute by using moss, wood and fire. I create bespoke art with timeless sophistication for special occasions (eg, weddings, newborn nurseries, pet portraits) and/or home decor. To check out my work you can find me on Instagram, Facebook and Pinterest, or my website (which will be getting updated before my new moss art collection is released) at: remnantsofnature.com

Thanks for reading, I hope to see more of you around here and if you have any questions, feel free to send me a DM. Have a great day!”

Follow Maria on Instagram, Facebook, Pinterest or www.remnantsofnature.com

RoN post Pic 2 - Remnants of Nature.png
moss and wood - Remnants of Nature.png
wood burning  - Remnants of Nature.png
wood burn - Remnants of Nature.png
pyrography - Remnants of Nature.png
wood burn and moss - Remnants of Nature.png


Featured WBC Takeover Artist: Mahealani Bradley of Art By Mahealani

Mahealani Bradley of Art By Mahealani

pyro+-+Mahealani+Bartz.jpg

“I’m Mahea (Mah-Hey-Uh) of Art by Mahealani and I’m a mixed race artist. I’m proud to be apart of the #API (Asian Pacific Islander) community being both native Hawaiian and Japanese. I’m mixed with German making me an unusual melting pot of identities but that’s what makes me, ME.

I struggled a lot to discover my voice amidst the chaos of wanting to be loyal to each of my races and heritage. Feeling like I’m too much of one to fit in with the others. But recently, I realized that I can be a bit of everything and that’s what makes me even stronger and unique and comes through in my art. It was a truly lovely awakening! Anyone who is mixed race, I say let your uniqueness shine and keep on creating! ✨

I express myself through wood burned art, or pyrography. I’ve always loved art but when I found wood burning, I lit up and couldn’t stop and I try to bring my different backgrounds through in my creations. I started my Etsy in 2020 which was a big step and challenge all on its own. But I did it. And I am so glad I did.”

Follow Mahealani on Instagram and Etsy

D105213D-BC49-43A5-A1EE-C5739F2B681F - Mahealani Bartz.jpeg
pyrograpehr Mahealani Bartz.jpeg
pyrography - Mahealani Bartz.jpeg
wood burner - Mahealani Bartz.jpeg
pyrography b- Mahealani Bartz.jpeg


Featured WBC Takeover Artist: Alissa DeCoteau of iissalissa

Alissa DeCoteau of iissalissa

Follow Alissa on Instagram and on Linktree

05600719-9B3B-4BBD-8270-15E8C2708D81 - issalissa.jpeg

“My name is Alissa DeCoteau and I am an Indigenous (Oneida tribe) artist from Georgia. For my entire life, I have felt disconnected from my heritage and avoided mentioning this aspect of my being. I have to thank other incredible Native creators like @notoriouscree @shinanova @nikitaelyse who have reminded me and others that no matter how disconnected you may be, you can always return and embrace your roots. And because you have been disconnected or not raised on the rez, does not make you any less Native.

Creating art, especially wood burning, makes me feel connected to everything. Being able to honor nature and all of our spiritual paths through this medium connects me to the creators of the past, trying our best to represent what we feel from Creator.

I encourage everyone to educate yourselves more on plights against Indigenous and other people of color. Foster empathy and kindness within yourself and pass it to others as often as you can. Take action when and as often as you can!”

8074A350-485D-49DC-81F3-F2484865A355 - issalissa.jpeg
192DE08A-3C95-4D88-9FCD-A9FE027F9158 - issalissa.jpeg
pyrography- issalissa.jpeg
wood burn - issalissa.jpeg
pyrography- issalissa.jpeg
pyrographer - issalissa.jpeg


Featured WBC Takeover Artist: Shanique Brown of Plaid And Peaches

Shanique Brown of Plaid And Peaches

Follow Shanique on Instagram and Etsy.

wood+burning+artist+-+Shanique+Brown.jpg

“By day I support individuals living with Alzheimer & Dementia! By night I'm a maker.

Within the current state of the world I have been to connect and learn from others makers, that previously I wouldn't be able too. It has shown me how supportive the maker community is, while encouraging my exploration with different mediums. It also enabled me to find and connect with other black creatives.

I create wood burn home decor pieces, ranging from signs, coasters and essential oil diffusers. Sometimes my pieces are sweet and other times they are sassy! I create pieces with the intention to make people feel good and/or spark a conversation.”

 
isla_500x500.29934662_akgi04be.jpg
 
pyrography - Shanique Brown.jpeg
wood burned - Shanique Brown.jpeg
IMG_20181211_134126_157 - Shanique Brown.jpg
pyrographer - Shanique Brown.jpeg
woodburned - Shanique Brown.jpeg
20200427_114512-02 - Shanique Brown.jpeg


Wood Burn Corner Platform Takeover

BLOG COVER images.png

This is one way that I and Wood Burn Corner can support BIPOC artists in our community. For all 7 days this week, I am going to be featuring a different Black, Indigenous, and/or Person of Color across all of Wood Burn Corner’s platforms. If I am not using my platform to help raise others voices, then why do I even have it?

I am so excited to introduce you to these incredible artists. They are all so unique, their art, their story, their message. I can’t wait to surprise them, and share them all with you. I encourage you to give these amazing artists a follow. They are all so unique, and I am honored to share their work.

Like, share, comment, and buy from BIPOC artists. Support Black, Indigenous, and People of Color artists in our community. If you aren’t sure how you can, check out @katerslater Antiracism Roadmap, it has been instrumental for me to actually take action.

Featured Artists:

Tool Care for your Woodburning Tool

IMG_6727.JPG

Tool care is important for getting a smooth burn, and for keeping your tool working for a long time.

Here are some general wood burning tool tricks for keeping your pyrography tool in tip-top shape. You will also want to keep your nibs clean. These require the most attention.


For general wood burner (machine)care:

Make sure your burner has good air flow.

Make sure it is free of dust and dirt.

When traveling, take care to pack your burner well. Store your pens so that the nibs and connection points don’t get damaged. Try not to bend any of the cords and wires with force or pressure or excessively.

I travel quite often with my burner and found that putting it in a hard shell duffel style case helps keep in tact and secure. Here I am using a vintage sewing case. It’s hard outer layer allows everything inside to keep from squishing!

Be sure to give your burner breaks, especially if you are burning on high temperatures. This will help keep your burner and pens happy for a long time.


Now, let’s talk nib care:

You will want to have a way to clean your tools while they are hot, and a deeper clean while they are cool.

My favorite cleaning tool while my burner is hot is a brass brush. I give my burner a gentle little scritch-scrath whenever my lines are looking a little '“jumpy.” This cleans up my burn by getting rid of the char build-up.


Every once in a while I also like to give my tools a deeper clean while they are cool. To do this, I use a leather strop with white compound. You rub the white compound onto the rough side of the leather, and then rub your nib until it’s nice and clean. This is the best way that I have found to clean nibs.

IMG_6730.jpg
 

Here are some Amazon Affiliate links to the tools I and other pyrographers use to clean their wood burning tools.

These are other ways that you can clean them: tea strainer, parrafin wax, sand paper, and damp high-heat sponge.

These all work fairly well, but are not my personal favorites.

Tea Strainer: Many pyrographers use this, but I feel it is a little too rough on my tools. To use this method, take a simple metal tea strainer and give your nib a little scrape to brush off any excess char that might be getting in the way of a clean burn.

Parrafin Wax: This is a fairly new method that I learned about from Pat, the creator of the Optima 1 pyrography machine. You simply touch your nib to the wax while it is hot. The wax will burn right off and rid your nib of that extra buildup on the nib. It works just fine, but I didn’t enjoy the smoke it gave off. It is the exact same as a candle burning, though.

Sand Paper: I don’t recommend this for any wire tip burners. It is too rough on their delicate wires. Even with the bulk of a solid-nibbed burner, you will want to be gentle and go easy on the sanding. It will wear your nibs down over time, and this is why many pyrographers will even cringe at the idea of mentioning this option. This is a “use the tools you have on hand” situation. Since you already have sand paper, using it to carefully, and gently scrape off excess char buildup on your solid-nibbed burners just makes sense.

Damp High Heat Sponge: This is was soldering iron users use, and it works pretty well to get big chunks of char off. It won’t clean your nib’s surface completely, but it will keep your lines smooth. Does require minimal prep of dampening the sponge before you start burning, but is great because you can use it while it is hot. Be sure to use a high heat sponge for this.

In a pinch and with solid-nibbed burners, sand paper can work. I like a damp high-heat sponge as well. Not as big of a fan of the parrafin wax or the tea strainer, but I know other people in our community are. Do what works best for you!


WANT TO LEARN MORE ABOUT WOOD BURNING AND IMPROVE PYROGRAPHY SKILLS?

Learn at your own pace from your home with The Complete Wood Burning Toolkit.

Grow with the community: Join Burn Club+, a place where you can ask questions, and get the full answers, a place of fun and learning.

Check out our templates for unique and fun designs to practice your burning with!


Alternative Mediums to use with Pyrography

Screen Shot 2020-10-16 at 12.06.04 PM.png

Adding mixed media elements to a wood burned piece is so much fun. The options are literally endless.

The image here is wood burned first, then holes were drilled, and then I used thread to create patterns that mimic the wood burned patterns! Imagine this with other rope materials (such as [amazon affiliate links]: iridescent thread or simple twine…)

Have fun with it and think outside the box!

Screen Shot 2021-01-21 at 9.40.18 AM.png
Screen Shot 2021-01-21 at 9.41.32 AM.png
IMG_7430.jpg
IMG_4708.jpg

One thing you want to keep in mind is that you should almost always do your pyrography first, then add your mixed media. It is not safe to burn on unnatural surfaces. Grab your Pyrography Safety Guide to stay safe while burning!

Here are a couple fun Mixed media on wood ideas to get your juices flowing.....

  • Dried Flowers

  • Artificial Flowers

  • Watercolor (click for a blog post for tips on how to add watercolor to wood)

  • Shelves

  • Chalkboard paint

  • Hooks

  • Mirrors

  • Stickers

  • Photographs

  • Lights

  • Macrame

  • Gemstones

  • Numbers

gold-leaf-on-wood

Gold Leaf on Wood

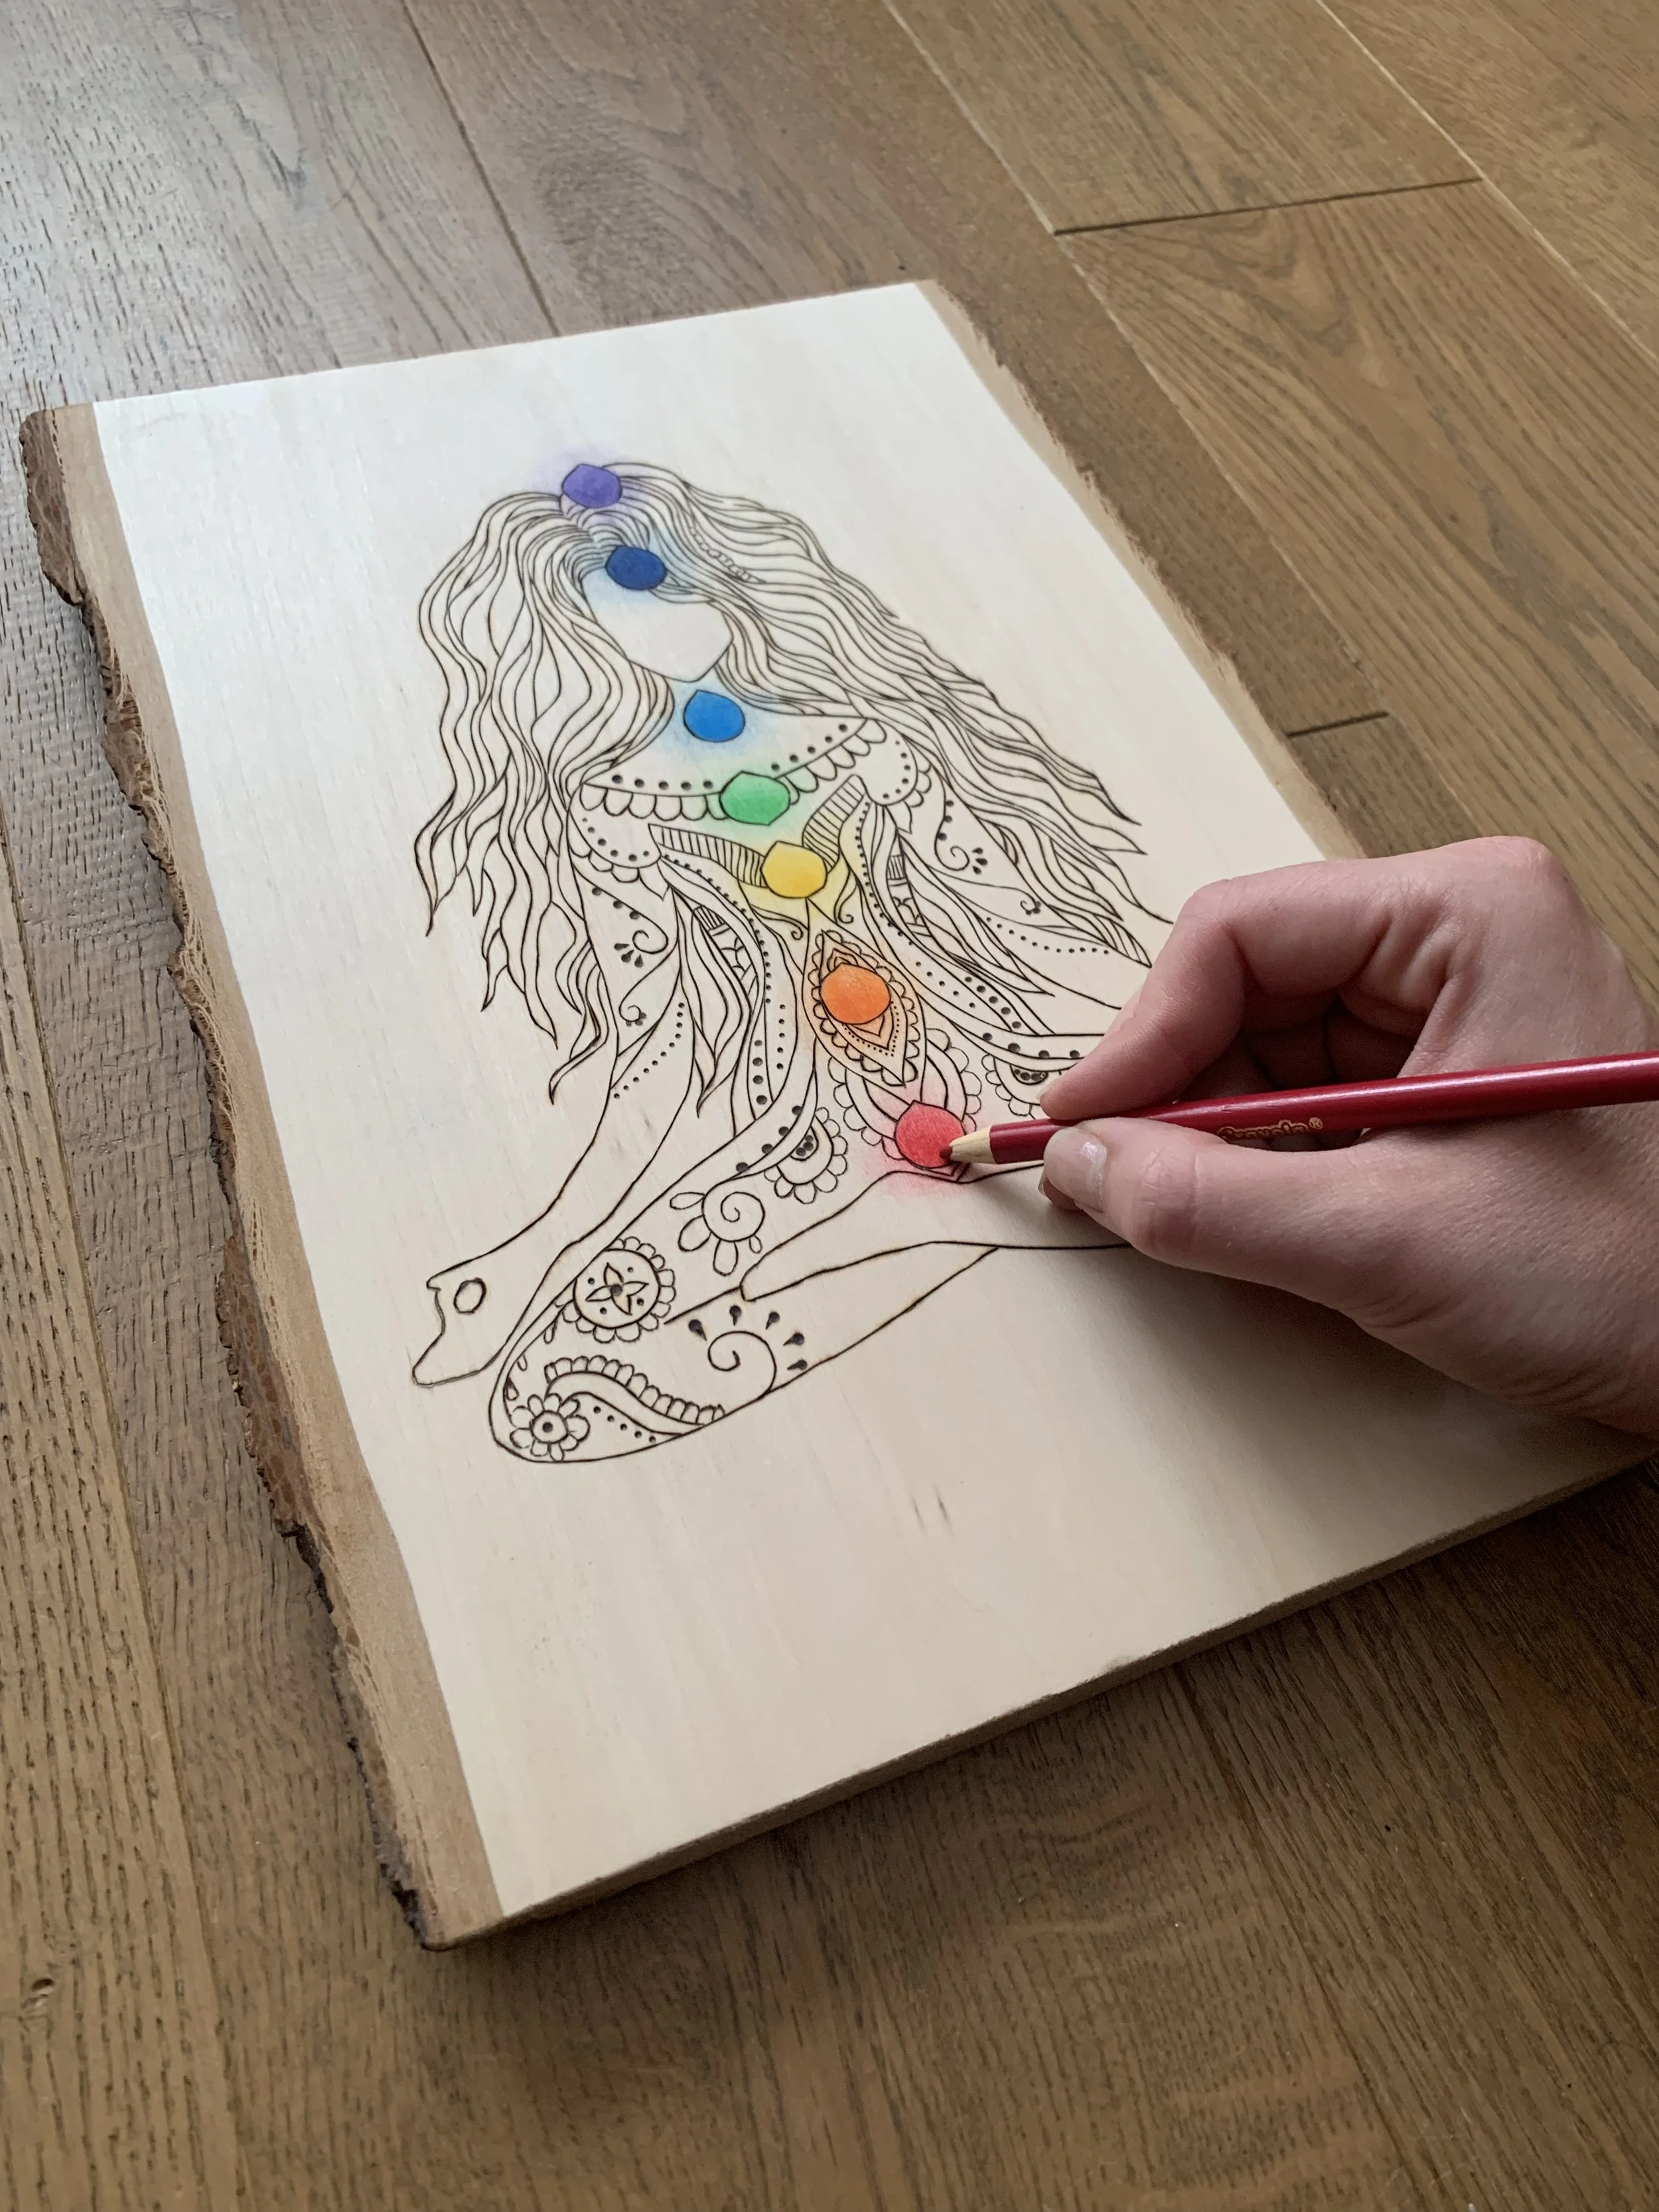
pencil-crayon-on-wood

Pencil Crayon on Wood

  • Plants

  • Embroidery

  • Gold Leaf (like in the image above, this medium is thinner and gives a lot of texture)

  • Gold foil (this adds a metallic touch but is a solid gold finish as it is thicker than gold foil)

  • Glitter

  • Sand

  • Shells

  • Beads

  • Sparkly Glue

  • Pencil Crayons

  • Water Marbling (Click to be taken to finelinepyro.ca and learn more about this medium)

Ebru Painting/Water Marbling on Wood

The options are endless so have fun experimenting with all different mediums! If you’ve tried one that is not on this list, leave a comment below!


Get more Inspiration for mixed media on wood

Follow along a variety of projects using mixed media in The Wood Burn Book to see other projects you can make on wood.

For some inspiration, follow my Pinterest board to see all sorts of different mediums you can apply to wood!


The Wood Burning Toolkit

Everything wood burning in one place.

With this Toolkit, you are investing in your craft, your creativity, and in yourself. I really believe in what is in it, and its ability to help pyrography knowledge and skils grow.  

Many people have told me that I have an excitement for life, and that my energy is contagious. I have a tendency to get people fired up about business, pyrography, and going after their goals, and I am excited to help YOU!

I am natural born helper. It's always been in my nature. Before wood burning, I was a registered nurse, and a nanny. Helping is my love language. That is where I find the most satisfaction out of life, and why I created this Toolkit.

While the Toolkit puts everything at your fingertips, you will still have to put in the work to see the results, you just won't have to do it the long + hard way.

This Toolkit is meant to help you. To assist you. To guide you. It is meant to offer advice and provide resources so you can make the best decisions for you and your unique business and the goals you have for it.

This isn't just a course. It is a toolkit that you can come back to time and time again, anytime you want and complete at any order and pace you want. The Toolkit will be updated, free of charge, and you will always have access to it.

As we learn and grow, so will the Toolkit.

So What’s inside???

The following are sections right out of the Toolkit. We take a deep dive into each one using audio lessons (transcripts included), written lessons, mini exercises, video and picture tutorials, as well as PDF printables:

Artist's Health + Safety

Techniques

Surfaces

Burners

Tools

Transfer Techniques

Adding Color

Finishes

21 Pyrography Books Recommendations

I'm so eager for you to dive in and see why I am really excited for this #woodburntoolkit. I can't wait to see what you burn!


Are you thinking of selling your artwork?

Check out the toolkit below which is includes the business fundamentals in order for you to learn how to make money selling your art! #wbctoolkit


Cultural Pyrography

Our very first guest Burn Blog post comes from three incredible artists in our community. Gauri Bansal, Auric Hout and Pushpa Javaji have each written on how culture influences art.

Have a read, and be sure to give these artists a follow.

How does your culture influence your art?

Gauri Basnal

Gauri Bansal


Gauri Bansal of Prettyful Creations

follow me on instagram and facebook

 
BLOG+COVER+images.jpg
 
Screen Shot 2021-01-06 at 3.19.55 PM.png

WHAT MAKES YOUR ART?

Have you ever asked yourself, why is your art what it is? Your style, your signature design, that one element which invariably shows up in almost every piece you make. Where did that come from? 

Mine it turns out, comes from my roots in Indian culture. I am realizing how heavily my art is intertwined around what impacted me as a child. My first instinct is always to incorporate a henna or mandala design into anything I create. 

That realization made me look more closely at other artists’ work. And I have come to strongly believe that artists take inspiration from and rely very heavily on their culture. There are modifications and interpretations, however the first thought that inspires a piece is mostly rooted in cultural and social traditions. Before discovering pyrography, I explored other mediums like candle making, candle holder making with Plaster of Paris and many other platforms. In all when it came to design, I gravitated towards henna patterns. It came naturally. There was/is no stressing my mind and my hand what feels like guides itself to make the motifs. Now I understand when another creator says, “Oh! It just comes to me”. 

Screen Shot 2021-01-06 at 3.19.46 PM.png

Two separate artists raised in same culture will still have their own style and that is the result of their perception. There are many factors attributing to how an artists’ perceives his/her culture. Factors like (not limited to) race, gender, ethnicity etc. Let your art flow out from you. Forced art is rarely outstanding or satisfying. Best work is one that comes from the heart and the artists feel a connection to. Art is about putting passion in your work. In my experience and humble opinion one can, be passionate only if they can relate to the concept. 

I can go on and on, give you plethora of examples and find quotes to support what my belief, but I think you get the picture. Go fall into your passion and embrace it. 

I would love to share our passions. Maybe combine our “cultures” and create a stunning piece.

Gauri Bansal


Auric Hout of Auric Hout Pyrography

follow me on instagram and facebook

 
pyrography guest
 

Art! Culture!

Most of us don’t think about them in daily life and definitely not how they impact us. Many of us don't even relate to either of them, I didn’t, but find they are integral part of our lives. Both are always influencing us in ways unknown to us. 

Let's talk about Art.

We are constantly surrounded by it. Whether it's a painting, music, movie or sculpture, they all have a huge impact on our mood and emotions. All kinds of art can affect us in all kinds of ways, most importantly a positive way, making us feel happier, calmer or even inspired to do something. Everywhere we go art is evident. It allows and motivates us to see things in a different perspective. 

Moving on to Culture.

Simply put, it is the way of life for a group of people, that we call society. The outlook, attitude, values, morals, goals, and customs shared by a society all together form a culture.  At least that’s what my take is on it.

When put together, art and culture have the ability to generate empathy, stir up dialogue, induce reflection, charter new relationships and bring up new ideas. It’s this interrelationship that creates interesting pieces. Our thoughts revolve around our culture and are translated in whatever art we create. All of this does not by any means state that artists within one culture will create same art. It does however explain similarities in thought process.  An artists’ individuality and their exposure to different environment also plays a role. This is how an artist’s style is born and individuals attempting to create same landscapes, objects or any kind of work still manage to come up with different pieces than their peers. 

For me: looking back I realize how huge of an influence Hindu culture has on my work. 

Whenever I get a thought or a prompt, my instinct circles around Hindu mythology, it is my culture and surrounds me all the time. It has influenced almost all of my work. Hindus are a spiritual society thus my most of my work stems from that background. The figures don't look like God/ Goddess, but my story or thoughts include them. Even in calligraphy work my first thought is to write a sanskrit slok (ancient scripture), in fact that's the only calligraphy I have done. Check it out. My one and only calligraphy and some other examples of my “cultural” work.

My one and only calligraphy art:

 
Screen Shot 2021-01-06 at 9.02.03 PM.png
 

Presenting Goddess Lakshmi (goddess of wealth) with "MELANGE" of emotions

 
pyrography on paper
 

 Welcome Lord Shiva as "Anagha" (the faultless)

 
wood burning
 

Auric Hout


Pushpa Javaji of Pushpa Pyrography

follow me on instagram and check out my website.

 
111521760_113510230449994_7598279797216656120_n.jpg
 

When I was asked about the impact culture has had on my art, I looked back to the start of my journey with Pyrography in 2017. I realized that I relied heavily on my Indian roots and Hindu culture for inspiration. Staring at a blank piece of wood, the most obvious ideas that would come to mind were the mandalas, rangolis, henna, or concepts like OM, yoga and mythology. That’s because your culture inspires your art and your art reflects your culture. 

art and culture in wood burning
yoga in wood burning
culture in our art

As an artist, my purpose is to communicate an idea, an emotion or a thought through my work. As a cultural ambassador, I want my art to inspire, connect and collaborate with other people and cultures. My experimental collaboration with another artist to blend two different halves into a harmonious unison is a perfect example of this idea:

 
mandala on wood pyrography
 
 
pyrography canvas
 

Just like music, art is universal and transcends all boundaries. Culture is just the language that the artist uses to express his/her thoughts. I can clearly see how culture has influenced the art I have created so far. I would like to specially mention the #burntday and #burntmonth challenges that have helped me to push my boundaries and think outside the box and showcase the various influences I have had.

burnt day prompt
burnt challenges by wood burn corner

This has been an exciting journey so far and I am looking forward to many more adventures along the way.

Pushpa Javaji


WANT TO LEARN MORE ABOUT WOOD BURNING AND IMPROVE PYROGRAPHY SKILLS?

Learn at your own pace from your home with The Complete Wood Burning Toolkit.

Grow with the community: Join Burn Club+, a place where you can ask questions, and get the full answers, a place of fun and learning.


Focus Five - The 5 Things That Describe Your Business

Find your focus, change the game


You and your business NEED focus in order to be able to help guide your day-to-day decisions and give you clarity. Narrowing down what you want your business to be will help you focus your efforts.

Let's get your message and your focus super clear.

how to find focus in your creative business

Here are some things to think about when doing this exercise to help narrow in on the focus areas of your business:

  • What do you want your business to say?

  • What do you want portrayed?

  • Why are you doing this business?

  • What do you want to get out of it?

  • What do you want to give to your following?

  • What is important to you?

  • Why is it important to you?

  • Do you have a message you want to send? Or something you want to bring awareness to?

  • Is there something you want to show your support of? Or speak out against?

  • Are you trying to make money?

  • If you could tell your followers just one thing, what would you tell them? What if you could tell them 5 things?

  • Why do you do what you do?


Little Reminders:

  • Limit it to about 5 things, so you can give those 5 things the time, attention, and focus they deserve. Fewer is also fine, but aim for 5.

  • This is YOUR platform, this is YOUR business. YOU get to choose what it is, and what it isn’t!

  • The truer and more honest you are to yourself, the more you will attract the audience of your dreams and have a greater impact on them. The things that make you and your business uniquely you will be the thing that draws in your people. Let your vibe attract your tribe. Be authentic.

  • It doesn’t have to be set in stone! Done is better than perfect. You can ALWAYS change your 5 things as your business changes.

  • Some of your areas of focus will present themselves to you easily, and some may come after a rearranging of priorities, or after you do the 5 year-to-1 year exercise. Pause and re-evaluate every quarter or at least yearly.

  • Tape it up somewhere. It is good to be reminded often where your priorities lie, DAILY! Or better yet, write them daily. You can even make a digital image and turn it into your home screen on your phone, iPad or laptop.


Here is an example of my Focus 5:
Wood Burn Corner

focus 5 exersize
  1. Teaching

  2. Collaboration with Artists and Companies

  3. Building Community & Supporting Other Makers

  4. Giving Back

  5. Creating and Sharing Beautiful Art

All of the decisions you make, all of the pieces you make, all of the posts you write, all the things you do when it comes to your business should involve one or more of these categories.


This will help give you and your business consistency across the board and will help give you a framework to work around.

Pausing to take the time to figure out what you are about in the big picture will ensure your business is exactly what you want it to be.

Make it clear for you, and clear for your audience.

Exercise: Write your Focus Five. Take your time, but don't fret about it, because you can always adjust it.

clarify your business


How to have fun with loose watercolor and pyrography

poppy+splatter.jpg

Download your FREE poppy design printable template

What you need: (Amazon Affiliate Links)

I show you the whole process of how to wood burn and add loose watercolor from start to finish here:


Creative Woodburner - 4 new nibs and how to use them

The Creative Woodburner from Walnut Hollow is a wire-tipped burner that comes with four interchangeable points/nibs.

Walnut Hollow just created four new nibs that work with this burner, and in this video I show them to you.

The 4 new nibs or points (Stamping Point 1, Drawing Point 2, Spoon Shading Point 1 and Spoon Shading Point 2) are now available for the Creative Woodburner. This is how each of the nibs can be used.

You can purchase these individually at walnuthollow.com

To see the Creative Woodburner’s original set of 4 nibs that come with the burner, check out this blog post!

Interview with Megan from Unstrung Studios

Name: Megan Farrell-Zweigle

Burning since: Fall 2017

Location: Rochester, NY

@unstrungstudios and unstrungstudios.com

unstrung studios

When and how did you first pick up a wood burning tool?

Leading up to my wedding in 2017, I was really into hand lettering. I had done a bunch of the decorations for my own, and a ton of signage for other friends ceremonies and random gifts. After I got married (wohoo!), my husband and I both found ourselves in a very odd (but very good) 3 week period where neither of us were working, and we could just spend time settling into our home. I started to feel kind of stagnant in the lettering world, and wanted to switch it up. So I found my dad’s soldering iron, and decided to see if I could burn letters into some (very smelly) driftwood. All it took was that first burn for me to be like, “uh yeah, this could be really cool.” 


How did you get your business name, Unstrung Studios?

Well, before lettering, I was making recycled guitar string jewelry under a different business name (lol, like, pick a lane, Meg). I had rebranded, and wanted something to allow for more flexibility in case i decided to branch out from jewelry, but wanted a nod to where I started. I loved the concept of taking something “Unstrung” and making it have a new purpose. It was only later that I realized that Unstrung Studios also oddly connected with my disability journey. I have something called Ehlers-Danlos Syndrome, and the way I describe it to people is that my body is like one of those “stand-up-man” dolls with the joints unstrung. All my joints are loose and floppy, and the string “holding” me together doesn’t really know how to do its job. So, I guess “Unstrung Studios” started as a very literal name for a guitar string jewelry business, but has become more of a metaphor for my condition, and how life can change when disability enters the picture. 


Have you always been artistic?

In a way? Yes? Yeah, I’ve definitely always been crafty... I was the kid that would spend hours on a diorama, painting all the details just right and creating little figures and furniture from cardboard and random things (hot glue was a favorite). I didn’t realize that I could actually draw until I was maybe, 15? And then it was all I did. 

I was one of the “art kids” in high school, that really came to school for art class and free periods which I would spend in art class. But the nice thing in high school art was, that was really all I HAD to focus on. Even my job was artistic (I worked at a paint your own pottery place). When I got to college, I found myself not having as much time as I wanted to draw the intricate, large pieces I wanted to do, so I shifted away from drawing into forms of creativity that I could do in lectures, or pick up for 5 minutes between classes. So I crocheted: a lot. And tried embroidery, and then lettering towards the end. 


How much time do you typically spend on art in a given week?

Oof. This is a hard one. I spend a ton of time dreaming and thinking about art I want to create, but time like hands-on the making of art runs anywhere from like 20 hours (a slow week or sick week) to…. well lets just say that during the holiday season I once logged a 60 hour burn week. I can get a bit obsessive about making new things in the week before an update or event. 

Screen Shot 2020-11-25 at 9.04.11 AM.png

How did you find your artistic voice/style/specialty?

Screen Shot 2020-11-25 at 9.04.22 AM.png

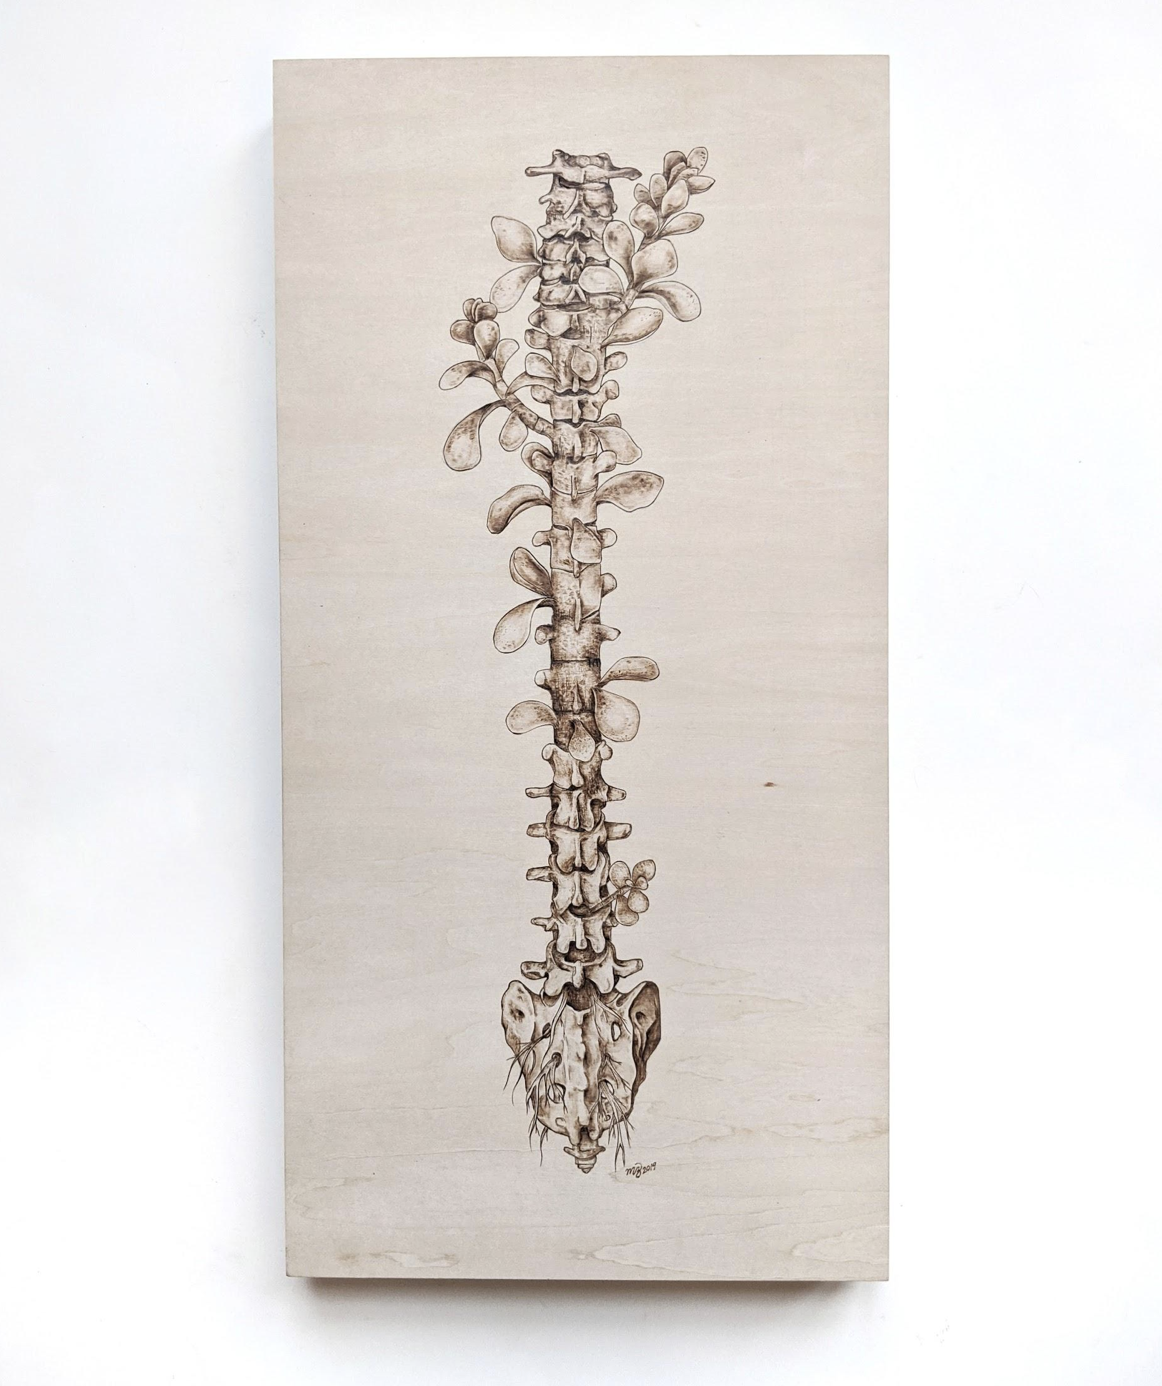
I tried to burn what I thought people wanted, and was miserable (and surprise: people didn’t want it!). I was the happiest when I was making “weird” art, even though a bunch of people told me it wasn’t marketable. So for a while I was trying to do both. Like I would do an anatomy illustration, but then slap a really corny lettered quote on it. Or I’d come up with a weird idea, and sketch it over and over until I had kind of — tamed it down? But then I reached a point where I threw my hands up and was like, “well, if they don’t like it, they don’t like it. I wanna draw weird things” And that’s when I fell into my artistic groove. When I stopped policing my ideas, and stopped sketching watered down versions of my ideas I really started to find my niche, and find out that — as a matter of fact — there are PLENTY of people that love anatomy, love the human body, and want work that can function in both fine art and educational realms. 

As far as style? I take a lot of inspiration from classic anatomical illustrations, and have TONS of books just filled with reference photos and drawings. A huge part of my philosophy on artistic inspiration is also this: at least half of your inspiration should come from mediums outside of your own. For that reason, I follow a lot of wood burners,but I follow even more ceramicists, embroidery artists, needle felters, and jewelers. It’s led me to take some the techniques and lines and textures from these various mediums and incorporate them into my woodburning. 


How has your disability affected your art in both positive and negative ways?

We’ll go bad news / good news so we can end on a high note. 

The hardest part about woodburning physically is that you have to sit upright (for safety). With POTS, there are stretches of days / weeks / months where it can be hard for me to sit upright for more than a half hour at a time without passing out. Because of this, it can be really difficult to get into an artistic flow. I work in a lot of shorter “chunks,” which in some ways is great, but when you’re working on a 3 foot project it can be really discouraging to see progress go so slowly. Sometimes the smoke can trigger migraines, sometimes the migraines mean I can’t see well enough to actually burn anything accurately (or safely), and sometimes my joints are just too painful to hold the pen the way I need to. 

On the other hand, my journey with health has been the driving force in my creating art and in me finding my niche. The first anatomical piece I ever did was as a way to cope with my cardiac condition, and to emotionally process a health crisis that my MIL went through. Dealing with my health every day, and trying to keep up with recent research on my conditions means that I am never short on inspiration or new information to incorporate into art pieces. 


Teaching about disability, diseases, health and science seem to be part of your mission. Was that always the purpose or did it find you?

I think it was the purpose before I knew it was the purpose! Some of my biggest frustrations are 1) medical misinformation that is shared as fact, and 2) not being able to find the words to explain how I am feeling - physically. 

In college I had a friend ask me what it “felt like to be me?” It took like an hour of talking for me to understand that she was really asking was for me to explain how being disabled actually, physically, felt. She was a fellow OT, so I could talk about my symptoms in medical mumbo jumbo and she would understand, but there were other parts of being sick that I just couldn’t figure out how to explain with words. So I started drawing.

Screen Shot 2020-11-25 at 9.20.18 AM.png

Words can be hard, but visuals take the jargon out of the equation. In some ways, I feel like visual representation of physical conditions can be a less intimidating, more direct way to explain to people what something feels like. And even if it is a piece that can be interpreted in different ways, they can be conversation starters. Like my floral stomach: I’ve had people say it resonates with them because of their Chron’s disease, IBD, chronic pain, anorexia, gastroparesis, and more. 

The educational aspect for me goes beyond just correct medical information, and includes providing an avenue for people to share their experience with health and disability. 


I would love for you to talk a bit about disability advocacy and how we can help.

The biggest thing I’d say is: Normalize access. If you go to a restaurants website and they don’t have anything about their accessibility (where their accessible entrance is, if they even have one, etc), email them and ask for it to be posted. Request for event planners to include access information on their flyers. If you see a wheelchair lift or a curb cut that is blocked by garbage, tables, or advertisements, request for it to be moved, and point out that they’re blocking an entire group of people from accessing their business.

It may seem like a small thing, but when you’re in a wheelchair and you show up to a place that said it was accessible, only to find out that the wheelchair lift is not at all easy to find, it’s outside, and the door to enter is locked from the inside (yep, that happened) it gets old REALLY quick. Making accessibility information public and easily found benefits everyone and hurts literally nobody. 

The second (and equally important) part of this is to follow disabled voices, and listen to what we have to say. Did you know that I’d prefer you call me “disabled” rather than “a person with disabilities?” Or did you know that when you tell me that you don’t “see me as disabled,” that actually is NOT a compliment? There’s enough of this topic to make 18 blog posts about it in itself (and people have!), but I’ll leave it at this: when deciding what’s important to disabled people, it’s important to prioritize disabled voices in the conversation. 

If you want to know more about any of this, I highly suggest the following accounts to follow on insta/twitter:

@Nina_Tame

@Crutches_And_Spice

@JessicaOutOfTheCloset

@TheSparkledLife

OH. Last thing I swear: 

  • caption your videos dang it

  • Use #CamelHumps for hashtags (that way screen readers identify each word, and don’t just try to read the whole thing as one)

  • Use Image Descriptions (I need to be better about this!)


What have you learned the hard way that you want to spare other people the pain of learning when it comes to anything wood burning or business related?

Make what you like. Make what you like. Make what you like. I spent almost a year talking myself out of burning anatomy art, for fear that it would be too weird. That year was the most frustrating, unfulfilling artistic year for me. 

And clean your dang tips. LOL. I still am awful at this, especially when burning a blackout background. I get so mad because I keep having to turn the heat up, or can’t get a nice smooth black and then I realize it’s because I have so much gunk on my burner! Every time I take 10 minutes to clean my tips I always go back to burning and am like, “Why didn’t I do that sooner!”


What goals do you have for your art or your business?

I have two goal shows: Oddities Flea Market in NYC (Ryan Matthew Cohn if you read this, hi), and doing the OOAK Show in Chicago (also Hi!) but those are big goals, and especially with COVID-19 being what it is, I’m not too keen on putting a timeline on those goals. 

My other goals include specific projects that are on my “bucket-list” if you will: burning a kitchen island, kitchen cupboards, a waterfall table, a full skeleton on a table. 


Deserted Island with power. You can choose ONE

Burner: Razertip SK (the only burner I’ve ever used, after my dad’s soldering iron)

Nib: Chisel Tip for sure!

Type of wood: Olive Wood!!! 

Non-essential tool (but basically essential to you): projector. Or coffee. But probably the projector!


Can you show us some of your favorite tools, must haves? Your favorite nibs? Or hacks?

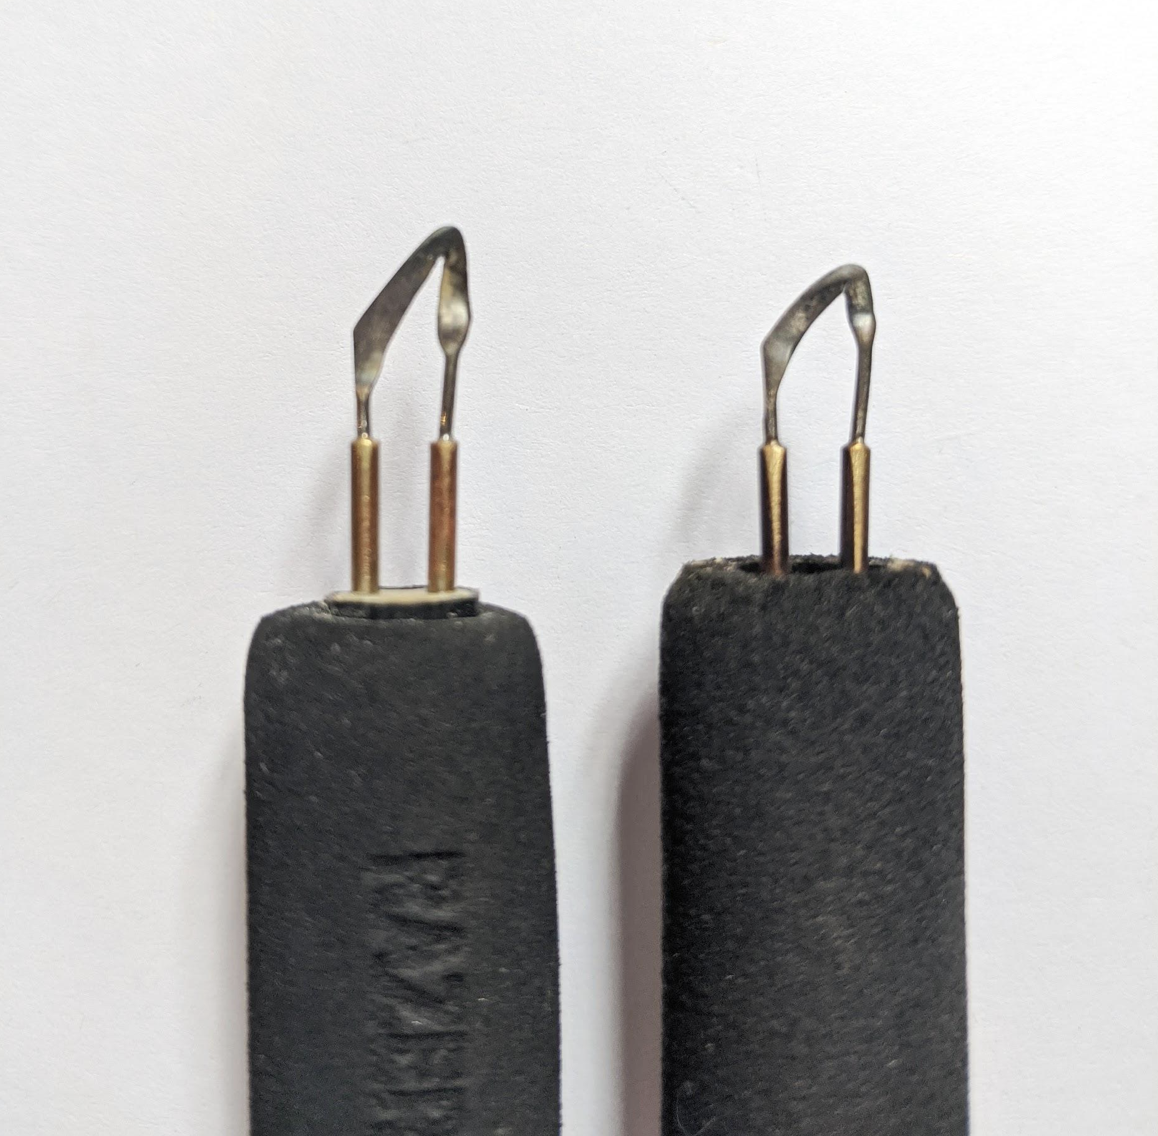
Oooh yes. So, I have a chisel tip that I have sanded down (sorry Razertip), to be even more narrow for when I am doing teeny line-work on some of my more complex illustrations. Here’s the two tips in comparison: 

 
Screen Shot 2020-11-25 at 8.57.03 AM.png
 

As far as hacks go, I am a big fan of the projector. With many of my designs, they look best when they fill the wood up a certain way. But if I were to resize and print out a template for every piece of wood, I’d kill so many trees. So instead, I photograph my drawings, digitize them, and then use a projector to get the image onto the wood. That way I can size it PERFECTLY to fit any shape, orientation, or size of wood! It also allows me to see exactly where different knots or colorations in wood will fall within a template. Especially with some of the really intricate designs, it can totally wash out the details if I place them over a darker part of wood, or even over a prominent grain pattern. 


You were working on a piece with a brain, can you share that piece with us?

Screen Shot 2020-11-25 at 9.04.30 AM.png

Do you see yourself veering away from anatomy, or are you happy right where you are?

I see myself bringing more INTO anatomy, but don’t see the anatomy going away. I am very happy playing with bones and organs right now, but I enjoying bringing in botany, other animal anatomy, and just generally pushing the limits of what can be incorporated into different structures while still keeping some realism and believability. I have a few pieces with mushrooms coming, some insects, some snakes, but all still have the human body as the main feature. 


What’s one piece of advice you would offer to a new pyrographer?

Don’t let other people tell you what to make. And DRAW. I know drawing is hard, and it’s frustrating when things don’t turn out the way you want, but practice practice practice is what will get you there. 

Draw what you see, and if it helps? Turn your piece upside down so you are focusing on line and shape, and not having your silly advanced brain focusing on the “whole picture” at one time. It takes you away from “This is what a petal looks like” and lets you focus on the actual, sometimes weird looking, shapes and shades that make things look realistic. I draw and burn upside down all the time! 


Watch the recorded live video:


How to get your kids involved in pyrography

E4DD1206-F8A6-4A83-BD8D-D5744C621CA5.jpeg

My kids are always so excited to see what I am making. They watch the process, they see the finished results, and they cheer me on, which is why getting them involved is so much fun. Collaborating with them to create a unique piece gives them such pride. You can use a design they have already drawn, or have them create something new.

I like to do the burning while they watch, and then have them finish it off with markers, colored pencils or watercolor.

This makes an amazing gift for a grandparent, spouse, or loved one. It is also a great class option if you teach, especially around Mothers/Father’s Day.

What you will need:

Watch the FREE video below or click here for written step-by-step instructions!

Why you need to start an email list today!

If Instagram, TikTok, and Facebook were to disappear tomorrow, would your business survive? With these platforms, they decide what your audience sees, or if they see it at all. Do you have a way of getting ahold of your clients? Of your fans? Or your followers? THIS is one reason why it is important to have an email list. Having a back-up plan is really important.

Connecting with your audience is another really important reason. Your e-mails are a chance to make the person receiving them feel special and individualized. This in turn creates a closer, more personal connection and gives them a sense of trust making them more likely to choose you when they are ready to purchase that custom art piece for their living room. Consider building this list an investment. Over time you will build a faithful following which will show its value as time passes.

Email is King!

What is one of the first things you do in the morning? For me, it is check my phone and my email. I know I am not alone. Email is effective in reaching your people for this reason. They will actually see what you send them (personally delivered to them), and that is half the battle. Your email list will naturally consist of your biggest supporters, and is a great way for you to connect with them on a more personal level.

How do I start an email list?

It is not hard to start an email list, you just have to do it. There are tons of free platforms that will get you started. I used to use Mailchimp before I had the squarespace integration. A lot of website hosts include a feature like this as well (usually at an extra cost). They make it easy to set it up and integrate it with your site making it cohesive with the look and feel of your branding. Once you come up with your first template and design, subsequent emails become much easier.

How do I get people to sign up for my email list?

To get people signed up, I suggest an incentive. You want to provide them with a reason to sign up in the first place. A free gift when they sign up can be a good way to get them in the door. This could easily be a printable or digital download of some sort. Keeping the overhead low is key here.

Also, make sure it’s easy to sign up. Include an area on your website that is clear and simple to fill out. Let people know on instagram and other social media platforms you have an awesome monthly newsletter filled with good stuff. Include those incentives for them to sign up in your Pinterest marketing and all other social media platforms you use.

I have a list, now what do i do? What do I even put in an email?

Think about sending out a monthly newsletter. This acts as a good reminder to your people about your business and what you offer. Give your email list coupons, special discounts, first access, behind-the-scenes information, freebies, and sneak peeks. Get them excited to open that email. Get them excited to learn more about you and the person behind the art and business, on a much more exclusive level. Think about what you would like to see in an email? Remember these are your most loyal customers. These are your best clients. Serve them well, and they will tell their friends.


LOOKING TO BOOST YOUR BUSINESS EVEN FURTHER?

Get some personal support: One-on-one coaching provides tailored support guaranteed to boost your business.


Make your own Pyrography Canvas Backpack

 
canvas+backpack.jpg
 

Canvas is another amazing non-wood surface to embellish with pyrography. You will find canvas material in many different forms and adding wood burned touches to any of these canvas materials will add that personalized touch that will step up your canvas game. It is a bit smelly to burn, and you will need to clean your wood burning tool often, but it will look cool and be totally worth it. Be sure to utilize your safety equipment. You and those around you won’t want to be inhaling the fumes from burning on canvas, so be sure to work in a well-ventilated space and have fun with it!

Materials

  • Canvas backback

  • Water-soluble fabric pen

  • Damp sponge

  • Safety Equipment

  • Wood Burning Tool, Spade and Flow Nibs or Ball-Point

Step 1: Choose your canvas backpack. Wash and dry before getting started.Step 2: Lay your backpack flat on your table.

Step 1: Choose your canvas backpack. Wash and dry before getting started.

Step 2: Lay your backpack flat on your table.

Step 3: With your water soluble pen, draw lines of varying lengths and arches from the bottom of the pack going up. These can be close together or spread apart, depending on how you envision the end result.

Step 3: With your water soluble pen, draw lines of varying lengths and arches from the bottom of the pack going up. These can be close together or spread apart, depending on how you envision the end result.

Step 4: Add lines of varying lengths to the right and left sides on these initial lines. Mix up the spacing between the lines to add interest.

Step 4: Add lines of varying lengths to the right and left sides on these initial lines. Mix up the spacing between the lines to add interest.

Step 5: Put on safety gear. Canvas can be quite smelly, you don’t want to be breathing the fumes. An outdoor environment with plenty of air flow would be best.

Step 5: Put on safety gear. Canvas can be quite smelly, you don’t want to be breathing the fumes. An outdoor environment with plenty of air flow would be best.

Step 6: Turn on your wood burning tool. The temperature will depend on how quickly you would like to burn. The lower the temperature, the more controlled the burn. Start lower and turn up the temperature as needed. Using a spade or writing nib, burn…

Step 6: Turn on your wood burning tool. The temperature will depend on how quickly you would like to burn. The lower the temperature, the more controlled the burn. Start lower and turn up the temperature as needed. Using a spade or writing nib, burn by tracing over all of your drawn lines with the wood burning tool.

Step 7: Once you’ve traced all the lines, turn off your burning tool and carefully switch to a flow nib, preferably a ball-point. Reheat the burner and start adding the dots to the ends of your lines. To make a dot, simply hold the burner in place b…

Step 7: Once you’ve traced all the lines, turn off your burning tool and carefully switch to a flow nib, preferably a ball-point. Reheat the burner and start adding the dots to the ends of your lines. To make a dot, simply hold the burner in place briefly. Be careful not to hold it too long, or you can burn a hole in your pack. Add burned dot ends until all lines are topped off with them.

Step 8: Rinse off your burned backpack or use a sponge and some water to carefully remove all water-soluble pen lines. Set out to dry.

Step 8: Rinse off your burned backpack or use a sponge and some water to carefully remove all water-soluble pen lines. Set out to dry.

Step 9: Wear your bag proudly, and enjoy the compliments.

Step 9: Wear your bag proudly, and enjoy the compliments.

SHOW OFF YOUR WORK!

Be sure to share your finished pieces on instagram using #thewoodburnbook

 
the wood burn book

More projects in the book!

This essential guide opens with a brief background to the art of wood burning, a list of tools and how to use them, basic techniques that can be used over and over again, and even what to burn (projects, designs and inspiration) and how to be safe doing it.


Make Your Own Poppy Wall Art

3+poppy+woodburn.jpg

Watercolor is one of my favorite mediums to add to wood. It is quite liberating to add watercolor in this unique and loose way. You can take any simple line drawing and quickly turn it into a beautiful piece of art that will add vibrancy and warmth to any space. You can create a dramatic and playful effect by adding these fun and perfectly imperfect splashes of watercolor. Those splashes of bright color change the whole look of the piece, and really bring it to life.

I chose the California poppy for this particular piece for its bright colors and because I am absolutely obsessed with them. They pop up everywhere, are super vibrant, and just make me happy.

Download your FREE poppy design printable template

Materials

Step 1: Choose any simple line-drawn floral design. This can be a hand drawn doodle, a drawing from a photograph, or a design in this book. Then choose a wood slice to fit the design.

Step 1: Choose any simple line-drawn floral design. This can be a hand drawn doodle, a drawing from a photograph, or a design in this book. Then choose a wood slice to fit the design.

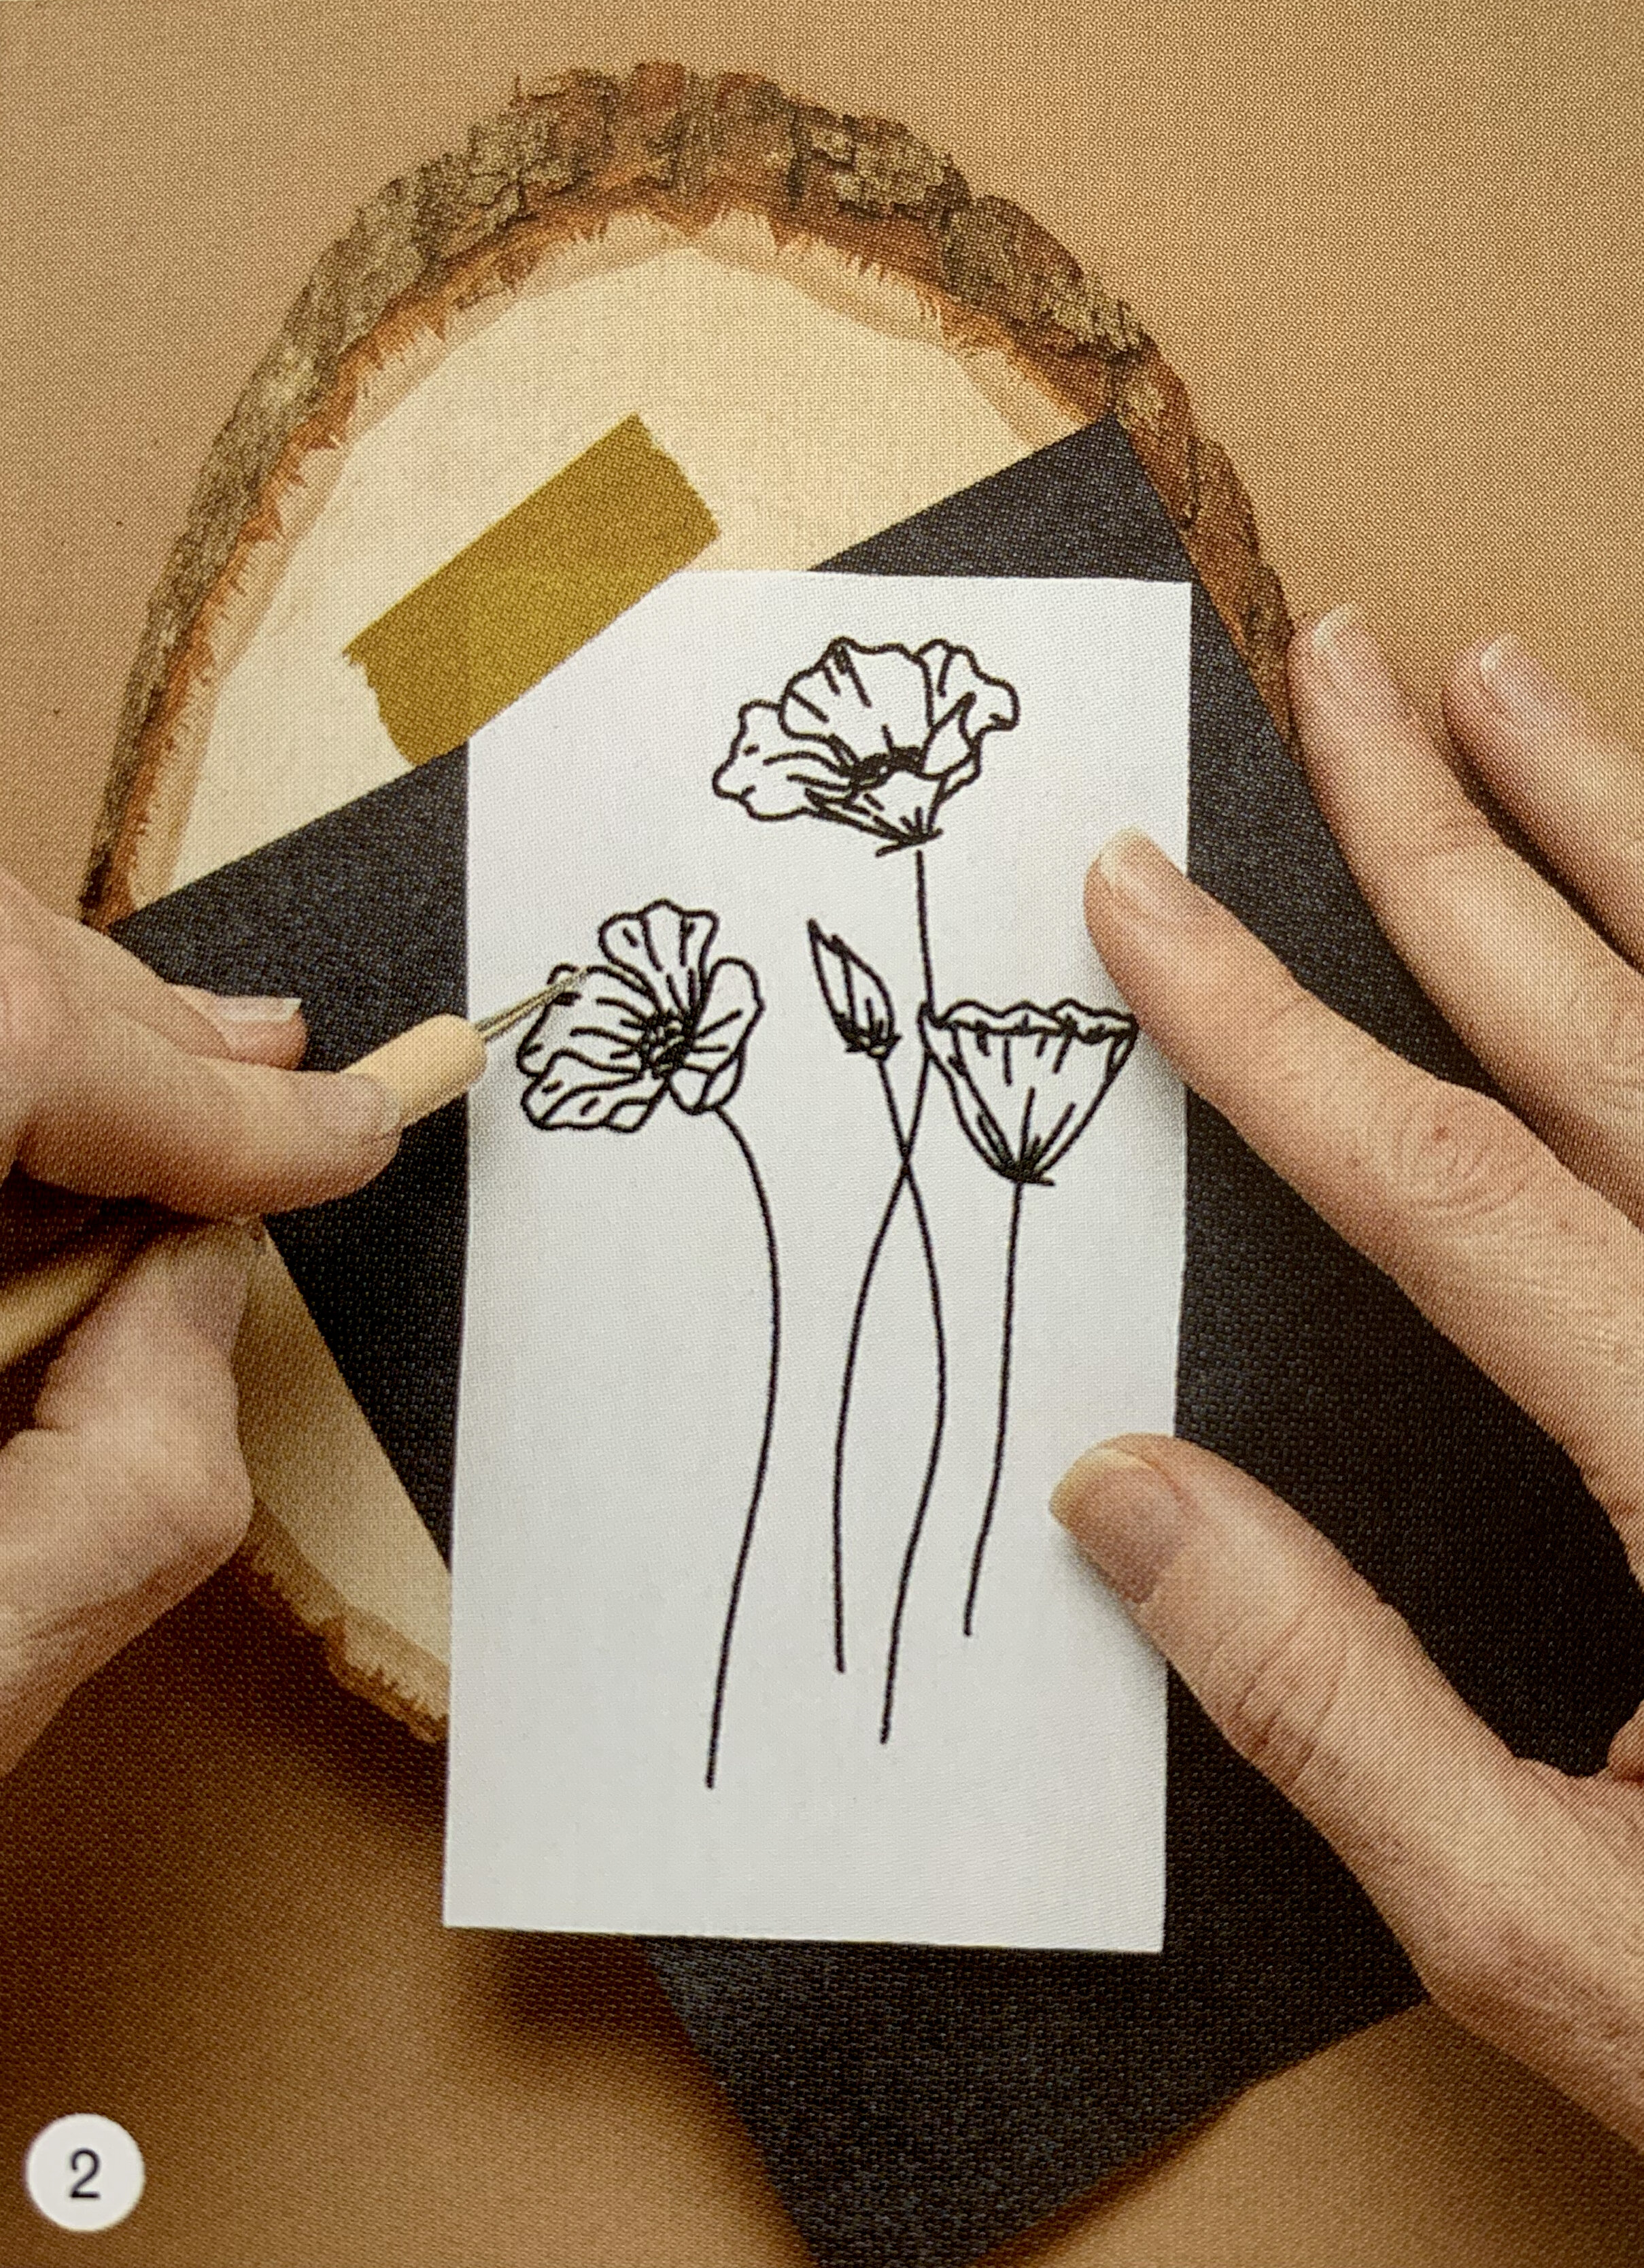
Step 2: Transfer the design to the wood. I am using graphite paper and a slice of basswood with a live edge. Make sure you have transferred the entire design before removing the design.

Step 2: Transfer the design to the wood. I am using graphite paper and a slice of basswood with a live edge. Make sure you have transferred the entire design before removing the design.

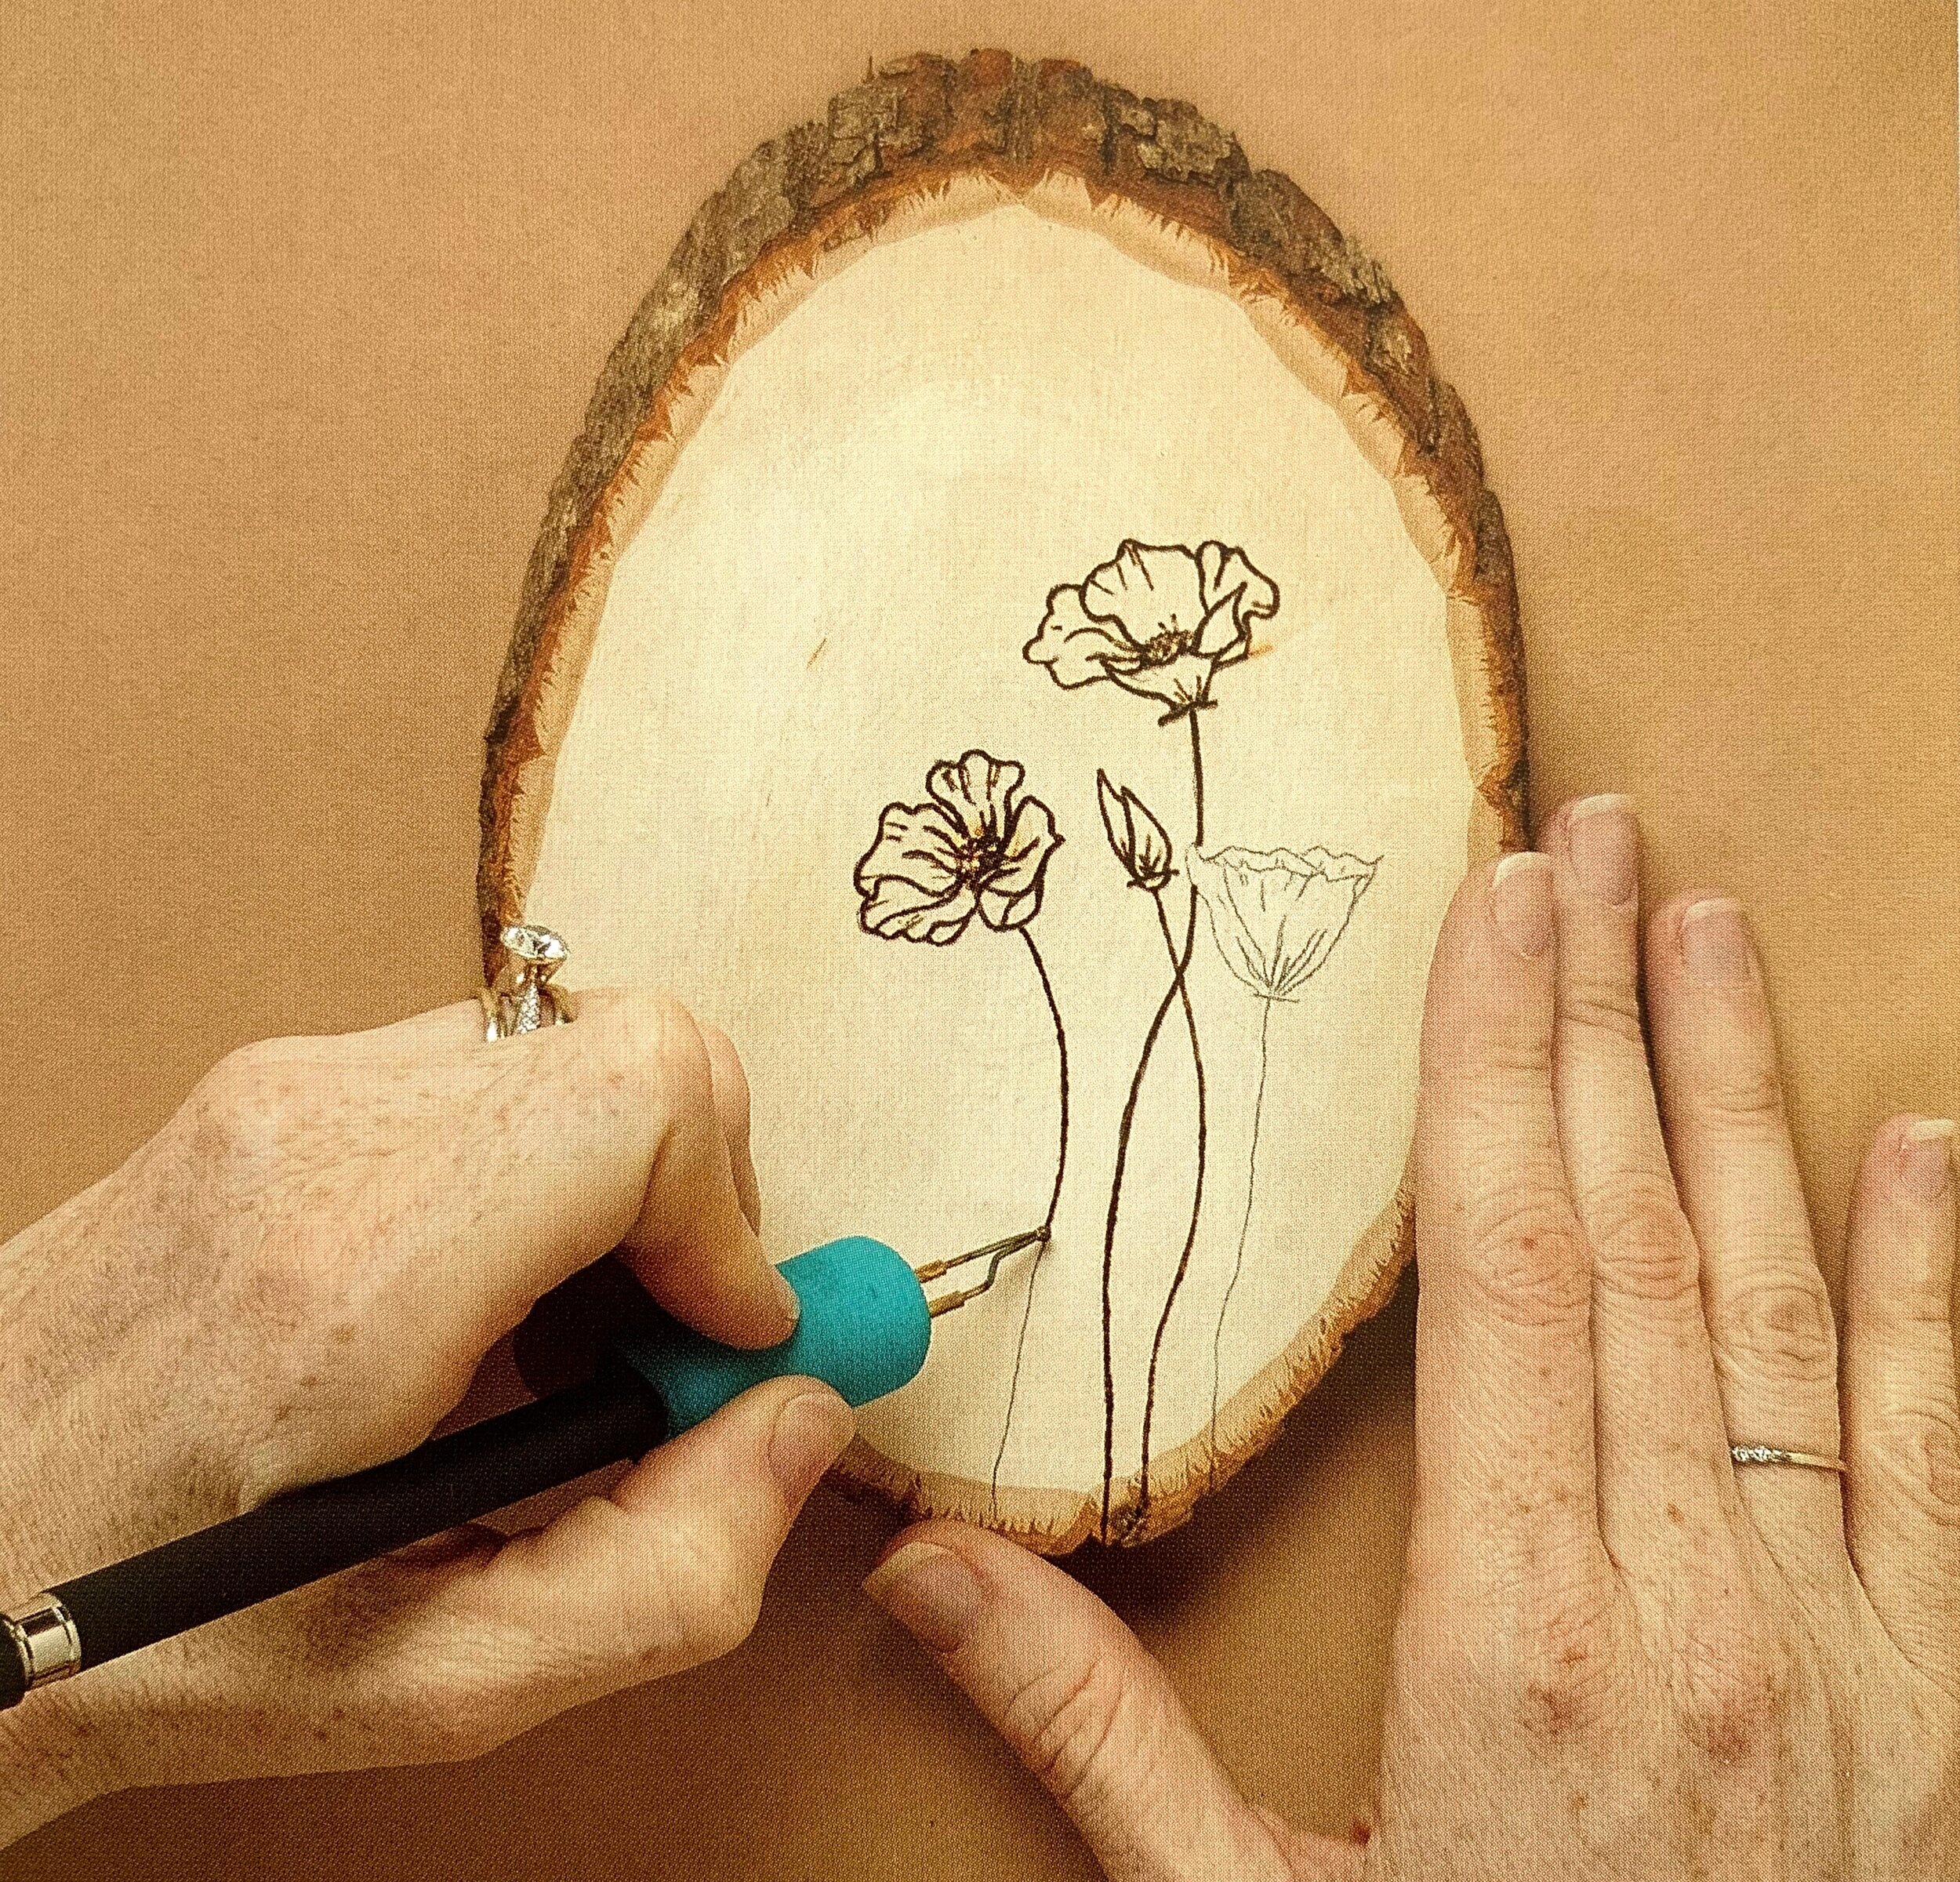
Step 3: Choose your nib and burn. For this particular piece I like to use a flow or writing nib. This gives me the freedom to burn smoothly in all directions, without catching an edge of the nib.

Step 3: Choose your nib and burn. For this particular piece I like to use a flow or writing nib. This gives me the freedom to burn smoothly in all directions, without catching an edge of the nib.

Step 4: Remove any remaining transfer lines after the design has been burned in its entirety.

Step 5: Pull out your watercolors, palette, water glass, paper towels, and paintbrushes.

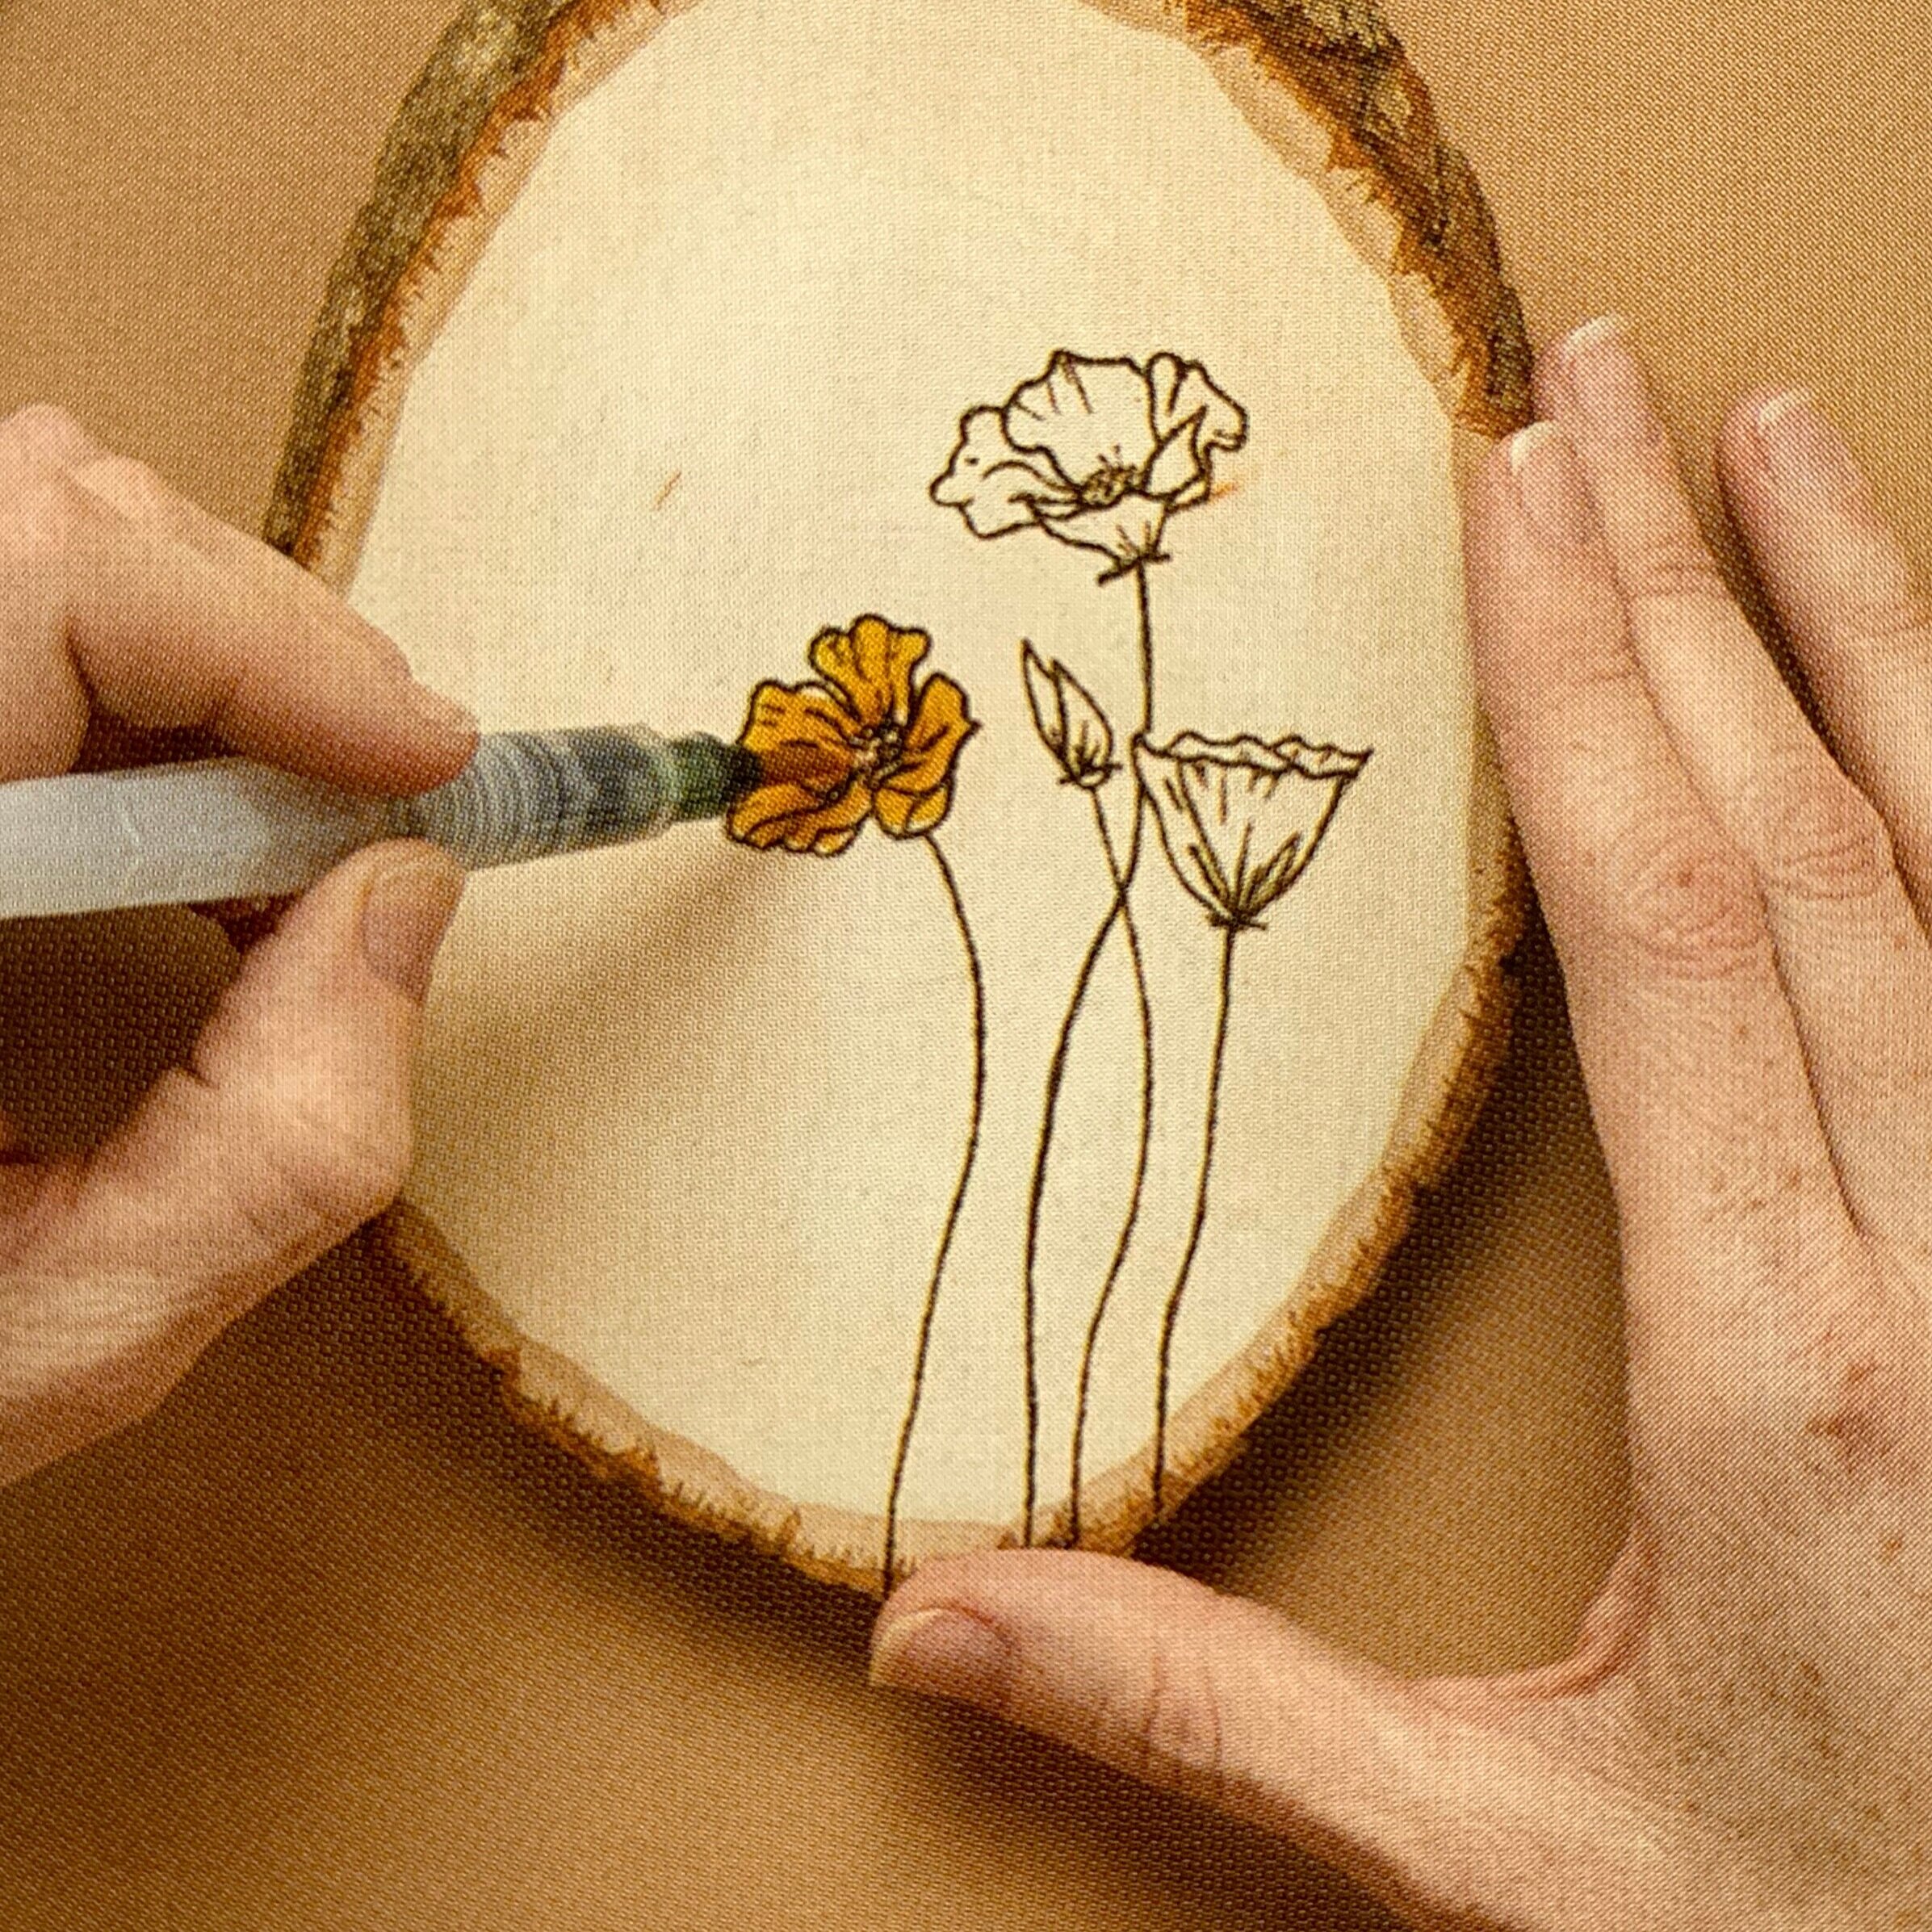
Step 6: Color the flower fully, or at least the parts you want colored. Don’t use too much water or you may split your wood. It’s OK if you go over the lines on this particular piece - you actually should! A loose watercolor look is what we are goin…

Step 6: Color the flower fully, or at least the parts you want colored. Don’t use too much water or you may split your wood. It’s OK if you go over the lines on this particular piece - you actually should! A loose watercolor look is what we are going for. This technique gives the feeling that the flower is extending past the lines you have given it.

Step 7: Add the splashes of paint once you have completed the coloring of the flower. Practice on a scrap piece of paper or on the backside of your piece first. Dip into the same color, hold your brush close to the wood, pull back on the bristles an…

Step 7: Add the splashes of paint once you have completed the coloring of the flower. Practice on a scrap piece of paper or on the backside of your piece first. Dip into the same color, hold your brush close to the wood, pull back on the bristles and let them go. This will create a splashed look. You can go heavy on the splashes, or very subtle, it is entirely up to you.

Step 8: Wait for the piece to dry, then attach a sawtooth picture hanger to the back

Step 8: Wait for the piece to dry, then attach a sawtooth picture hanger to the back

Step 9: Complete your piece with a finish of your choosing. I prefer a spray finish over watercolors, so as to not unintentionally spread the paint on the wood.

Step 9: Complete your piece with a finish of your choosing. I prefer a spray finish over watercolors, so as to not unintentionally spread the paint on the wood.

Step 10: Hang it on your wall, or wrap it up and give it as a gift!

SHOW OFF YOUR WORK!

Be sure to share your finished piece on instagram using #thewoodburnbook

the wood burn book

More projects in the book!

This essential guide opens with a brief background to the art of wood burning, a list of tools and how to use them, basic techniques that can be used over and over again, and even what to burn (projects, designs and inspiration) and how to be safe doing it.