wood3

5 Easy DIY Wood Burned Project Ideas

 
diy-pyrography-project-ideas
 

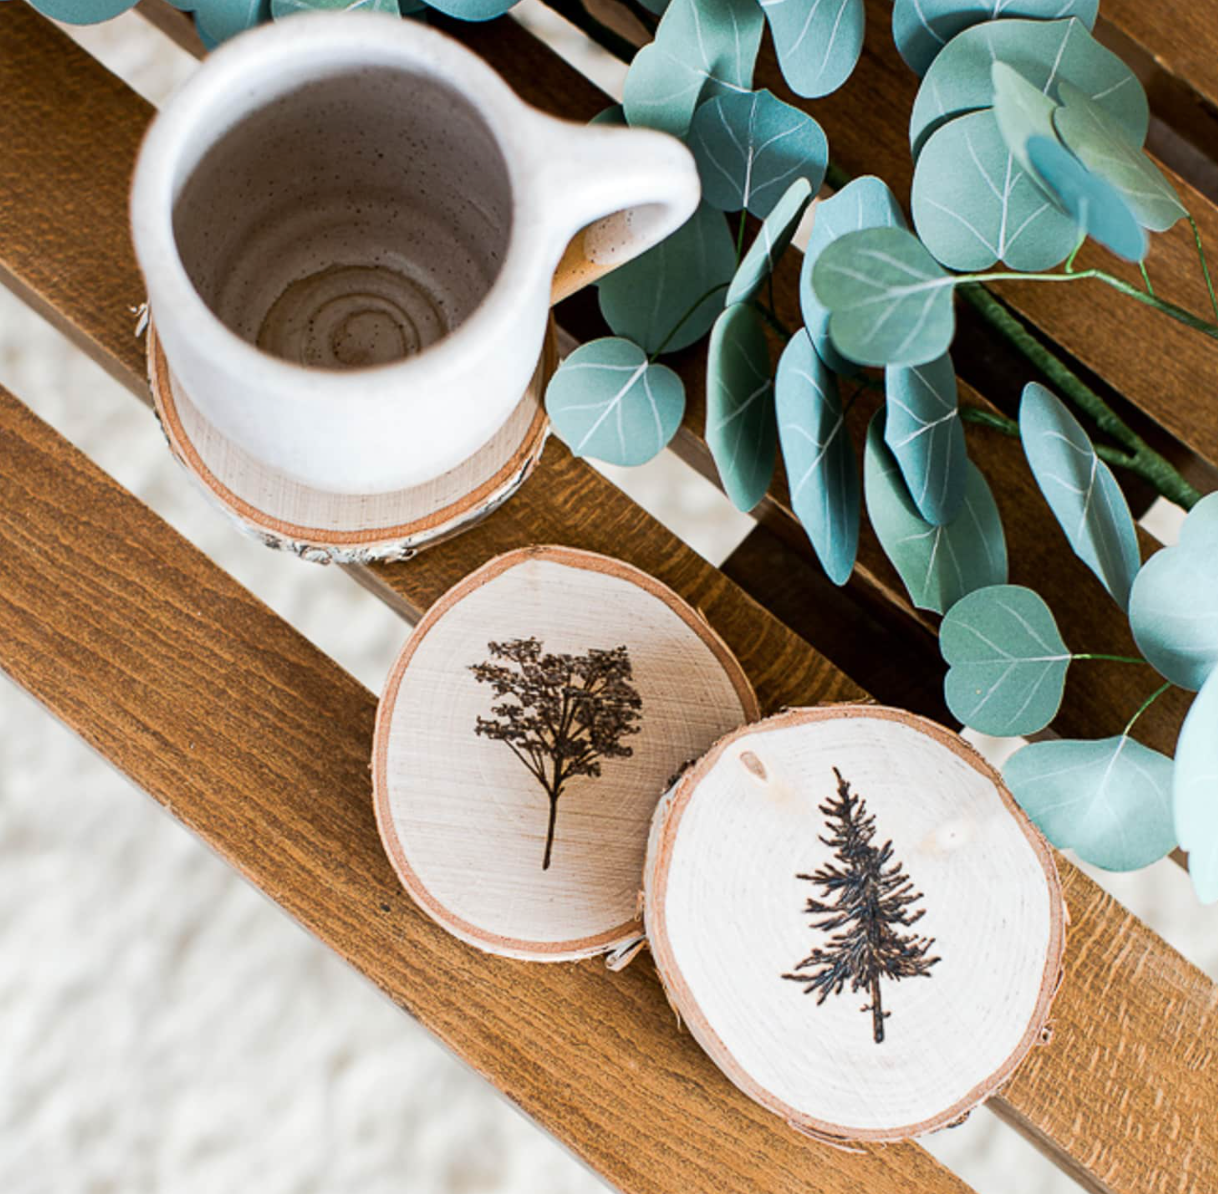
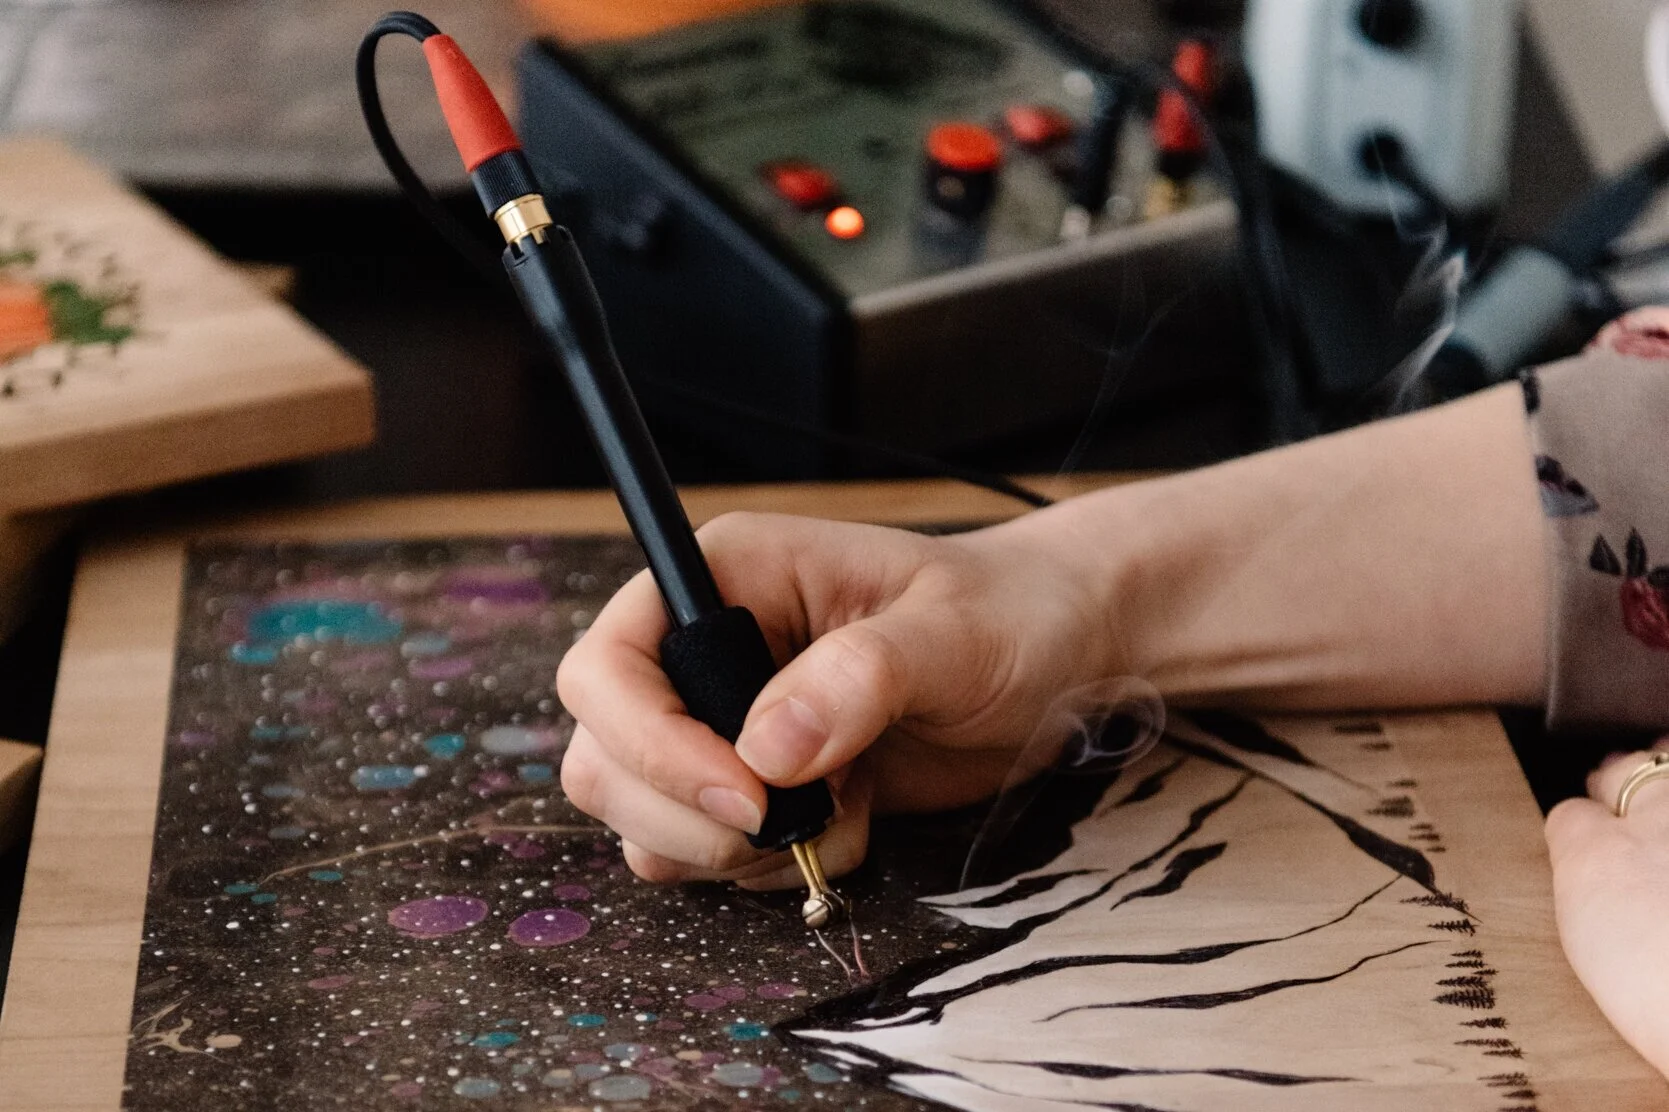
Want to make your own personalized DIY gifts for a loved one?? Pyrography is such a versatile hobby, below are 5 very easy projects you can make yourself and personalize in any way!

New to wood burning?

Check out our blog post: Start Here if you are NEW to Wood Burning

Here you will learn all about the tools you need, wood you should be using, safety you should be following and tips and tricks to help you make your own DIY wood slice project ideas come to life!


1. Wood Burned Spoons

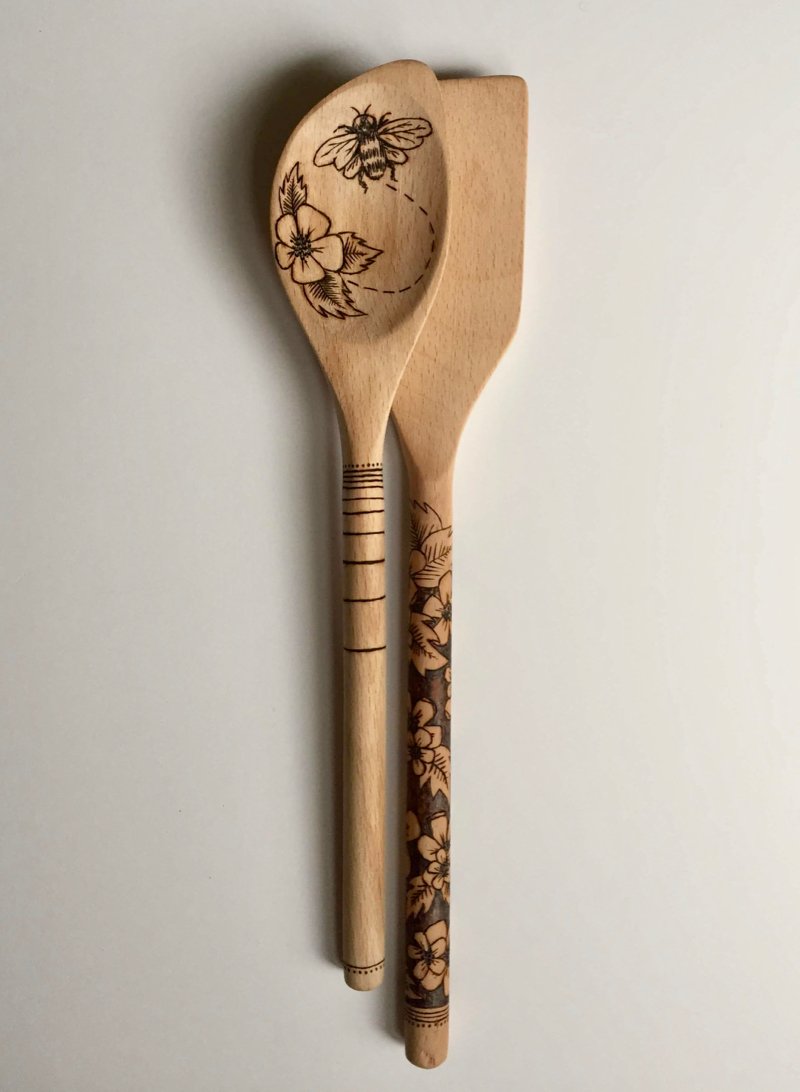
Practical, useful gifts are always a good choice! Choose wooden spoons, spatulas, or salad servers with a simple design, or customize it with their name or their favorite quote. You really can’t go wrong with this functional art piece. Remind your gift receiver to not wash wood in the dishwasher, or to leave it soaking in water. Oil it with a food-grade safe oil, and recommend that your recipient re-oil them as needed to keep them looking good! I recommend Howards Butcher Block Conditioner or Howards Cutting Board Oil.

 
wood-burned-magnet-gifts

2. Fridge Magnets

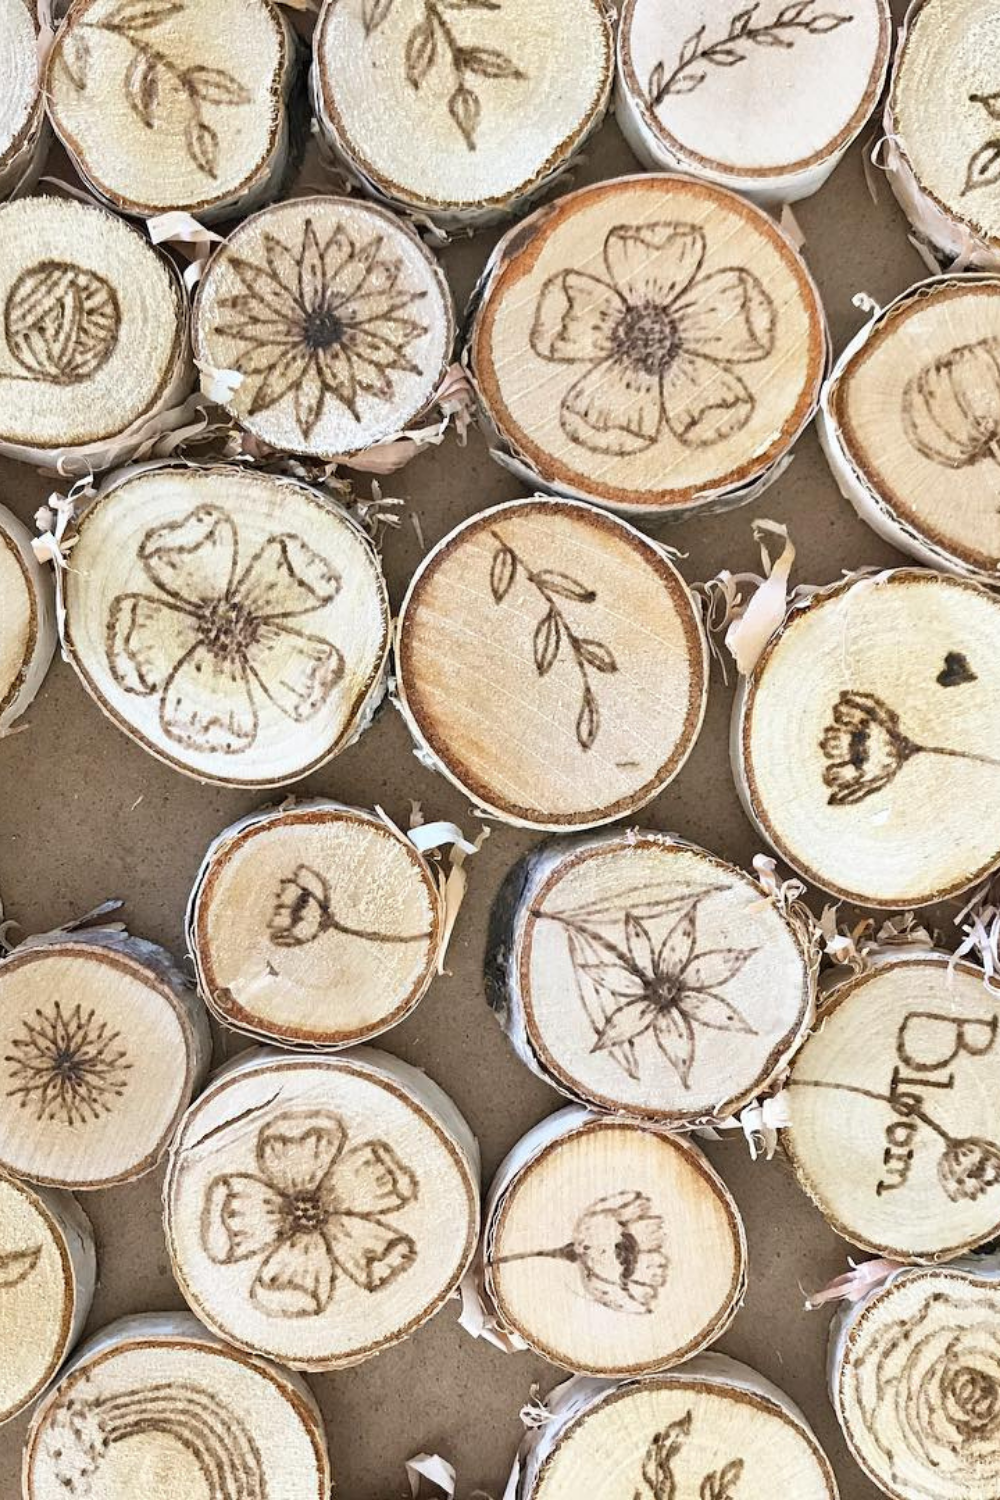
These can make such a cute gift. Create a set to give, and customize them for each person. I like to use mini birch slices, some E6000 glue (this stuff works!) and a strong magnet. You want your magnets that you give to be useful, so choosing a magnet that is strong enough is key! I like this magnet from Amazon. I think the size is great and they are super strong. I make these magnets in bulk so I have them on hand to customize when I need to put together a gift. Give it a try!


3. Cutting Board

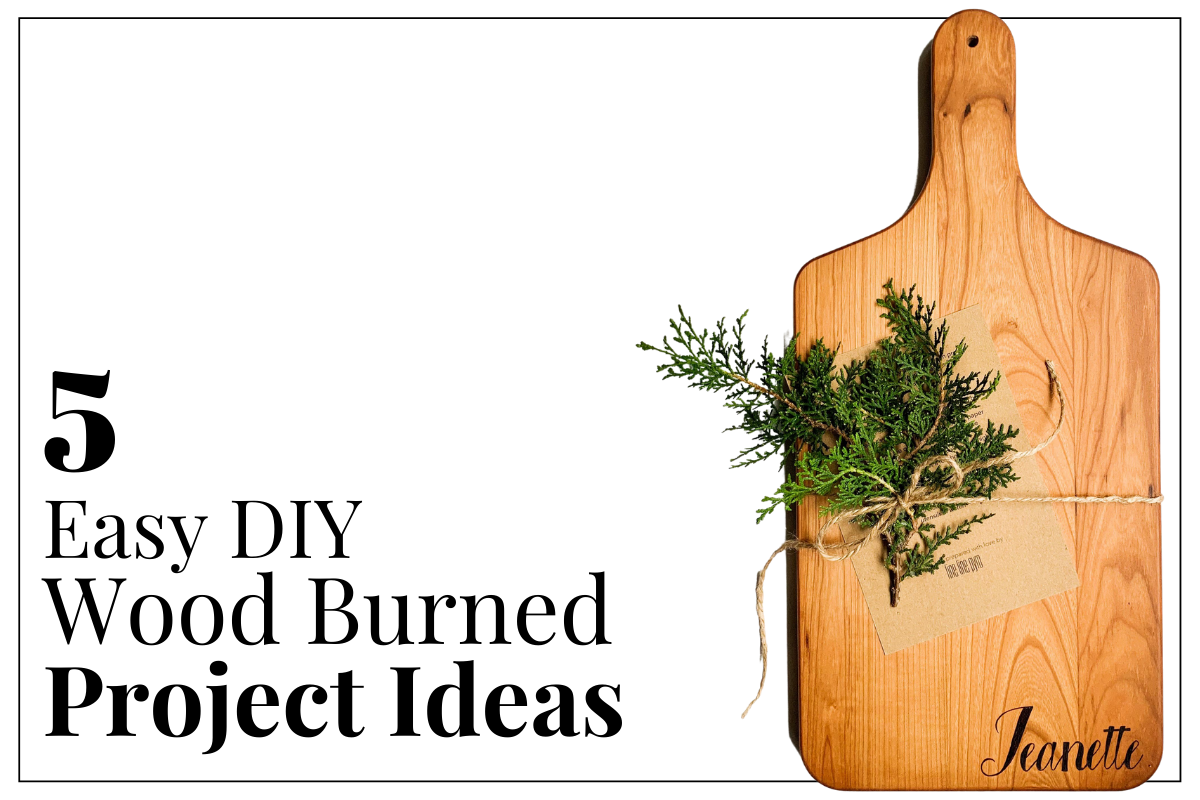
Another practical, useful and functional art gift! Wood burning is so versatile, and I love how everything can be customized. Turn a favorite photo of them into functional art. Add their name to a cutting board, or their favorite food/plant/flower/animal/etc to a serving board. Make it special to them. Remind them to hand wash only and to use a food-grade safe cutting board oil and reapply as necessary. I like these two board options. A classic board and a long rectangle.


4. Name Sign or Welcome Sign

New house? New marriage? New Baby? Create a family name sign! These are always well received. I like to keep my design simple so it can fit with other people’s decor. You could also add color, their house, or a special date if you have that information. Customize it to them! I love using a Basswood Country Round for a rustic feel, and a Basswood Canvas for a modern look.

 
wood-burned-clock

5. Wood Burned Clock

This is such a gorgeous, unique and thoughtful gift. It adds a warmth to any space, and is not only beautiful, but quite helpful. To create this piece I used a drill, Clock Parts from Walnut Hollow and a slice of Basswood. I sized and printed the numbers in the font of my choosing to fit the canvas. I then transferred the design using graphite paper and an embossing tool, and then burned the numbers using a Versatool burner. Then I used the drill to poke a hole in the center and added the clock parts. I used a Basswood Country Round, but you could also use a Circular Wood Canvas. I did not put a finish my clock, because I want to be able to darken it over time, as need be.


Click here to learn how to transfer your child’s artwork onto wood and wood burn it for a lasting and personalized gift!

For more gift ideas and things to make next with your wood burning tool, check out this blog post with over 150 ideas of what to burn next!

And if you are just getting started in your pyrography journey, head here.

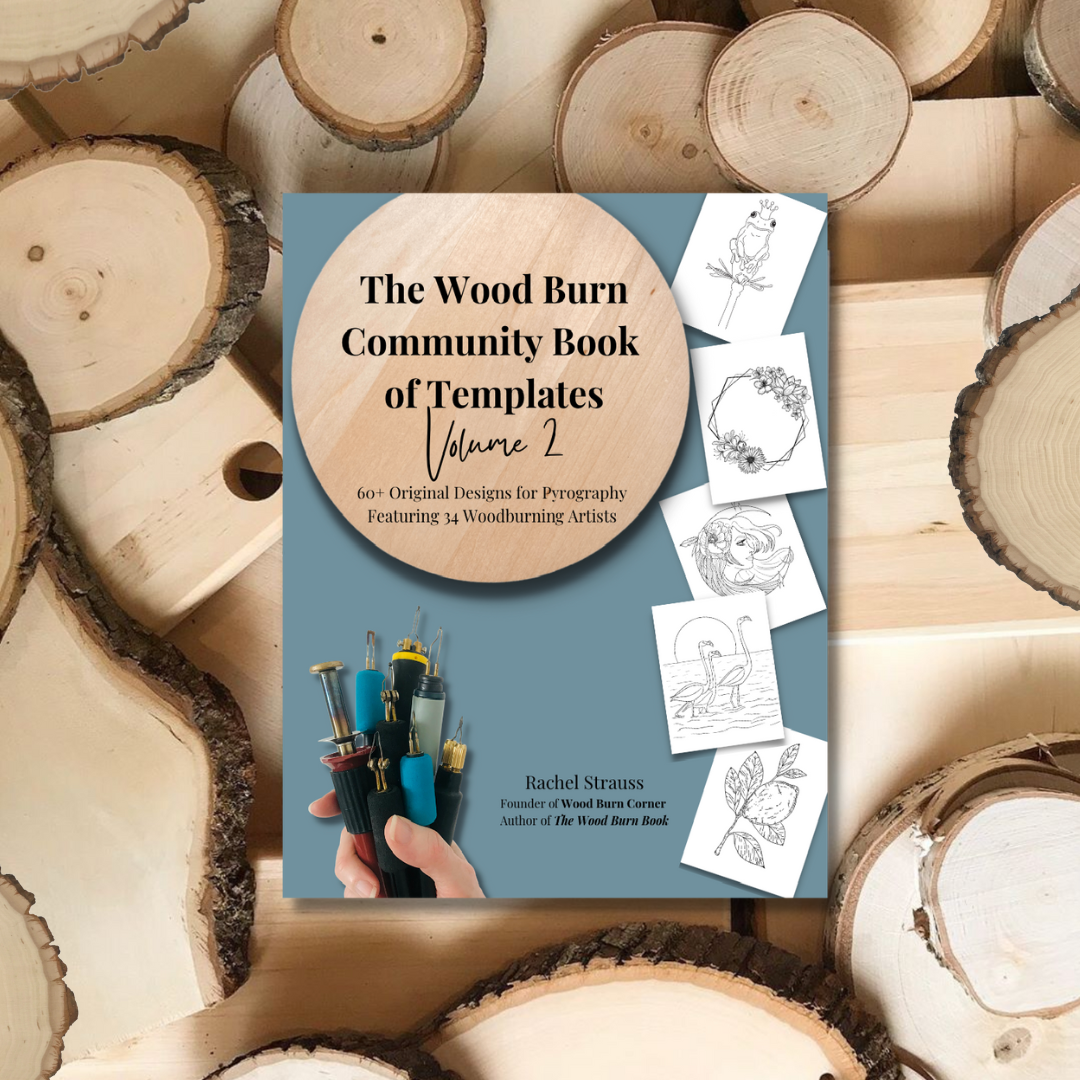
You can also find more project ideas and a full how-to in The Wood Burn Book or get yourself one of the Wood Burn Community Book of Template books full of traceable templates you can practice pyrography with!

Interview With Miranda From Live Free Creative Co.

business-coaching

I am a huge believer in coaching, and what it can do for your business. Having an outsider look at your business, provide accountability, run ideas by, and work out different parts can be incredibly helpful, and the amount of goodness that I have gotten out of following, listening to, and getting coached by Miranda is kind of astounding and so is every word she has to say.

You can find Miranda @livefreemiranda + @livefreecreativeco

Visit her website: livefreecreative.co

Buy her book, More Than Enough

Listen to her Podcast

Take a listen to the interview with Miranda from Live Free Creative Co.:

This interview was created for Burn Club+ in 2020, and was just now released to the public.

Grow with the community and get first access to interviews, exclusive tutorials and lessons by joining Burn Club+, a place where you can ask questions, and get the full answers, a place of fun and learning.

Last Minute Wood Burning Artists Gift Guide: Online Gifts for Pyros

 
last-minute-gift-guide.png
 

Below is a collection of online gift options that are perfect for wood burning artists or creative people who are looking for a new hobby and like trying new things. These include gift ideas for experienced pyrographers who are selling their art to those who are just discovering pyrography.

Send this list to people you love, or go ahead and treat yourself and your business to an awesome gift or two! Set yourself up for success and keep on learning!


Learn

The pyrography + Business summit

Learn from pyro experts with live wood burning masterclasses, panel discussions that dive into pyrography and panel discussions on business, plus interviews, community chats + challenges and more.

learn-to-wood-burn-mandalas

Learn to Wood Burn Your OWn radial symmetry patterns

Learn two creative and relaxing art forms in one (or get them separately).

how-to-wood-burn

just The wood burning toolkit

Everything you need to know about pyrography in one spot.

learn-pyrography-online

Learn online from awesome teachers

Skillshare is an amazing learning platform with TONS of classes for creatives. Give the gift of learning! Such a fantastic place for small creative businesses to grow.


Grow

wood-burn-corner-private-coaching

One-on-one-coaching

The best way to boost a creative business, increase motivation and stay accountable. Invest in yourself and your business, and see results. One-on-one coaching is Rachel’s specialty.


Products

wood-burned-art

Make it personalized

Alaina of @sweetpeachburns can create a digital drawing of your pet! Send her an email at sweetpeachburns@gmail.com or send her a DM on Instagram.

wood-burned-earrings

best earrings ever

My favorite earring designer, Chelsea of @cgdesigns_wear has a gift card available for last minute purchases. If you wanted to get me something, this would be it!

artist-calendar

stay on task

Jess of @countrypinesshop put together this printable to help keep you on task in the new year!

artist-printable

Printables, yes please

These downloadable printables from Jessica of @brownpaperbunny are too good to pass up! And they are FREE!

track-your-business-goals

Radial Symmetry Habit tracker

For tracking personal lifestyle habits, art goals and/or business goals!


Online Books

book-of-templates

Community Book Of Templates

Pyrography instructions and design patterns showcasing 57 original templates from 34 wood burning artists from around the globe, with the intention of helping artists of all skill levels past, present, and future to hone their craft, try new styles, and make beautiful art through collaboration.

traceable-pattern-templates

Community Book of Templates Volume TWO

The same vibe as the first edition with a whole new set of templates, artists and fun!

book-of-watercolor

try something new

Learn from the best, Jessica of @brownpaperbunny. Her first book comes out in 2022, but you can get the digital version now!

business-book-recommendations

For artists

A book that ALL artists should read. Really puts things into perspective.

business-book-ideas

Go Viral

Such a great book on how ideas go viral. This book will fill you with ideas.


From Artist to Author Book Publishing Summit

A first-of-its-kind virtual book publishing summit just for artists

artist-to-author-series
 
from-artist-to-author
 

This is a unique event that is for those who have ever dreamed of writing and publishing their own book!

Learn how to create your own best-selling book as we spend 5 days with 30+ of the top published artists and industry experts in the field.

Meet the Speakers

I will be among those interviewed! Here is the lineup of the amazing artists and authors who will be sharing their experience in writing their own books:

Ali Kriegsman - @alikriegs

Sarah Simon - @themintgardener

Alli Koch - @allikdesign

Miranda Anderson - @livefreemiranda

Cori George - @heyletsmakestuff

Andrea Pippins - @andreapippins

Josh Ryan - @imakethangs

Jen and Amy Hood - @hoodzpahdesign

Morgan MacDonald - @paperravenbooksteam

Liz Kohler Brown - @lizkohlerbrown

Katerina Popova - @katerinaspopova

Jeanetta Gonzales - @nettdesigns

Jessica Hische - @jessicahische

Melissa Iwai - @melissaiwai1

Melanie LeBarge - @melanie.labarge

Caroline Corrigan - @carolinecorrigan

Jessica Mack - @brownpaperbunny

Curtis Canham - @curtiscanham

Samantha Nielsen - @sj_nielsen

Olivia Herrick - @olivaherrickdesign

Erin McManness - @paperraven.co

Sarah Sax - @sarahsaxart

Katie Vaz - @katiemarievaz

Becky Simpson - @beckymsimps

Alyce Zawacki - @attorneyforcreatives

Lisa Congdon - @lisacongdon

Kate Woodrow - @presentperfectlit

Brooke Robinson - @goodtype

Lindsay Wilkes-Edrington - @bluestarpress

Brenna Licalzi - @bluestarpress


TIER ONE

CliffsNotes

$97

Access to the
3 Featured Sessions

You’ll get live access (plus recordings) of the three featured sessions by Jessica Hische, Lisa Congdon, and The Hood Sisters

Great if you just wanna dip your toes in…

TIER TWO

Bookworm

$247

Live Access to the
Full Summit

You’ll get live access to the entire 5 day summit, plus recordings of the three featured sessions by Jessica Hische, Lisa Congdon, and The Hood Sisters

Great option if you can make it live!

TIER THREE

Unabridged

$297

Live Access to the Full Summit + Replay Vault

You’ll get live access to the entire 5 day summit plus 1 year of access to recordings of every session in our replay vault.

Best for serious learning & long-term success!


Comparison Is The Thief of Joy - Theodore Roosevelt

creative-business-motivation-quote

Social Media makes it really easy to fall into the comparison game. It is a dangerous game to play, because there will always be someone who you think is doing better than you, prettier, making more money, etc. Don’t compare your real life to their highlight reel!

Remember, that social media is not real life.

Whenever you are feeling that comparison pull, focus on YOUR goals, and try not to get roped into what everyone else is doing. If you allow yourself to compare to others, you will end up chasing their dreams instead of your own.

In order to take care of your business, and your art, you must first take care of yourself. You won't be able to do anything to the best of your ability if you are not physically or mentally well. Even though we don't always put it first, our well-being is quite important.

Just like the airlines tell you, put your oxygen mask on first. This is because you can't help anyone else, if you don't take care fo yourself first.

If you are anything like me, this is difficult, but it is necessary to work at my best.

  • Pay attention to your body

  • Pay attention to your mind

  • Utilize safety equipment

  • Practice good ergonomics

  • Stretch and strengthen your body

  • Mind your social media consumption

  • Eat well

  • Drink water

  • Take breaks

  • Be kind to yourself

YOU are precious.

It is important to take care of YOU.

MENTAL HEALTH suggestions for small businesses:

  1. Take social media breaks.

  2. Remind yourself that this is YOUR business, and you can take days off if you want to. You are the boss.

  3. Do not follow people who make you feel bad no matter the reason. Your mental health is more important than that follow.

  4. Follow people who inspire, uplift, and motivate you.

  5. Connect with people! Use social media, for social connection. It will change the game for you. Use DM's more than you scroll.

  6. Comparison is the thief of joy. Remember to keep your head in your lane. You can look to the right and left of you for inspiration and to cheer on your fellow maker/small business, but really you should be looking in front of you to see where you are going, and behind you to remind yourself of how far you have come.

  7. Get involved in the community. Join Burn Club+. Make friends. Talk shop. It really helps.

  8. And please, seek professional help if you need it! There is no shame in seeking mental health assistance. I see a therapist weekly, and take daily medication. There is no shame in taking care of you, and you will run a better business if you put yourself first!

    Take care of your body and your mind, whatever that means to you. It's worth it. How do you take care of yourself?

Learn more about the physical and mental health of an artist (plus more) from The Complete Wood Burning + Business Toolkit


Interview with Shelly Kim of Letters by Shells

interview-with-shelly-kim-of-letters-by-shells

This interview with Shelly Kim of @lettersbyshells is a discovery of how Shelly became a successful artist and the ups and downs of her artistic journey. We talk how Shelly started making money with her artwork and she turned her passion into money!

Follow Shelly @lettersbyshells + @learnletteringtoday

Visit her Website: lettersbyshells.com

Shop Lettering Workbooks

Buy Shelly’s Book: Digital Hand Lettering and Modern Calligraphy

Listen in on how Shelly created a successful community through social media, how important it is to have peers in the same field and so much more on switching your hobby into your full time business.


This interview was created for Burn Club+ in 2020, and was just now released to the public.

Grow with the community and get first access to interviews, exclusive tutorials and lessons by joining Burn Club+, a place where you can ask questions, and get the full answers, a place of fun and learning.


Burnt October 2021

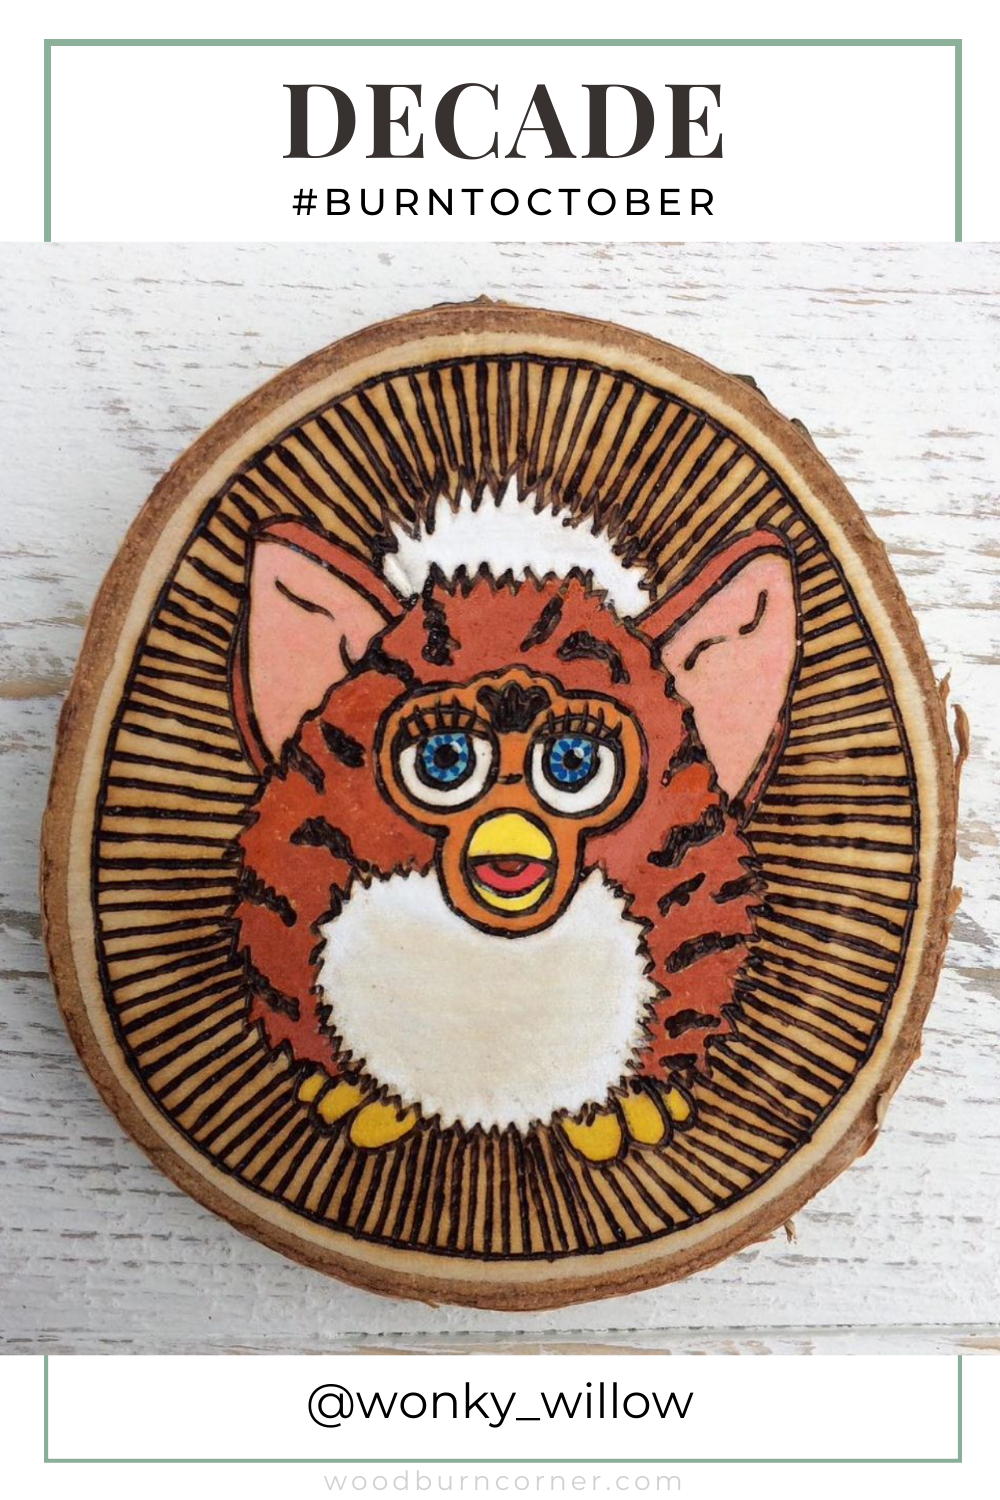
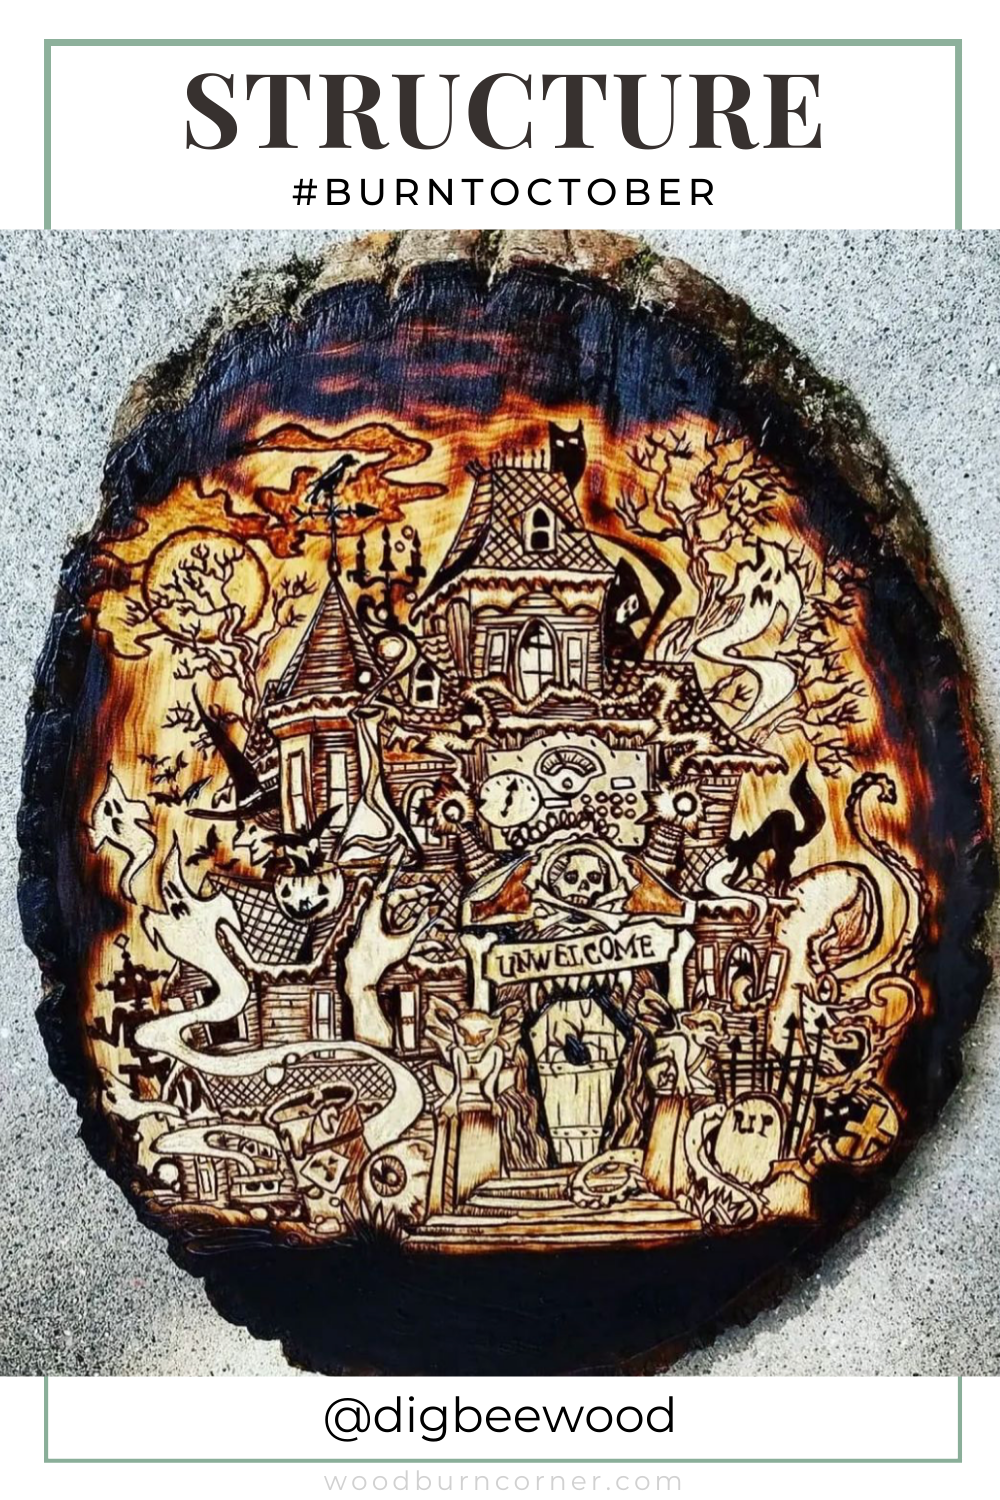
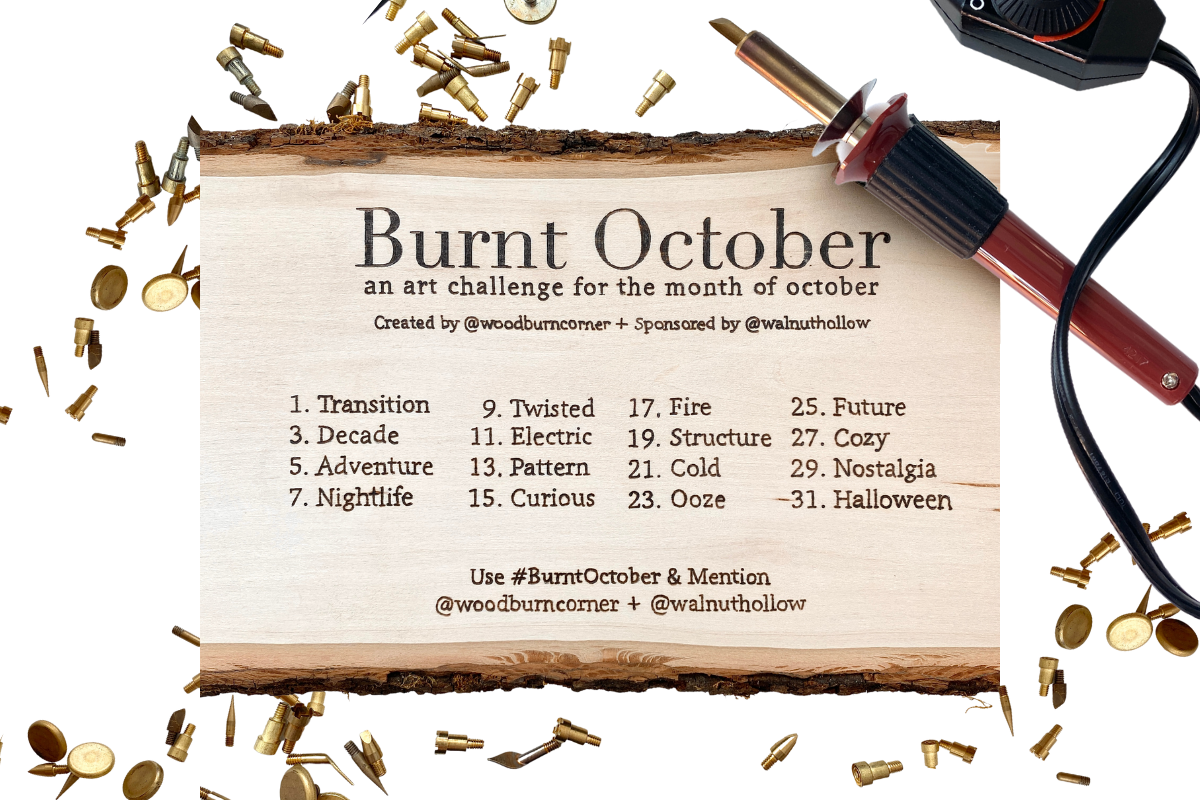
Burnt October 2021 was amazing! Held on Instagram, #burntoctober is an every-other-day art challenge for wood burning artists of all stages. It was created for artists to push their craft, expand their portfolios with new art, gain followers, try new things, meet fellow pyrographers, sell art, and have a lot of fun. Scroll to the bottom to see the featured artists!

 
community wood burning challenge
 

This is a sponsored challenge and post from our friends at Walnut Hollow, the amazing makers of excellent wood surfaces and wood burning products like the wood and burner in this photo of the amazing prompts we have for you next month. These prompts were all requests from Burn Club+ members, and I personally can not wait to see what artists create with them.

It is a full month of creativity, and a ton of fun. I really hope you join in!

You do not have to participate in the entire month to join, but we hope you do. You also do not need to be a professional pyrographer to join in the fun. If you have a burner, I hope you give it a try.

How it works: Every-other-day post your piece of art that was created for that particular prompt. Be sure to use the #burntoctober hashtag and mention @woodburncorner and our sponsor @walnuthollow in your post. We will both be featuring artists who participate ALL MONTH LONG on our respective Instagram accounts in both stories and posts.

the challenge begins October 1, 2021

where to find wood for pyrography

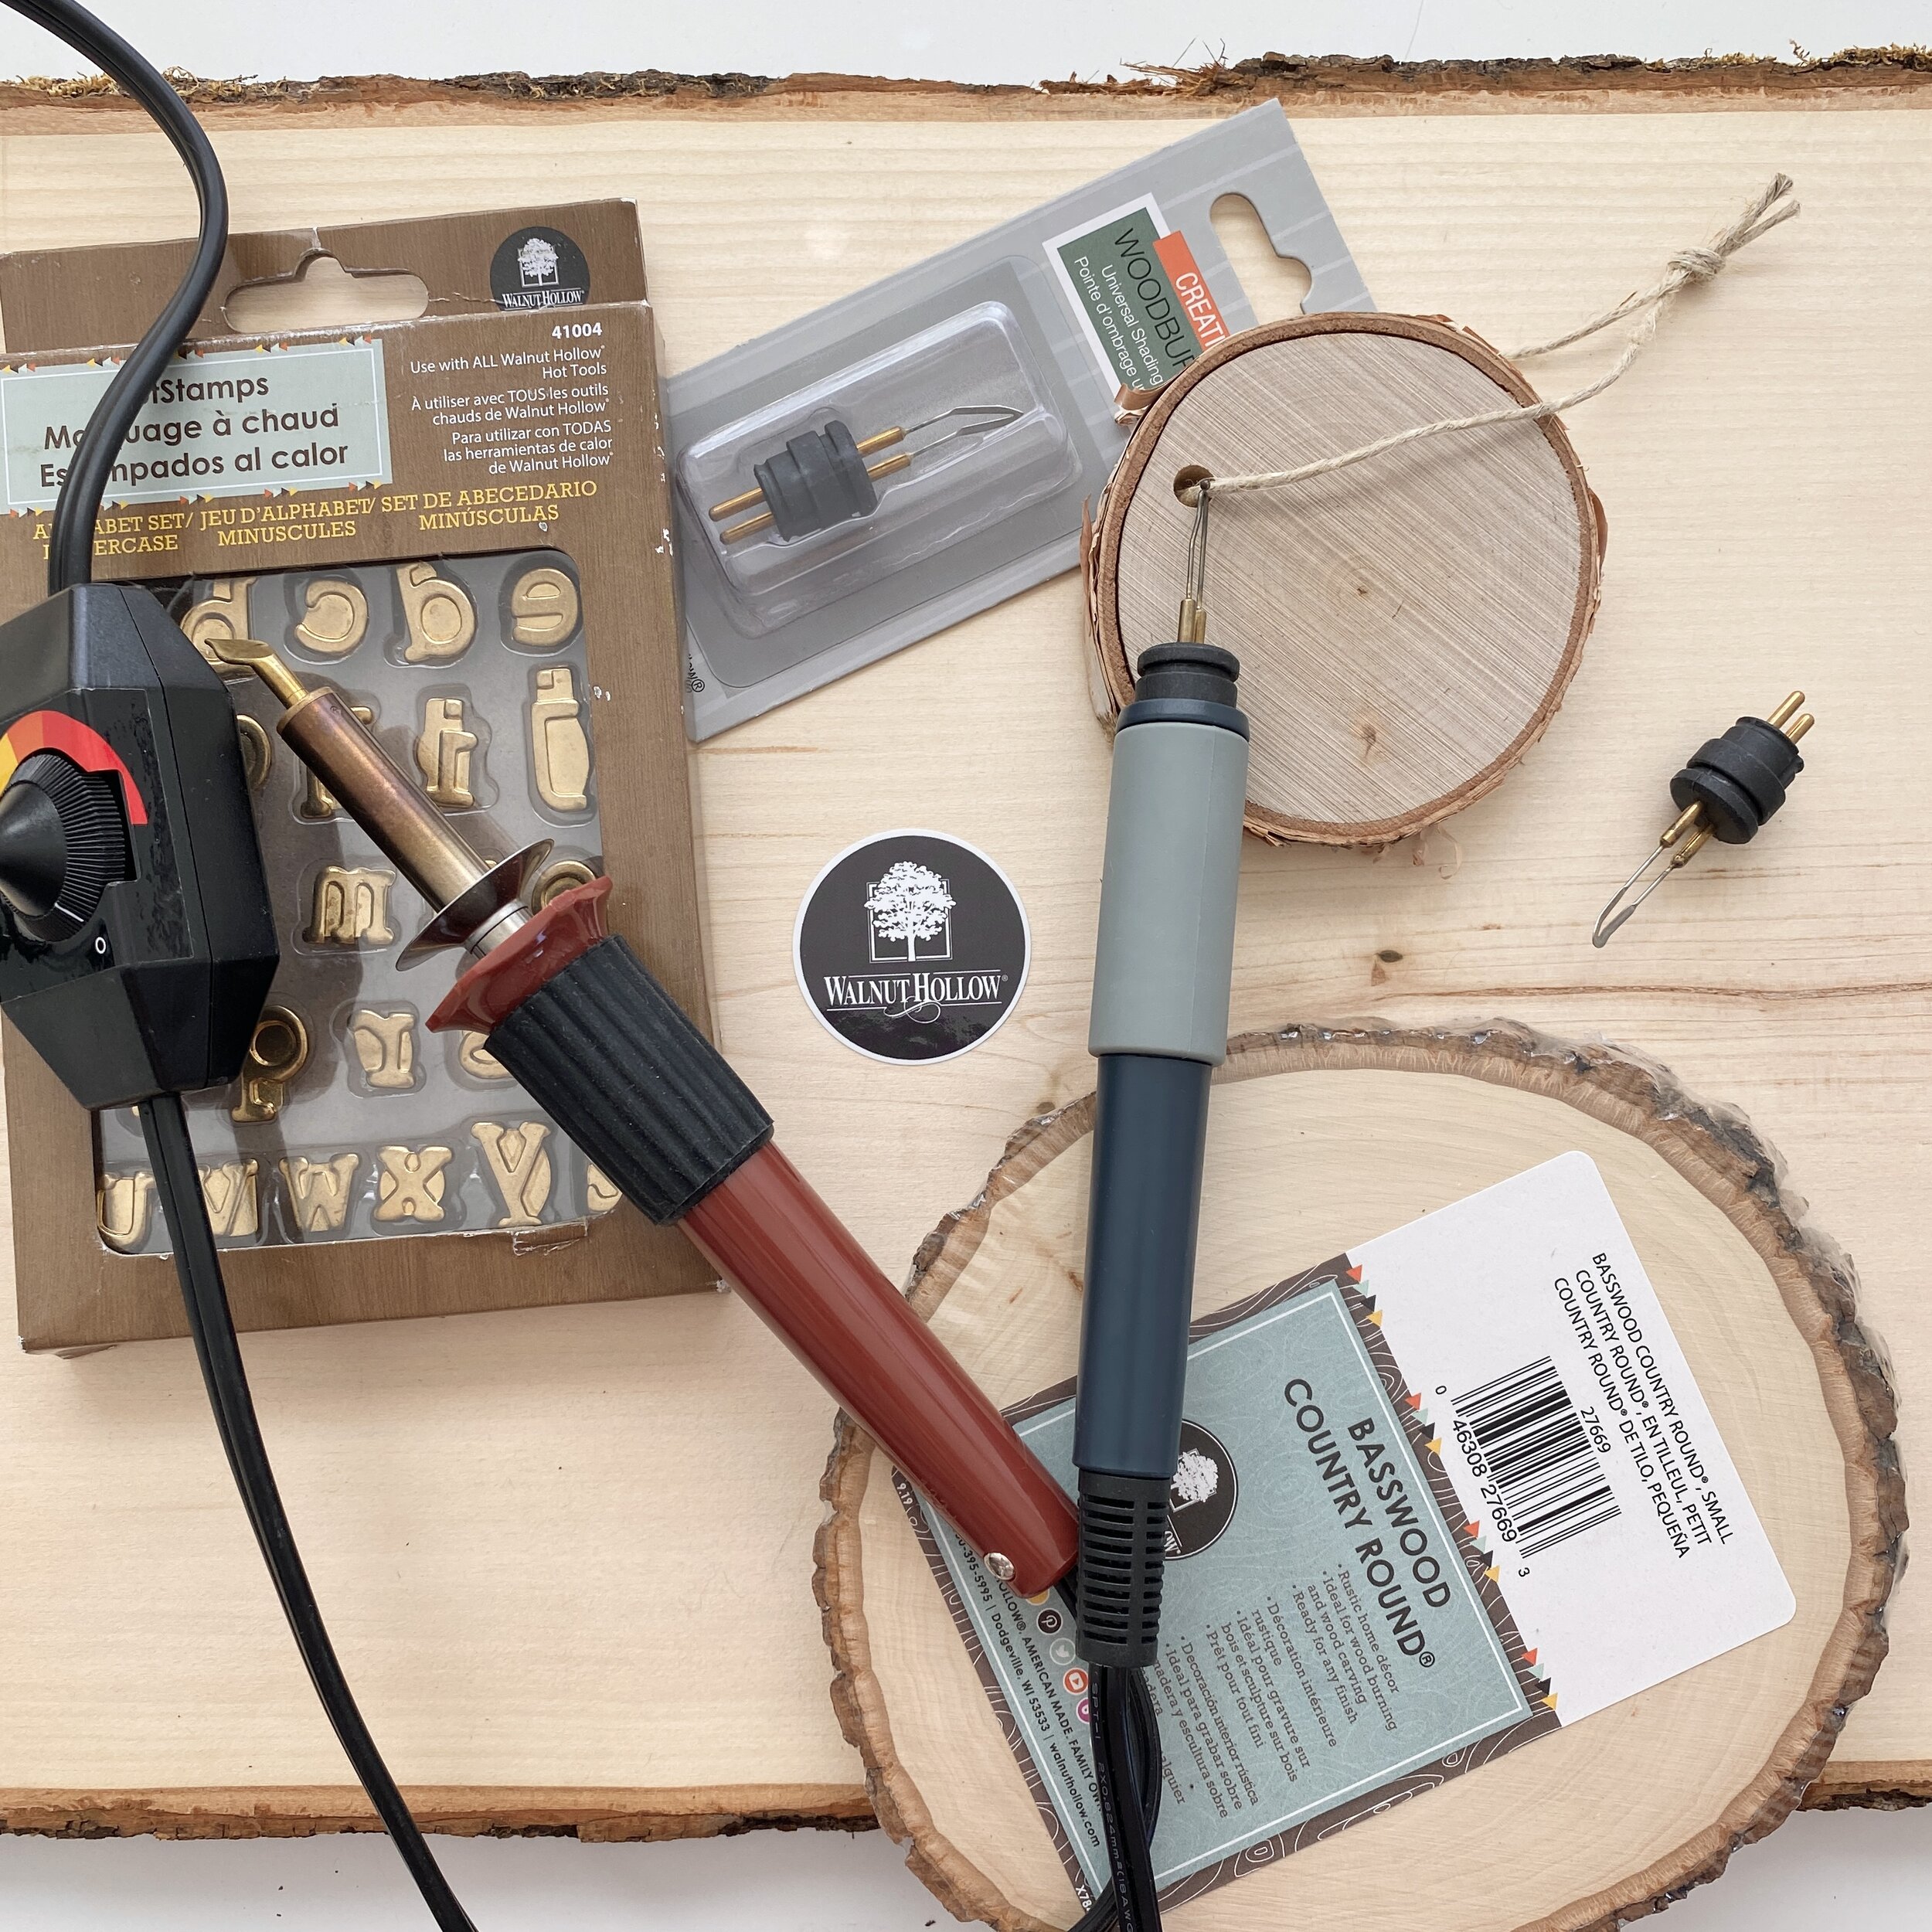
I am so pleased to have Walnut Hollow(@walnuthollow) once again sponsor this Burnt October challenge on Instagram for so many reasons. My favorite wood, and the tool that I suggest all pyrographers should own, are made by this company. (Basswood and Versatool - Both shown in the prompt image above). Walnut Hollow is incredible to work with, and it is clear they really care about their customers and community. Go check them out and all of their other offerings at walnuthollow.com.

If you would like to see what I specifically recommend on their website, head to the Wood Burn Corner section on walnuthollow.com.

DID I MENTION….. if you want a shot at winning a G I V E A W A Y box full of goodies from Walnut Hollow and a signed copy of my book, The Wood Burn Book, be sure to share this the official prompts image (above) on Instagram (or share our post) using #burntoctober and mentioning both your host @woodburncorner and our sponsor @walnuthollow before October 1st. And you will have another chance to win more goodies at the end of the month.


Cant wait to see what you aLL create.

happy burning!


Check out past Burnt Month Challenges here

Check out the Burnt October Sponsor’s Website, walnuthollow.com here


Featured Artists for Burnt October 2021


Sanding Your Wood: Before and After You Burn + Prepping Wood Surfaces for Pyrography

sanding wood in preparation for wood burning

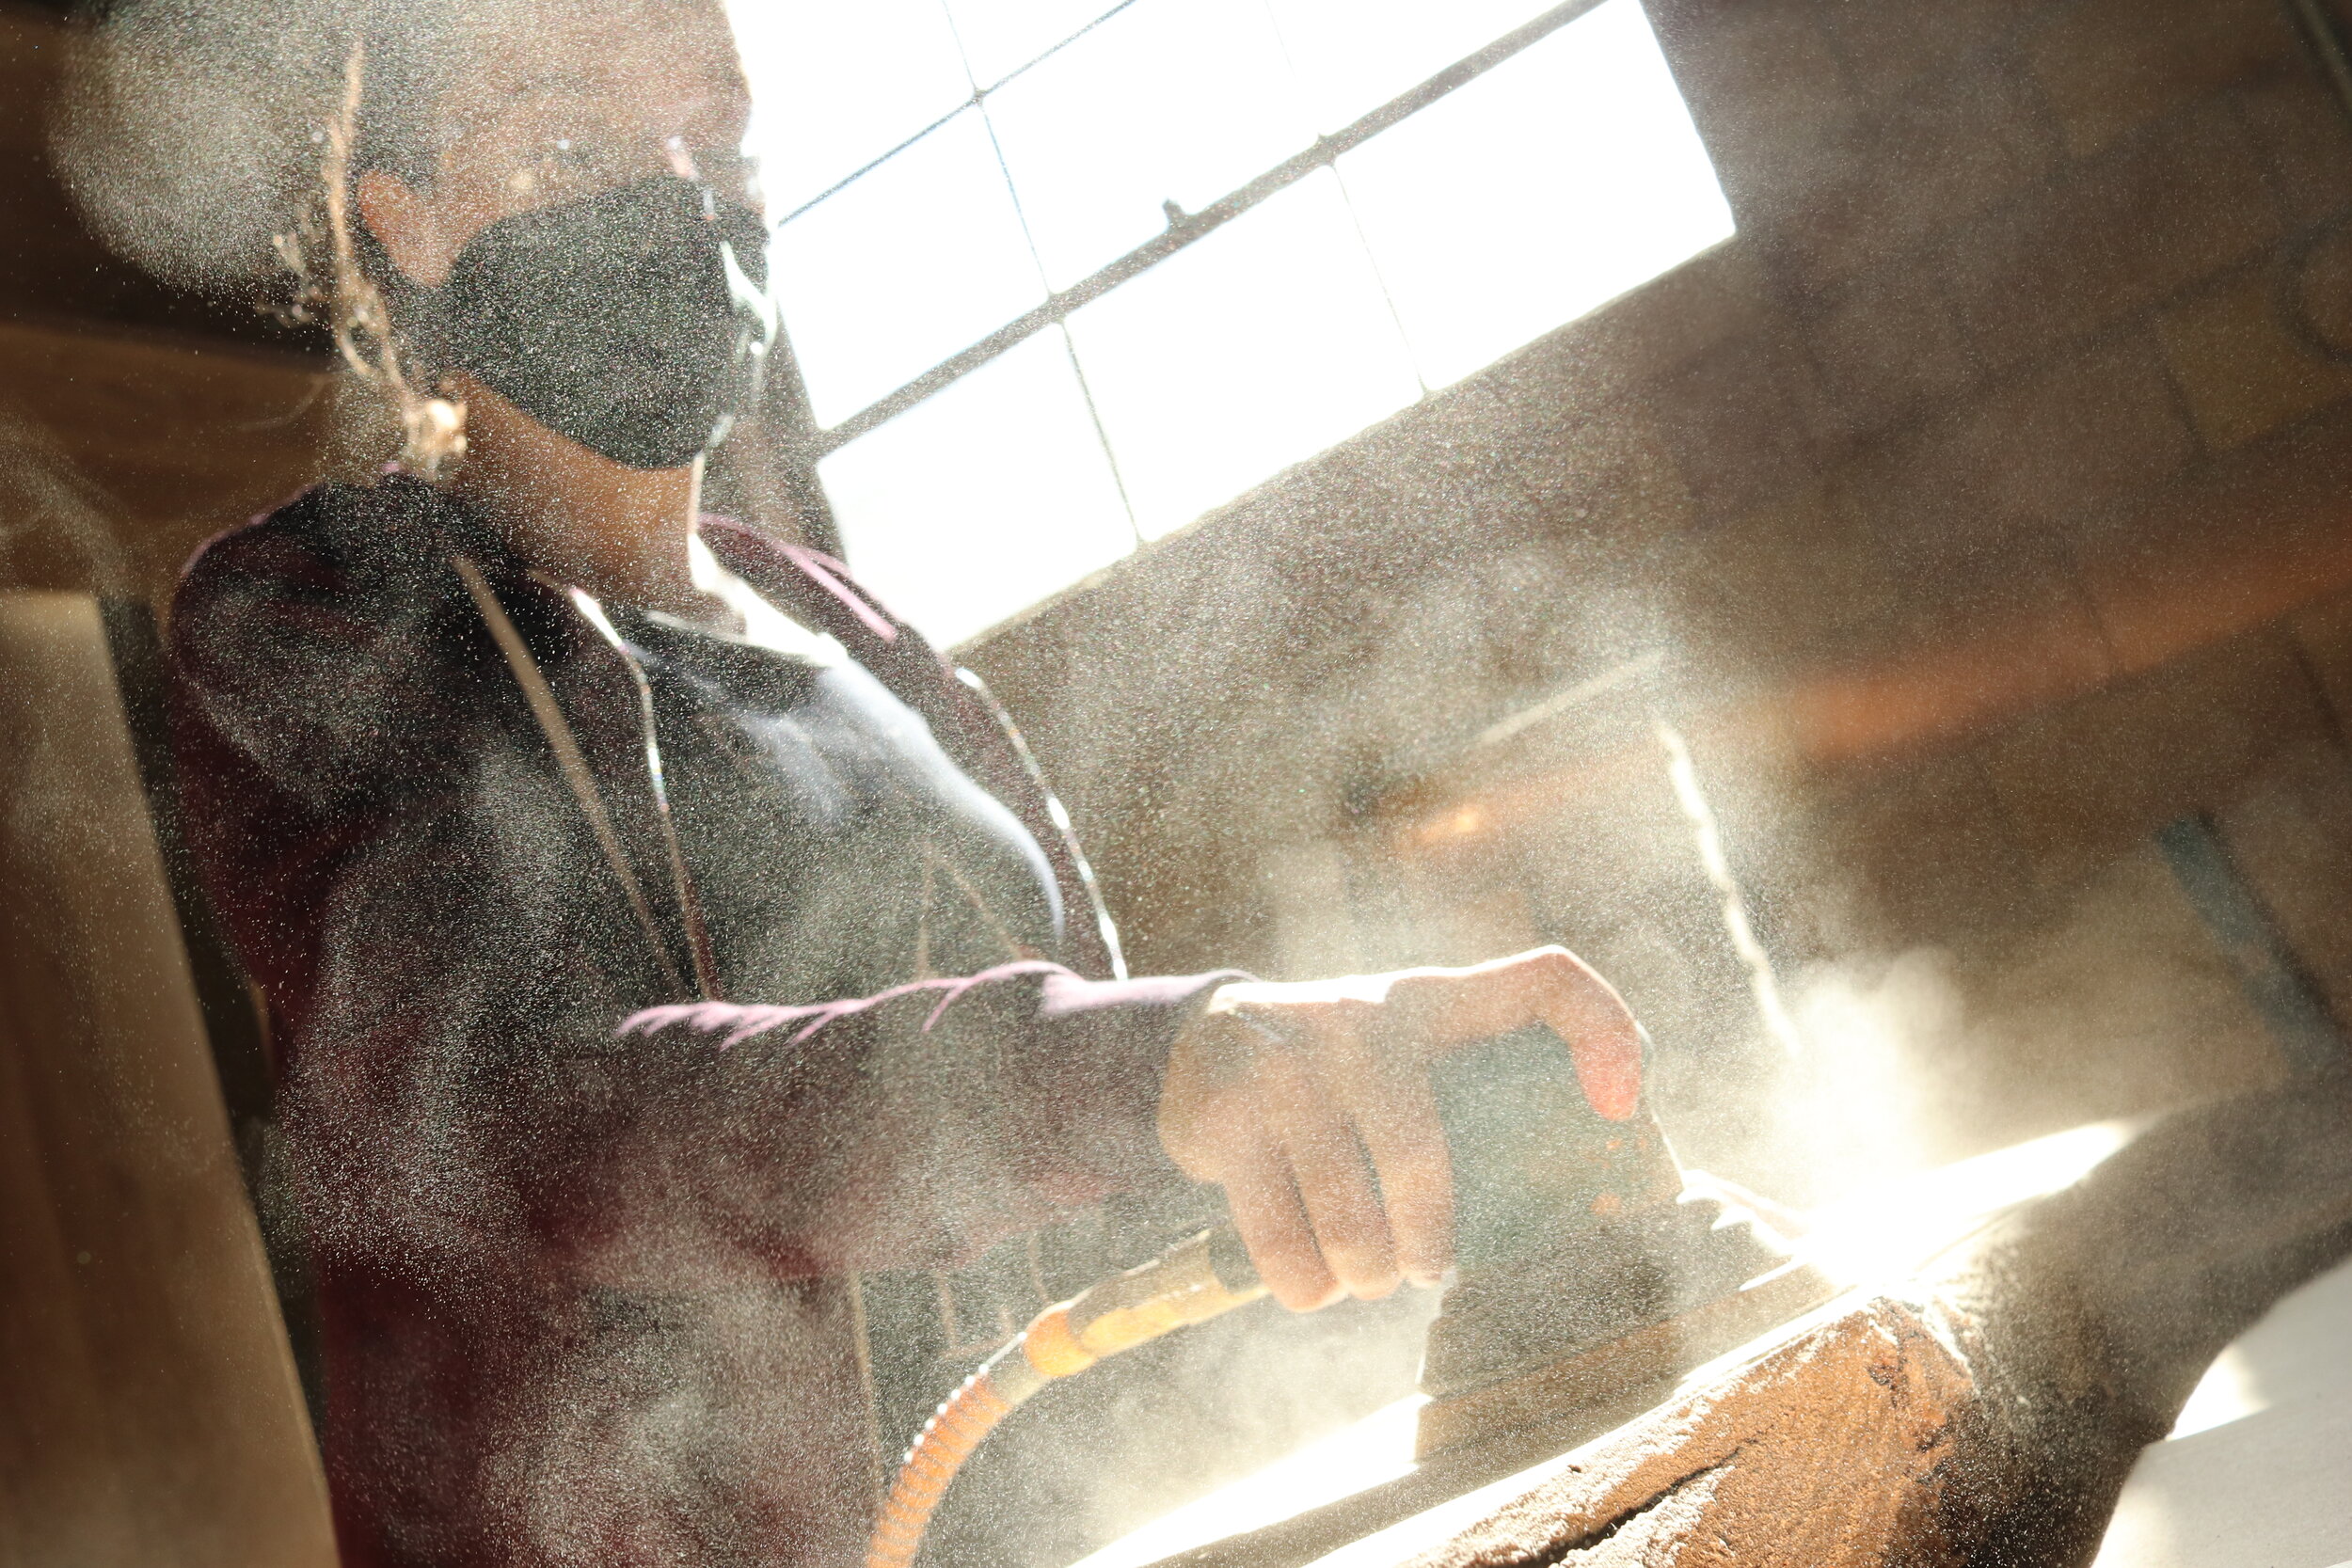
Sanding, like it or hate it, is a part of being a wood burning artist. Sanding your wood before and after you burn can make your entire piece and your burn lines crisper.

A smooth wood surface will help you create a smoother, better burn. It is worth the time it takes to make it smooth, trust us.

There are some things you can do to make the job a little easier on yourself. See the steps below to getting the perfect surface to burn on:


Prepare the workspace

Place the wood slice on a flat and stable surface that won't move during sanding. You may want to clamp it down to keep it steady.

SAFETY FIRST!

Make sure you are in a well ventilated space, have an air purifier if sharing the space and you are wearing proper safety equipment. Something to protect your eyes and your lungs. Do it every time. The last thing you want is for your art to cause you harm. Protect yourself!

My favourite mask to use for everything I do with pyrography is RZ Mask. The M model is my favourite but they have so many to choose from and in so many different colors... They all have activated carbon filters which are replaceable and the mesh mask shell and valves are washable and reusable. They are comfortable, breathable and are 99% efficient against particulates down to 0.1 microns in size.

Choose the right sandpaper

The type of sandpaper you use will depend on how rough the surface of the wood slice is. Start with a coarse grit sandpaper (60-80 grit) and gradually move to a finer grit (120-150 grit) for a smoother finish.

Understanding Grit:

In the US grit is determined based on a scale. When shopping for sandpaper, you’ll see numbers such as 80-grit, 100-grit, or 200-grit. Keep in mind:

  • The higher the number, the smaller the grains and the finer the sandpaper grit.

  • The lower numbers indicate larger grains and overall coarser sandpaper

Generally you want to start out with a lower grit (coarser sandpaper). This helps to get rid of any larger scuffs, scratch marks, bumps and/or irregularities. Then you will want to increase the grit and finish off with a finer, more gentle sandpaper to get that ultra smooth finish.

Always sand with the grain of the wood, not against

Sand your pieces before you do any wood burning to ensure clean and crisp lines. A smooth surface will be much easier to burn on, and will create a better result.

Begin sanding the wood slice using the coarse grit sandpaper. Work in the direction of the grain and use a back-and-forth motion. Sand any rough spots until they are smooth.

sanding-tip-and-tricks

Once you've sanded the rough spots with the coarse sandpaper, switch to a finer grit sandpaper. Continue sanding until the surface is smooth and free of any scratches.


Finish with the finest grit for the ultimate smoothness

For an extra-smooth finish, use the finest grit sandpaper (220 grit) to sand the surface once more at the end. This will remove any remaining scratches and leave the surface with a smooth texture.


Clean the surface

Wipe off any dust and debris from the wood slice with a clean cloth. You can also use an air compressor to get rid of any dust. Be careful to not get too close to the bark on a live edge wood slice. The strong air may remove delicate bark pieces and can come off. If you don’t have access to an air compressor, use a brush to sweep of the dust or, better yet, use a bristle attachment on a vacuum to safely capture the dust.


Sanding Tools

Please note these are Amazon Affiliate links. We only share items that we have used and love!

In the video below, I used:

RZ Mask: M (RZ Mask rocks!! My first mask was the M2 but the M has the ear straps which fit me better. They have loads of styles and sizes to choose from!!)

Dewalt Oribit Sander

Course Sandpaper: 80-100 grit

Fine Grit Sandpaper: 240 grit

Sanding after you wood burn a piece

prepping wood surface and after you burn.png

Sanding a piece after you burn removes any tracing lines as well as “overburn.” (Overburn, as you can see here on the left) is when you have a browning coloration right next to your burn line on the surface). Sanding your piece after you burn it gives your piece crisper and finer lines.

Use a 200-grit or 220-grit sandpaper (the finer the better) and remember to be super gentle when sanding at this stage, especially if you don’t burn very deep.

If you have any shading or surface burn lines, they may come off, so really; go light and slow here.

Watch how I sand my wood slices before I burn on them!


more Fun tips and tricks

Sanding sponge versus sanding block:

Since sponges form to your hand, a block sand paper will allow you to put in less effort and ensures you are sanding flat and not creating any divots. Try wrapping a sandpaper sheet to a scrap wood if you don’t have a pre-made sanding block (use a tube or pvc pipe instead of a block for contoured wood pieces)


Sanding power tools:

These come in handy! Especially if you prefer to sand your pieces in “batch work” style, meaning you sand a whole bunch all at once. I recommend this, because it is a time saver. You only have to get dirty once, you only have to pull out the tools once, and clean up the mess once. Then you have a stack of ready to go canvases. It’s awesome.


WANT TO LEARN MORE ABOUT WOOD BURNING AND IMPROVE PYROGRAPHY SKILLS?

Learn at your own pace from your home with The Complete Wood Burning Toolkit.


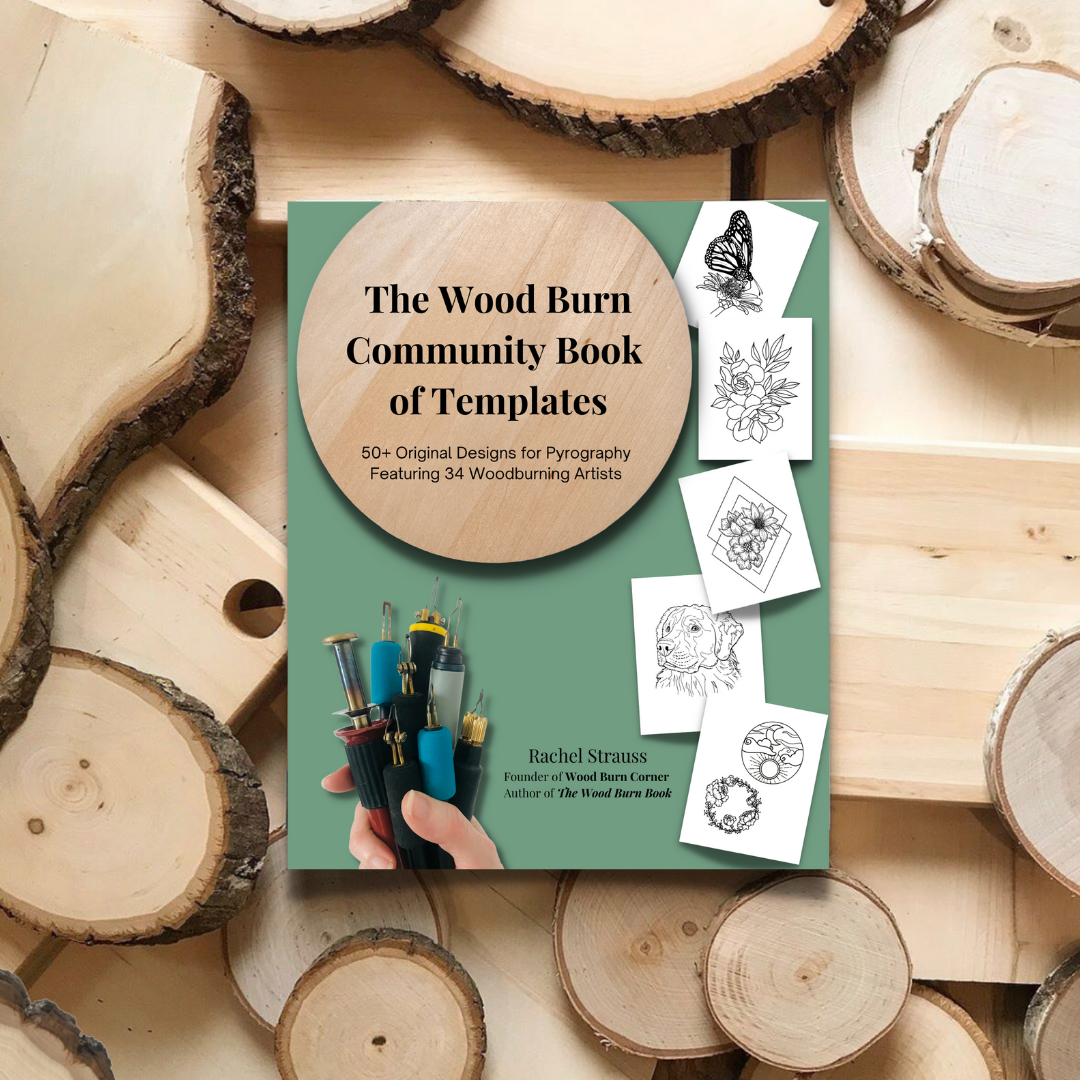
The Wood Burn Community Book of Templates

This book is a dream realized: a pyrography book of templates created by our community for the community.

stencil book for wood burning

This book of templates is a beautiful collection of designs for artists at all stages from our incredibly talented and diverse community.

pryography stencils

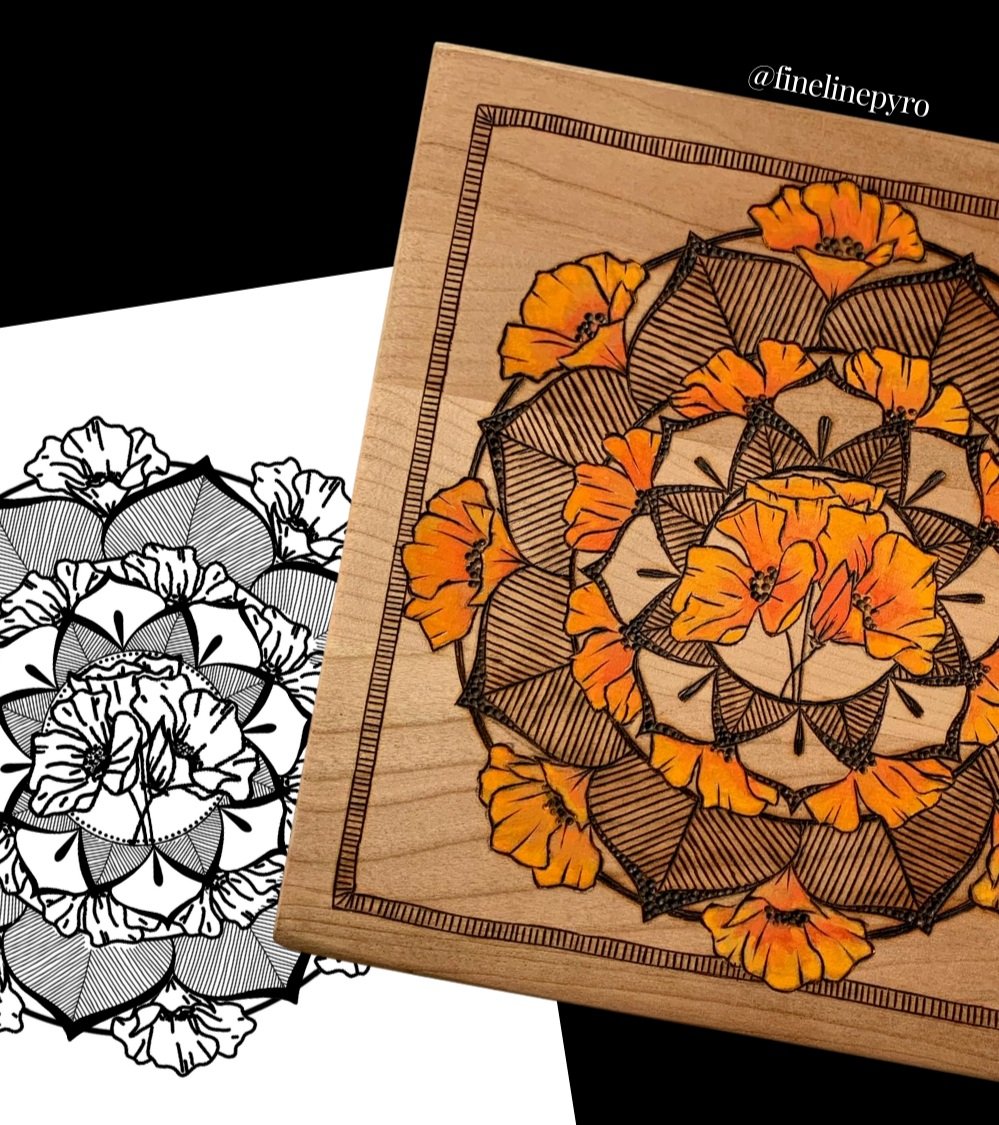
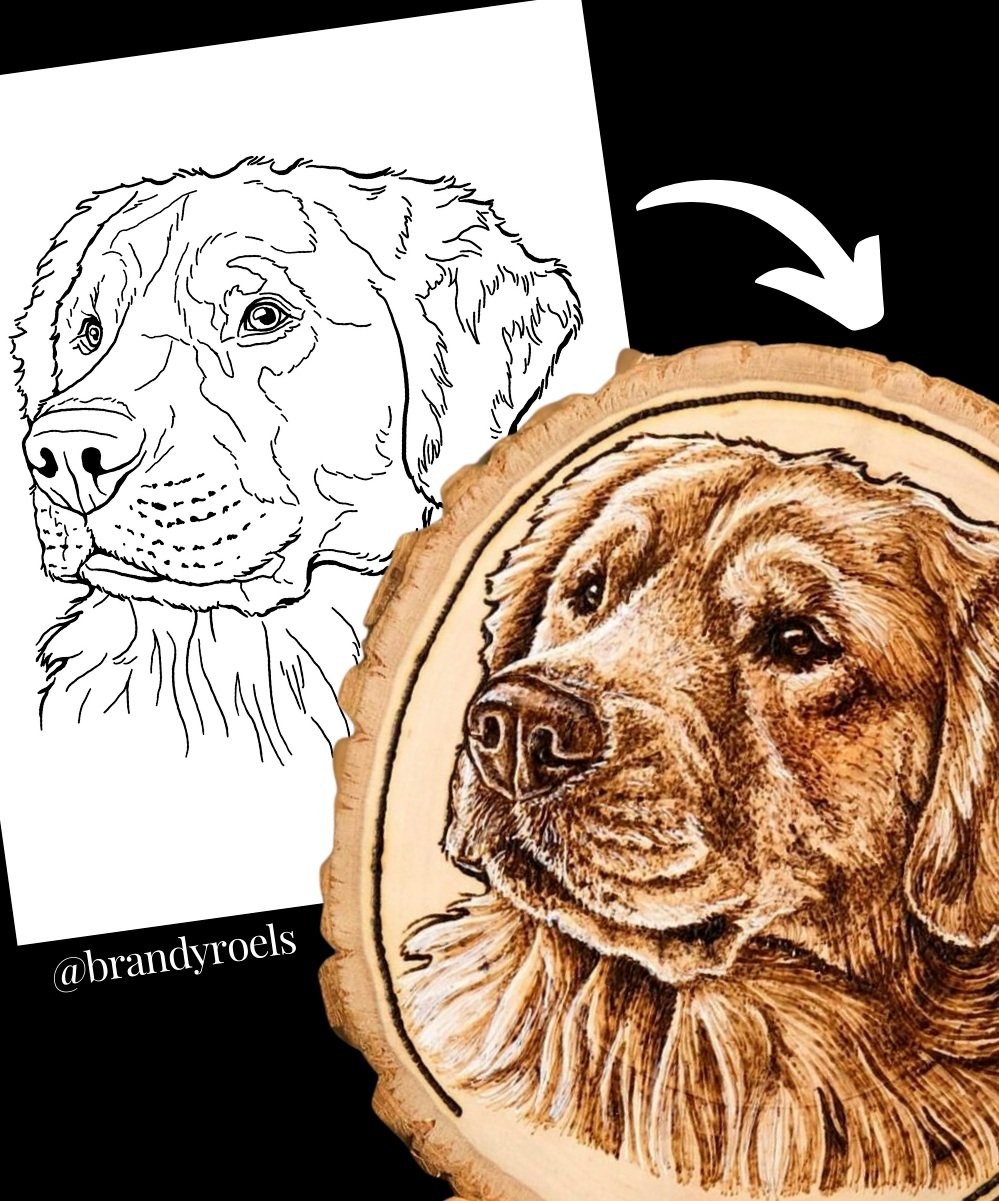
The Wood Burn Community Book of Templates features pyrography design patterns created by the community for the community. It showcases 57 original templates from 34 wood burning artists from around the globe, with the intention of helping artists of all skill levels past, present, and future to hone their craft, try new styles, and make beautiful art through collaboration. This collection of designs include mandalas, florals, animals, nature pieces, frames, and more.

Check out #thewoodburncommunitybook on instagram to view completed projects!

wood burning templates

Every one-of-a-kind piece of art you create from these community templates is a collaboration! Each design can be interpreted in an infinite number of ways.

4.png

The artists featured in the template book are below. Please click the links and give them a follow!

Rachel Strauss, author of The Wood Burn Book, founder of Burn Club and Wood Burn Corner, also includes a basic wood burning quickstart guide, and provides you with a list of essential materials needed for pyrography. She offers information on getting involved in the community, before presenting you with a feast of artwork, each begging to become your next creation!

pyrography basics
 
 
Templates-Book-with-traceable-patterns
Templates-Book- with-wood-burning-patterns.jpg
 

Want more patterns?

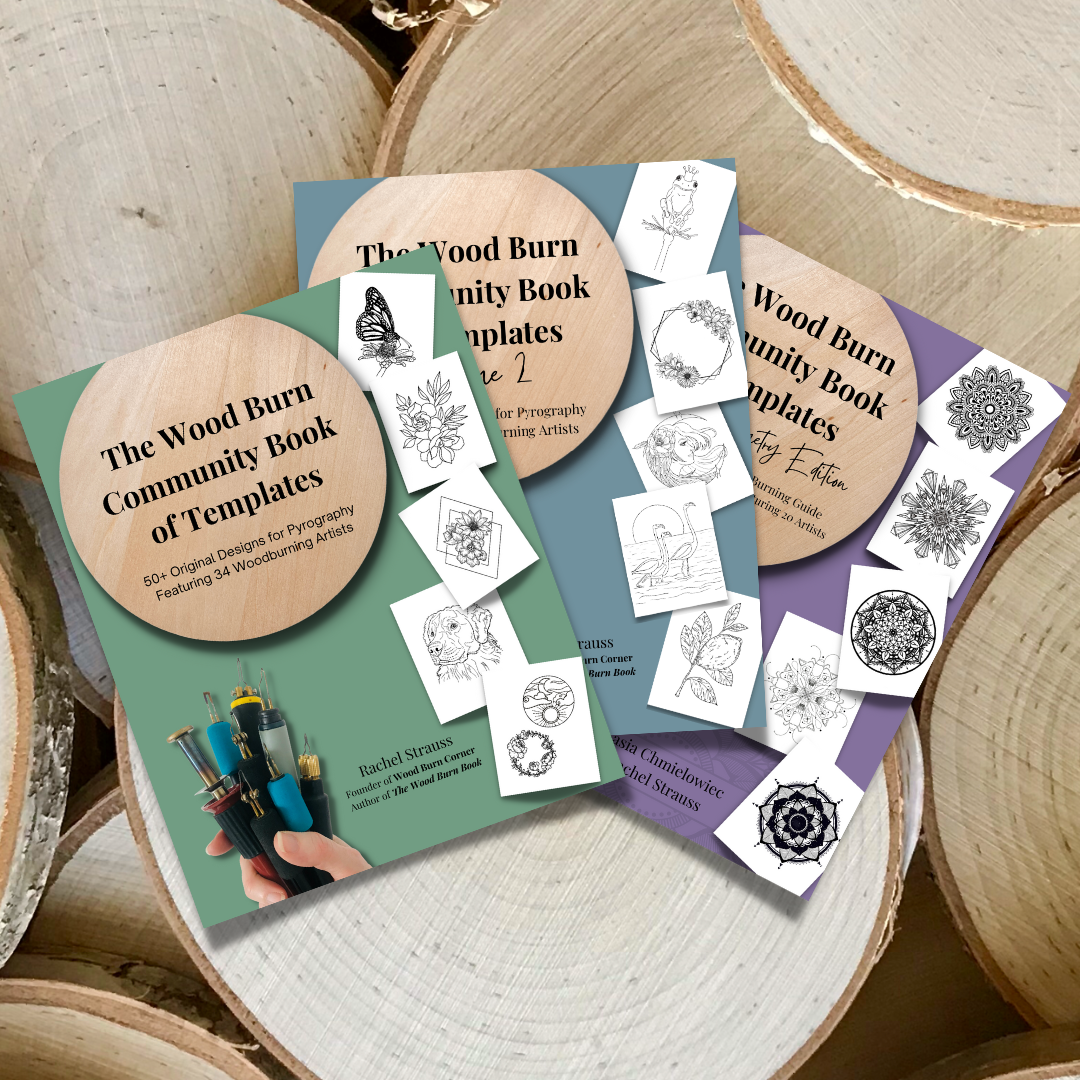
Check out all the TEMPLATE books or VISIT the templates store full of individual patterns for sale

Looking for Rachel’s first book; The Wood Burn Book?


10 Pyrography Book Recommendations

pyrography books

There are so many pyrography books out there and it can be difficult to choose which to own. Well, lucky for you, I have gone through almost all of them (seriously, I own over 20 pyrography books!) and have picked out my top ten favorite pyrography books.

When I set out to write my book, The Wood Burn Book, I knew I wanted something that was different. My style of pyrography didn’t feel like the rest of the books out there. I wanted something that fit my style. Something that felt fresh, clean, modern, and jam packed full of the best information. I wanted something that involved our awesome community. I wanted to showcase the versatility of pyrography and the infinite number of ways you can use it. I wanted to give the reader all the information they need to create beautiful pieces of art from wood and burner to literal finish, and I am beyond proud of the finished product. The Wood Burn Book truly is an essential guide to pyrography, and I hope you pick yourself up a copy.

template-books-for-pyrography

You should also check out The Wood Burn Community Book of Templates Series. This gem includes over 50 designs from 34 different pyrographers for you to practice your pyro skills with patterns you will actually enjoy burning!

While The Wood Burn Book is my favorite pyrography book, I also have many others that I think are fabulous for people wanting to learn this craft. Introducing my list of Top Ten Pyrography Books. *These are Amazon Affiliate links, and they will take you directly to Amazon where you can purchase them

Top 10 Pyrography Books:

  1. The Wood Burn Book - Rachel Strauss

  2. Drawing with Fire - Aney Carver

  3. Yearn to Burn - Simon Easton

  4. Art and Craft of Pyrography - Lora S. Irish

  5. Woodburning Realistic Animals - Minisa Robinson

  6. Pyrography Workbook a Complete Guide - Sue Walters

  7. Learn to Burn a Step by Step Guide - Simon Easton

  8. Creative Woodburning - Bee Locke

  9. WoodBurning Projects and Patterns For Beginners - Minisa Robinson

  10. Big Book of Pyrography - Pyrography Magazine

If I could only choose 3, I would go with: The Wood Burn Book - Rachel Strauss, Creative Woodburning - Bee Locke and Woodburning Realistic Animals - Minisa Robinson but you really can’t go wrong with any of the books listed above.

12 Runner Ups:

  1. Pyrography Basics - Lora S. Irish

  2. Pyrography For Beginners - Derk Shaw 

  3. The Pyrography Beginners Workbook - Clayton M. Rines

  4. The Little Book of Pyrography - Lora S. Irish

  5. Woodburning Realistic People - Jo Schwartz

  6. Pyrography Patterns - Sue Walters

  7. Woodburning Project and Pattern Treasury - Deborah Pompano

  8. Landscape Pyrography Techniques and Projects - Lora S. Irish

  9. Solid-Point Pyrogpraphy - Lisa Shackleton

  10. Pyrography - 18 Step-by-step Projects to Make - Bob Neill

  11. Great Book of Woodburning - Lora S. Irish

  12. The Wood Burning Community Book of Templates - Rachel Strauss and Basia Chmielowiec

If you buy any books from these awesome authors, make sure to leave them a review, and happy burning!


WANT TO LEARN MORE ABOUT WOOD BURNING AND IMPROVE PYROGRAPHY SKILLS?

Grow with the community: Join Burn Club, a place where you can ask questions, and get the full answers, a place of fun and learning (just scroll to the bottom)


Interview with Peggy Dean of The Pigeon Letters

interview with peggy dean of the pigeon letters

This interview with Peggy Dean of @thepigeonletters covers so many different topics. Peggy Dean is a powerhouse, and I am so excited for you to learn from her. If you aren't in her membership service, The Flock, following her on social, own any of her books, or learn from her dozens and dozens of classes on Skillshare, you are missing out! This is a woman who believes in the power of community and information sharing, and she doesn't hold anything back in this interview. I hope you enjoy.


This interview was created for Burn Club+ in 2020, and was just now released to the public.

Grow with the community and get first access to interviews, exclusive tutorials and lessons by joining Burn Club+, a place where you can ask questions, and get the full answers, a place of fun and learning.


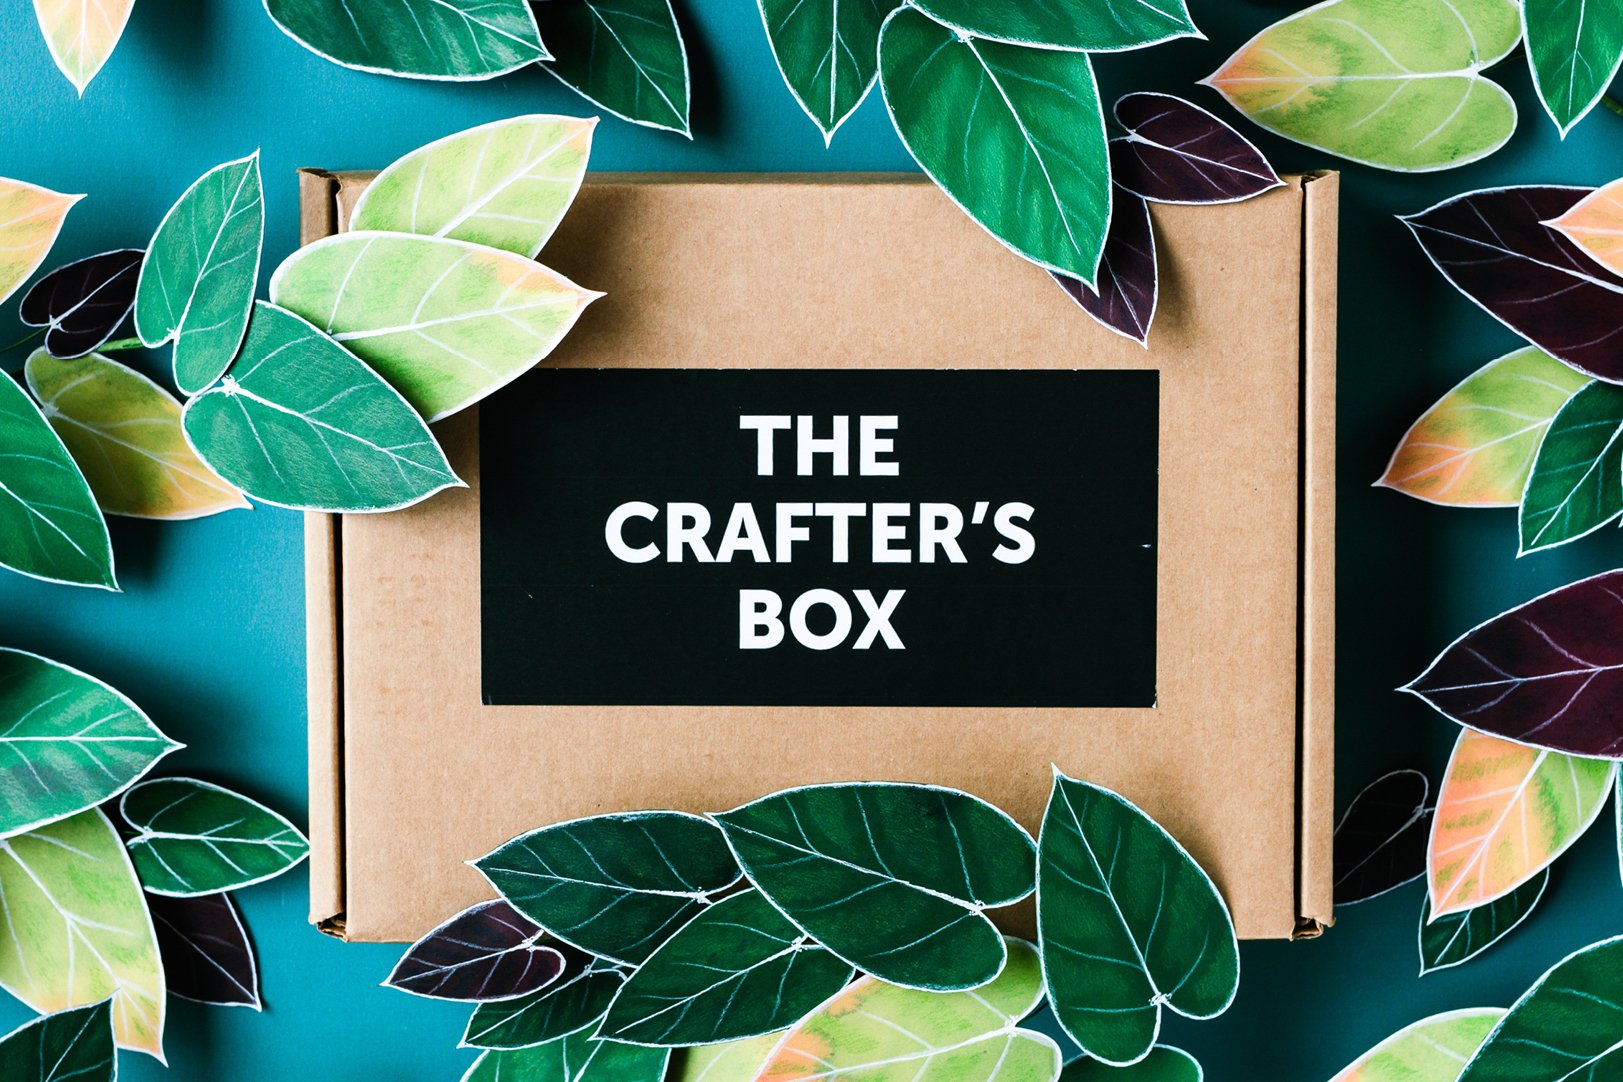
The Crafters Box - Crafting Done Right

the-crafters-box
2019-11_materialskit_roundcheeseboard_burned2_1000 2.JPG

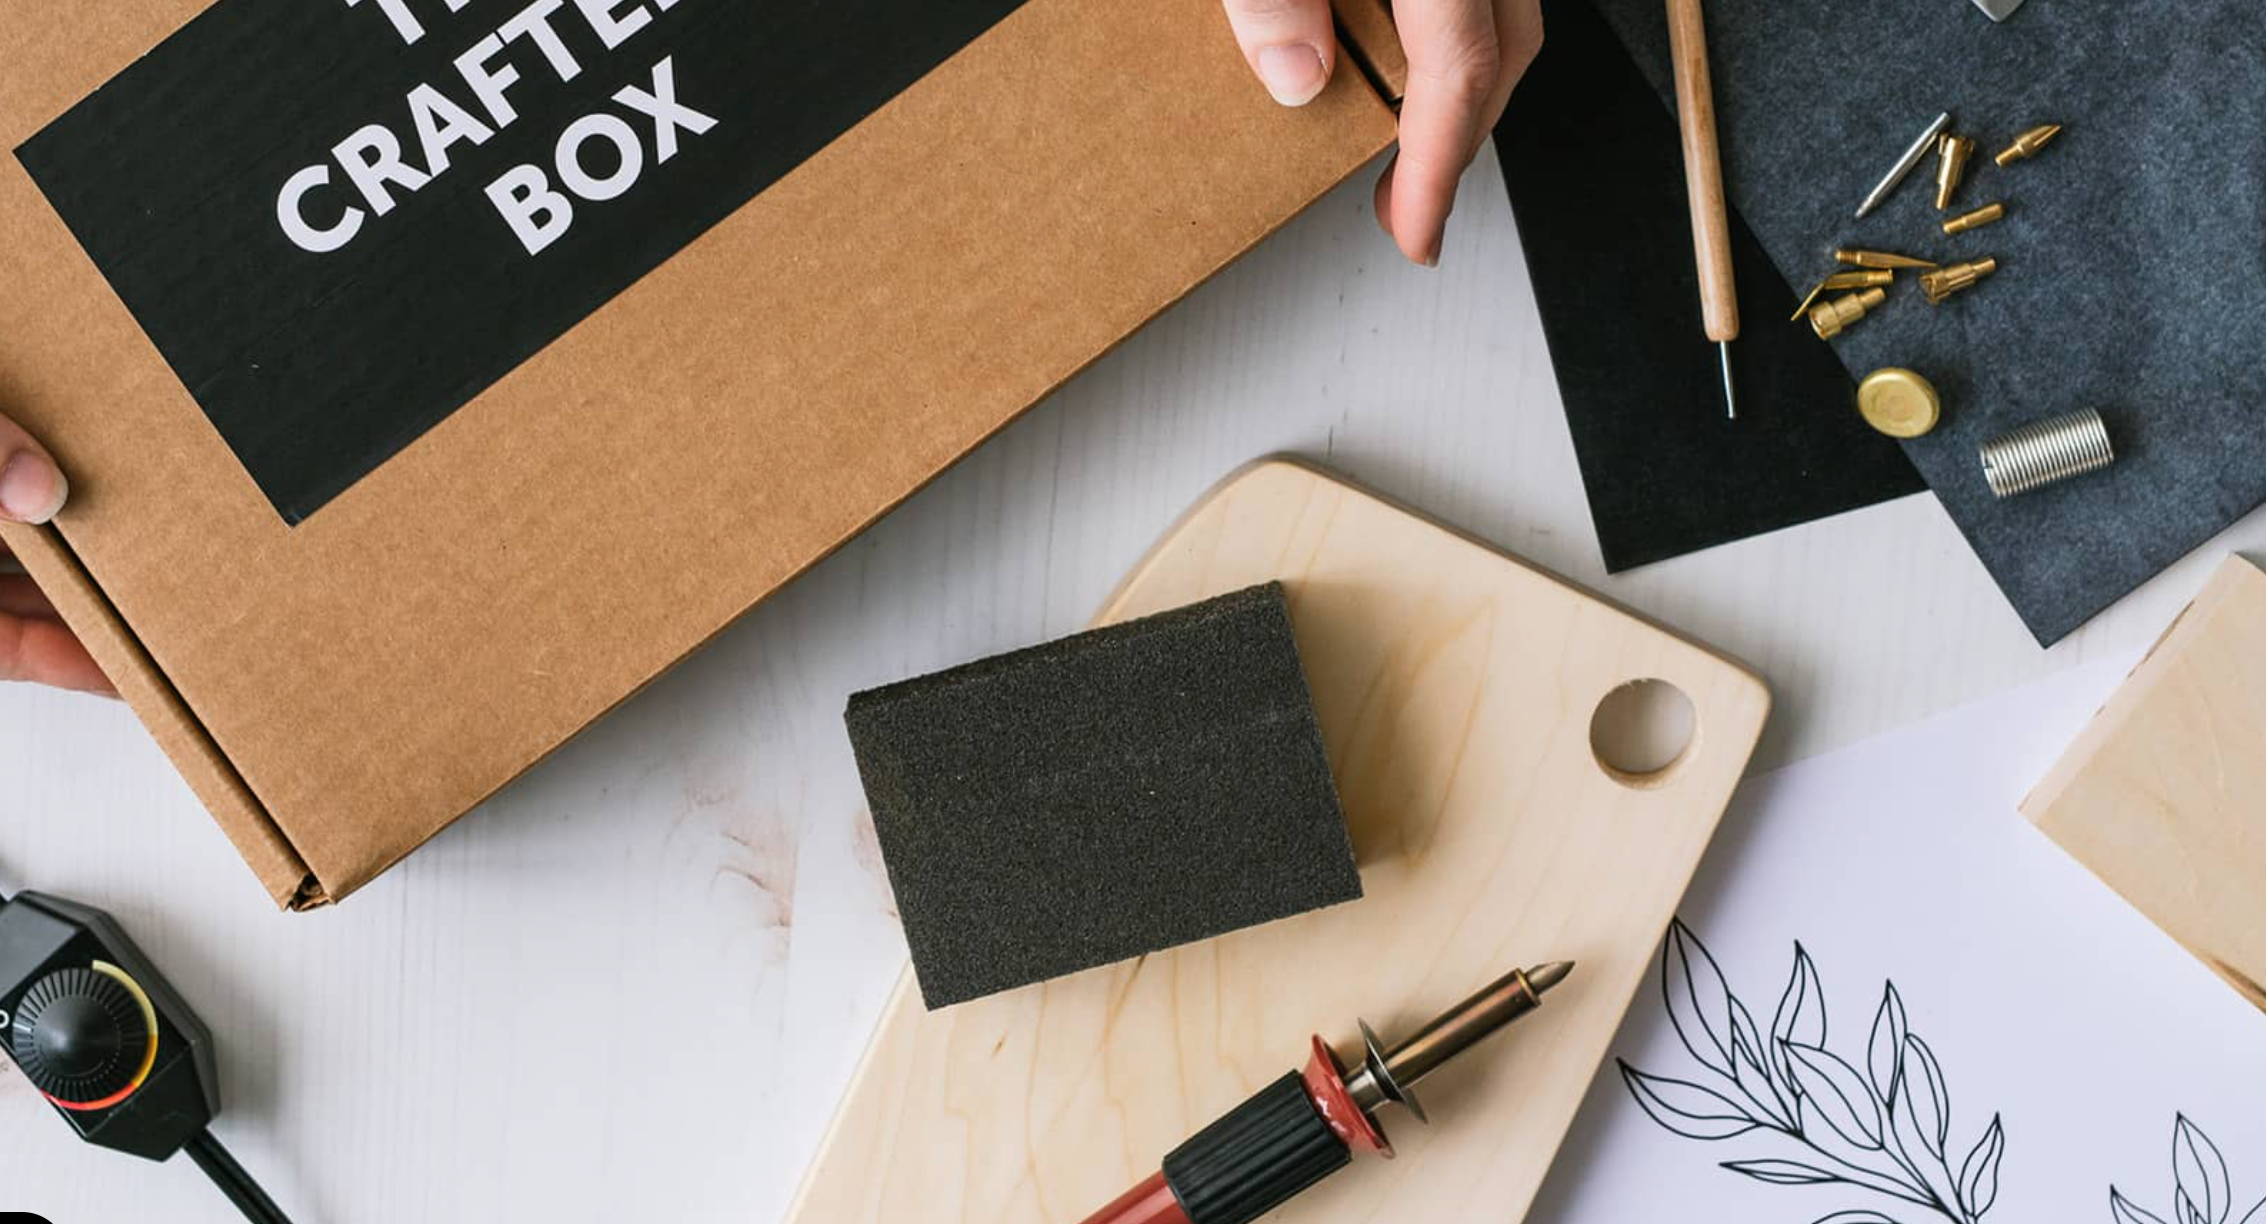
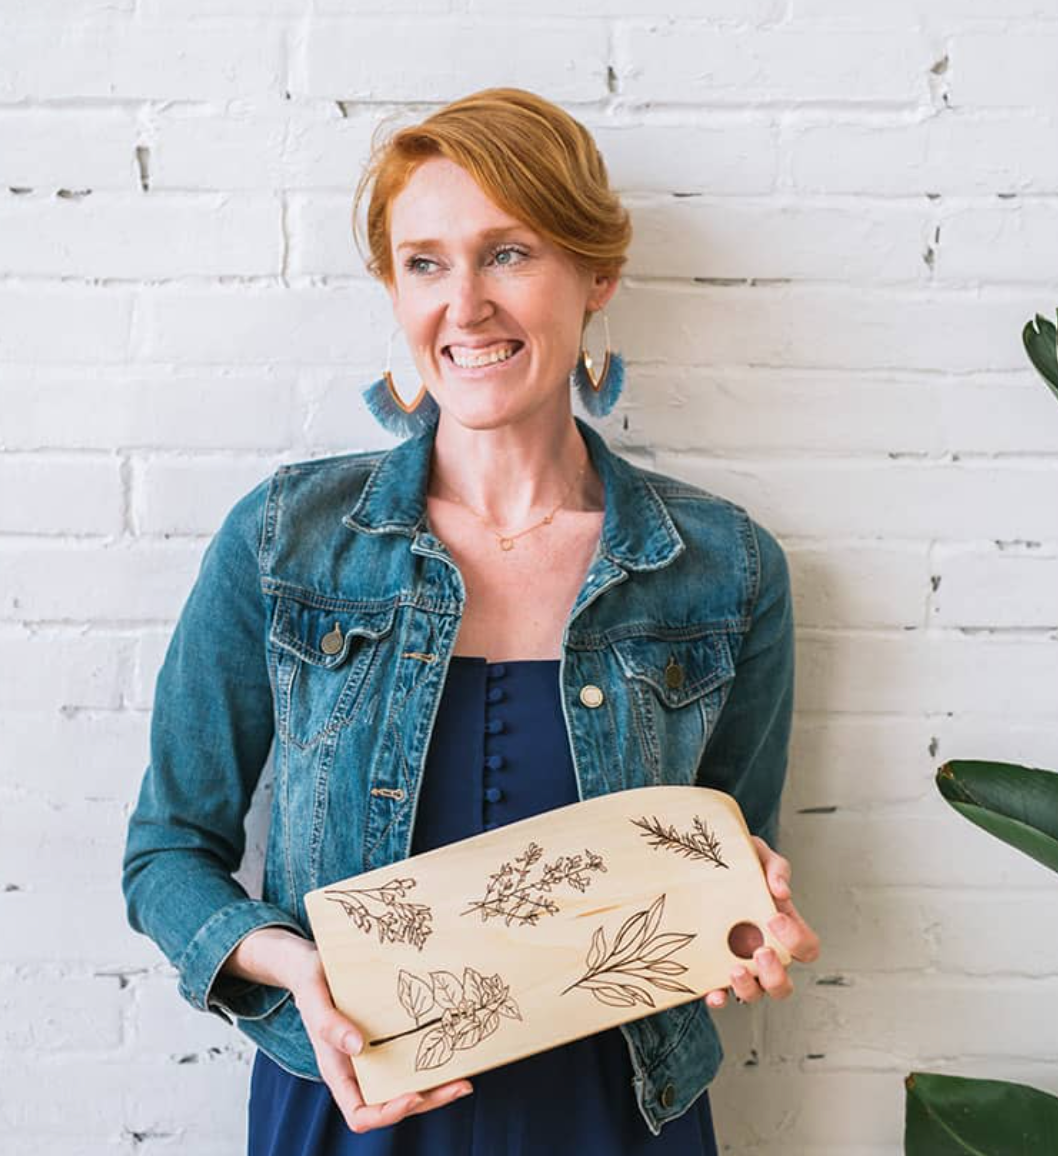
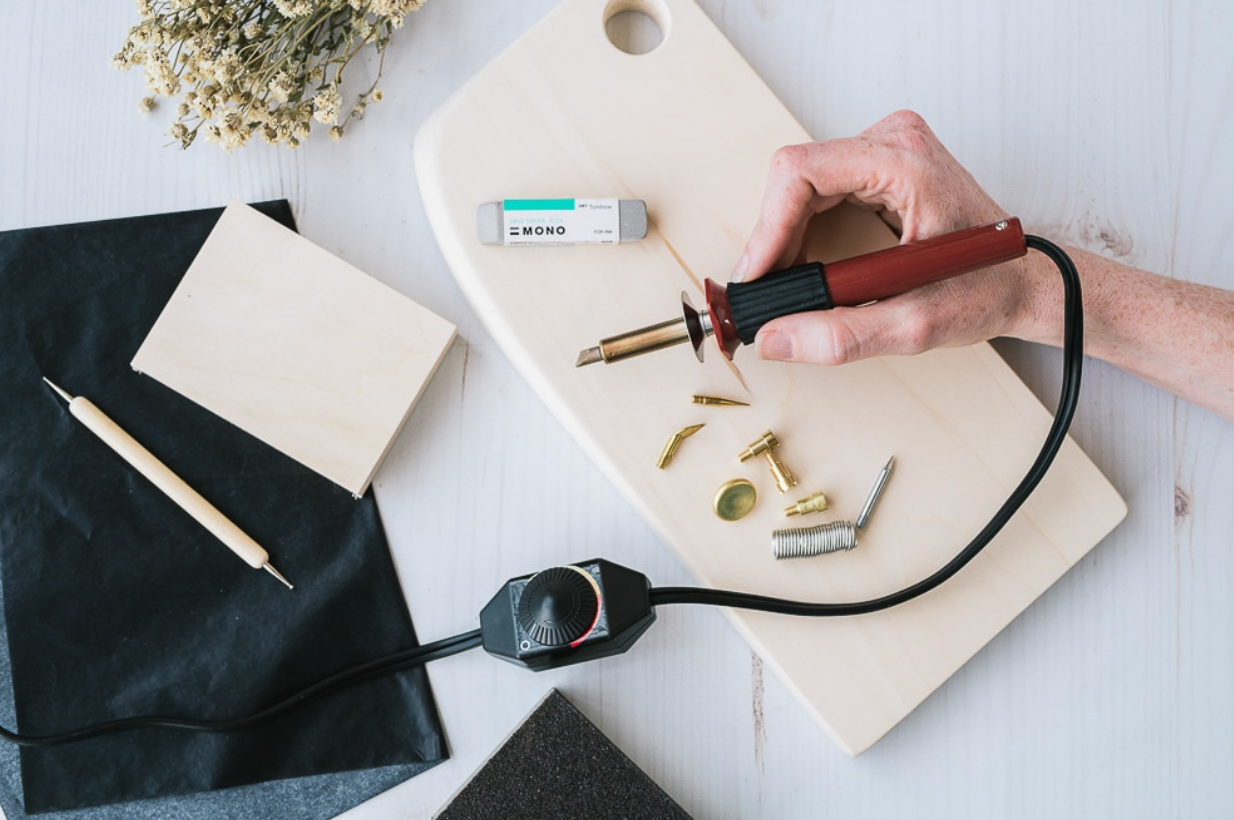
The Crafters Box is an amazing small business run by female entrepreneurs that support handmade makers. It is a service where they provide AMAZING, high-end, slow-craft kits with accompanying videos by experts to teach the new and interesting crafts, like pyrography.

Screen Shot 2021-03-31 at 1.15.37 PM.png

I was tapped to do an introduction to a wood burning class, and you can find it and the add-on wood items here. The quality of materials The Crafters Box uses is so good. Everything is well thought out, and their attention to detail shows.

Screen Shot 2021-03-31 at 1.13.48 PM.png

There are also so many incredible crafts to try. I, myself have tried my hand at spoon carving, geometric painting, color-blocked landscapes, quilling, and a couple others…

Use this link, and check out all the amazing classes The Crafter’s Box has to offer.

These kits and classes are crafting done right! I know you will enjoy them as much as I have been enjoying them.

Check out all that The Crafter’s Box has to offer here.


How To Transfer Designs To Wood Without Using Heat

how to put a picture onto wood

If you want to learn all the ways we transfer designs to wood, check out The Wood Burn Book by Rachel Strauss.

To get started with a design, grab one of our free templates, check out our template books or visit the templates store!


top 3 ways to easily transfer an image onto wood


1.GRAPHITE

Note: you may come across carbon paper which looks the same and transfers the same. The biggest difference is that carbon is much harder to get off of the wood after the transfer so stick to graphite when you can!

how to get a design onto wood

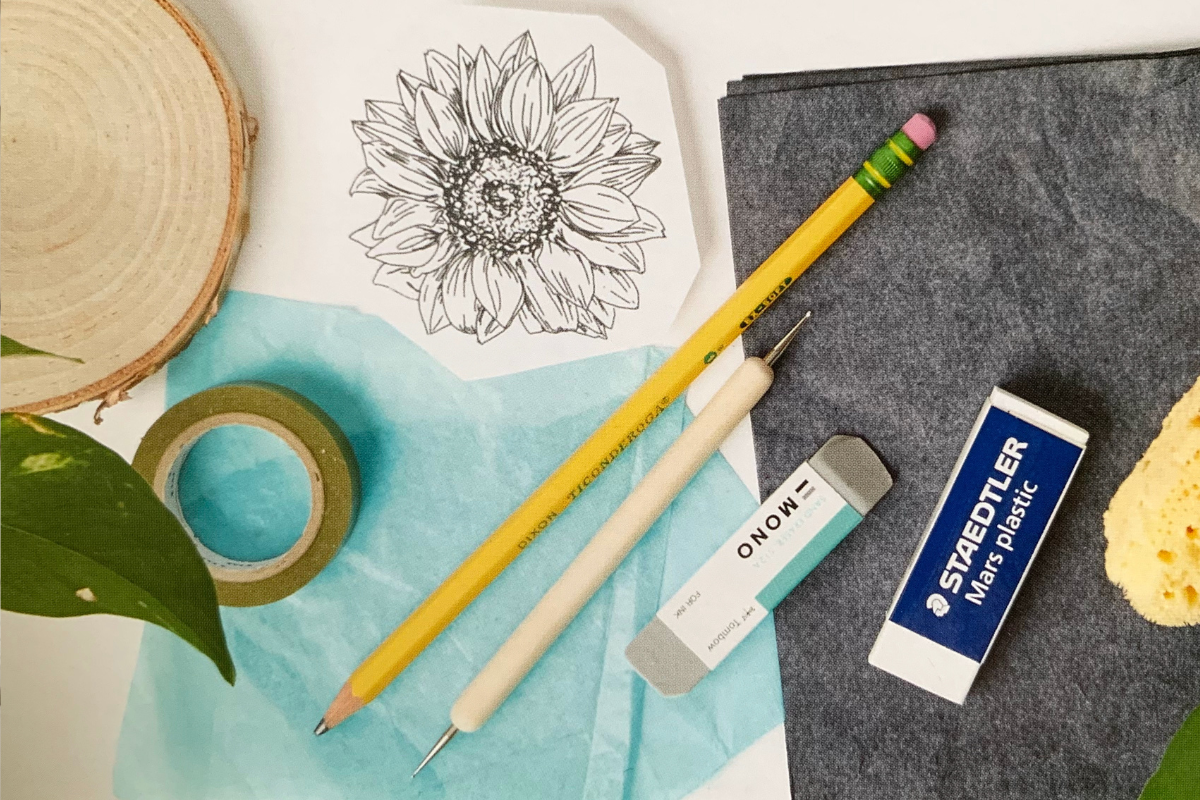
PRO’s Only need graphite paper, design, tape and a pencil. Low cost, easy to use and does a great job transferring even detailed designs. Graphite paper can be reused numerous times, and your designs can be used again as well.

CON’s: Graphite doesn’t remove easily on wood, so you have to be really careful with the transferring (don’t press too hard). Accidental smudges can happen easily. Store graphite separately from wood to make sure they don’t rub together. If you do get any smudges or leftover graphite, there is a chance you can save it by giving it a gentle sand with a 180 to 220 grit sandpaper (a finer grit sandpaper). Here are some other ways to remove leftover lines from transferring or drawing your design.

How to transfer using graphite:

  1. After you’ve chosen a design and sized it to your sanded down wood slice; line it up and secure it using tape.

  2. Slide the graphite paper, dark side facing the wood, underneath the design.

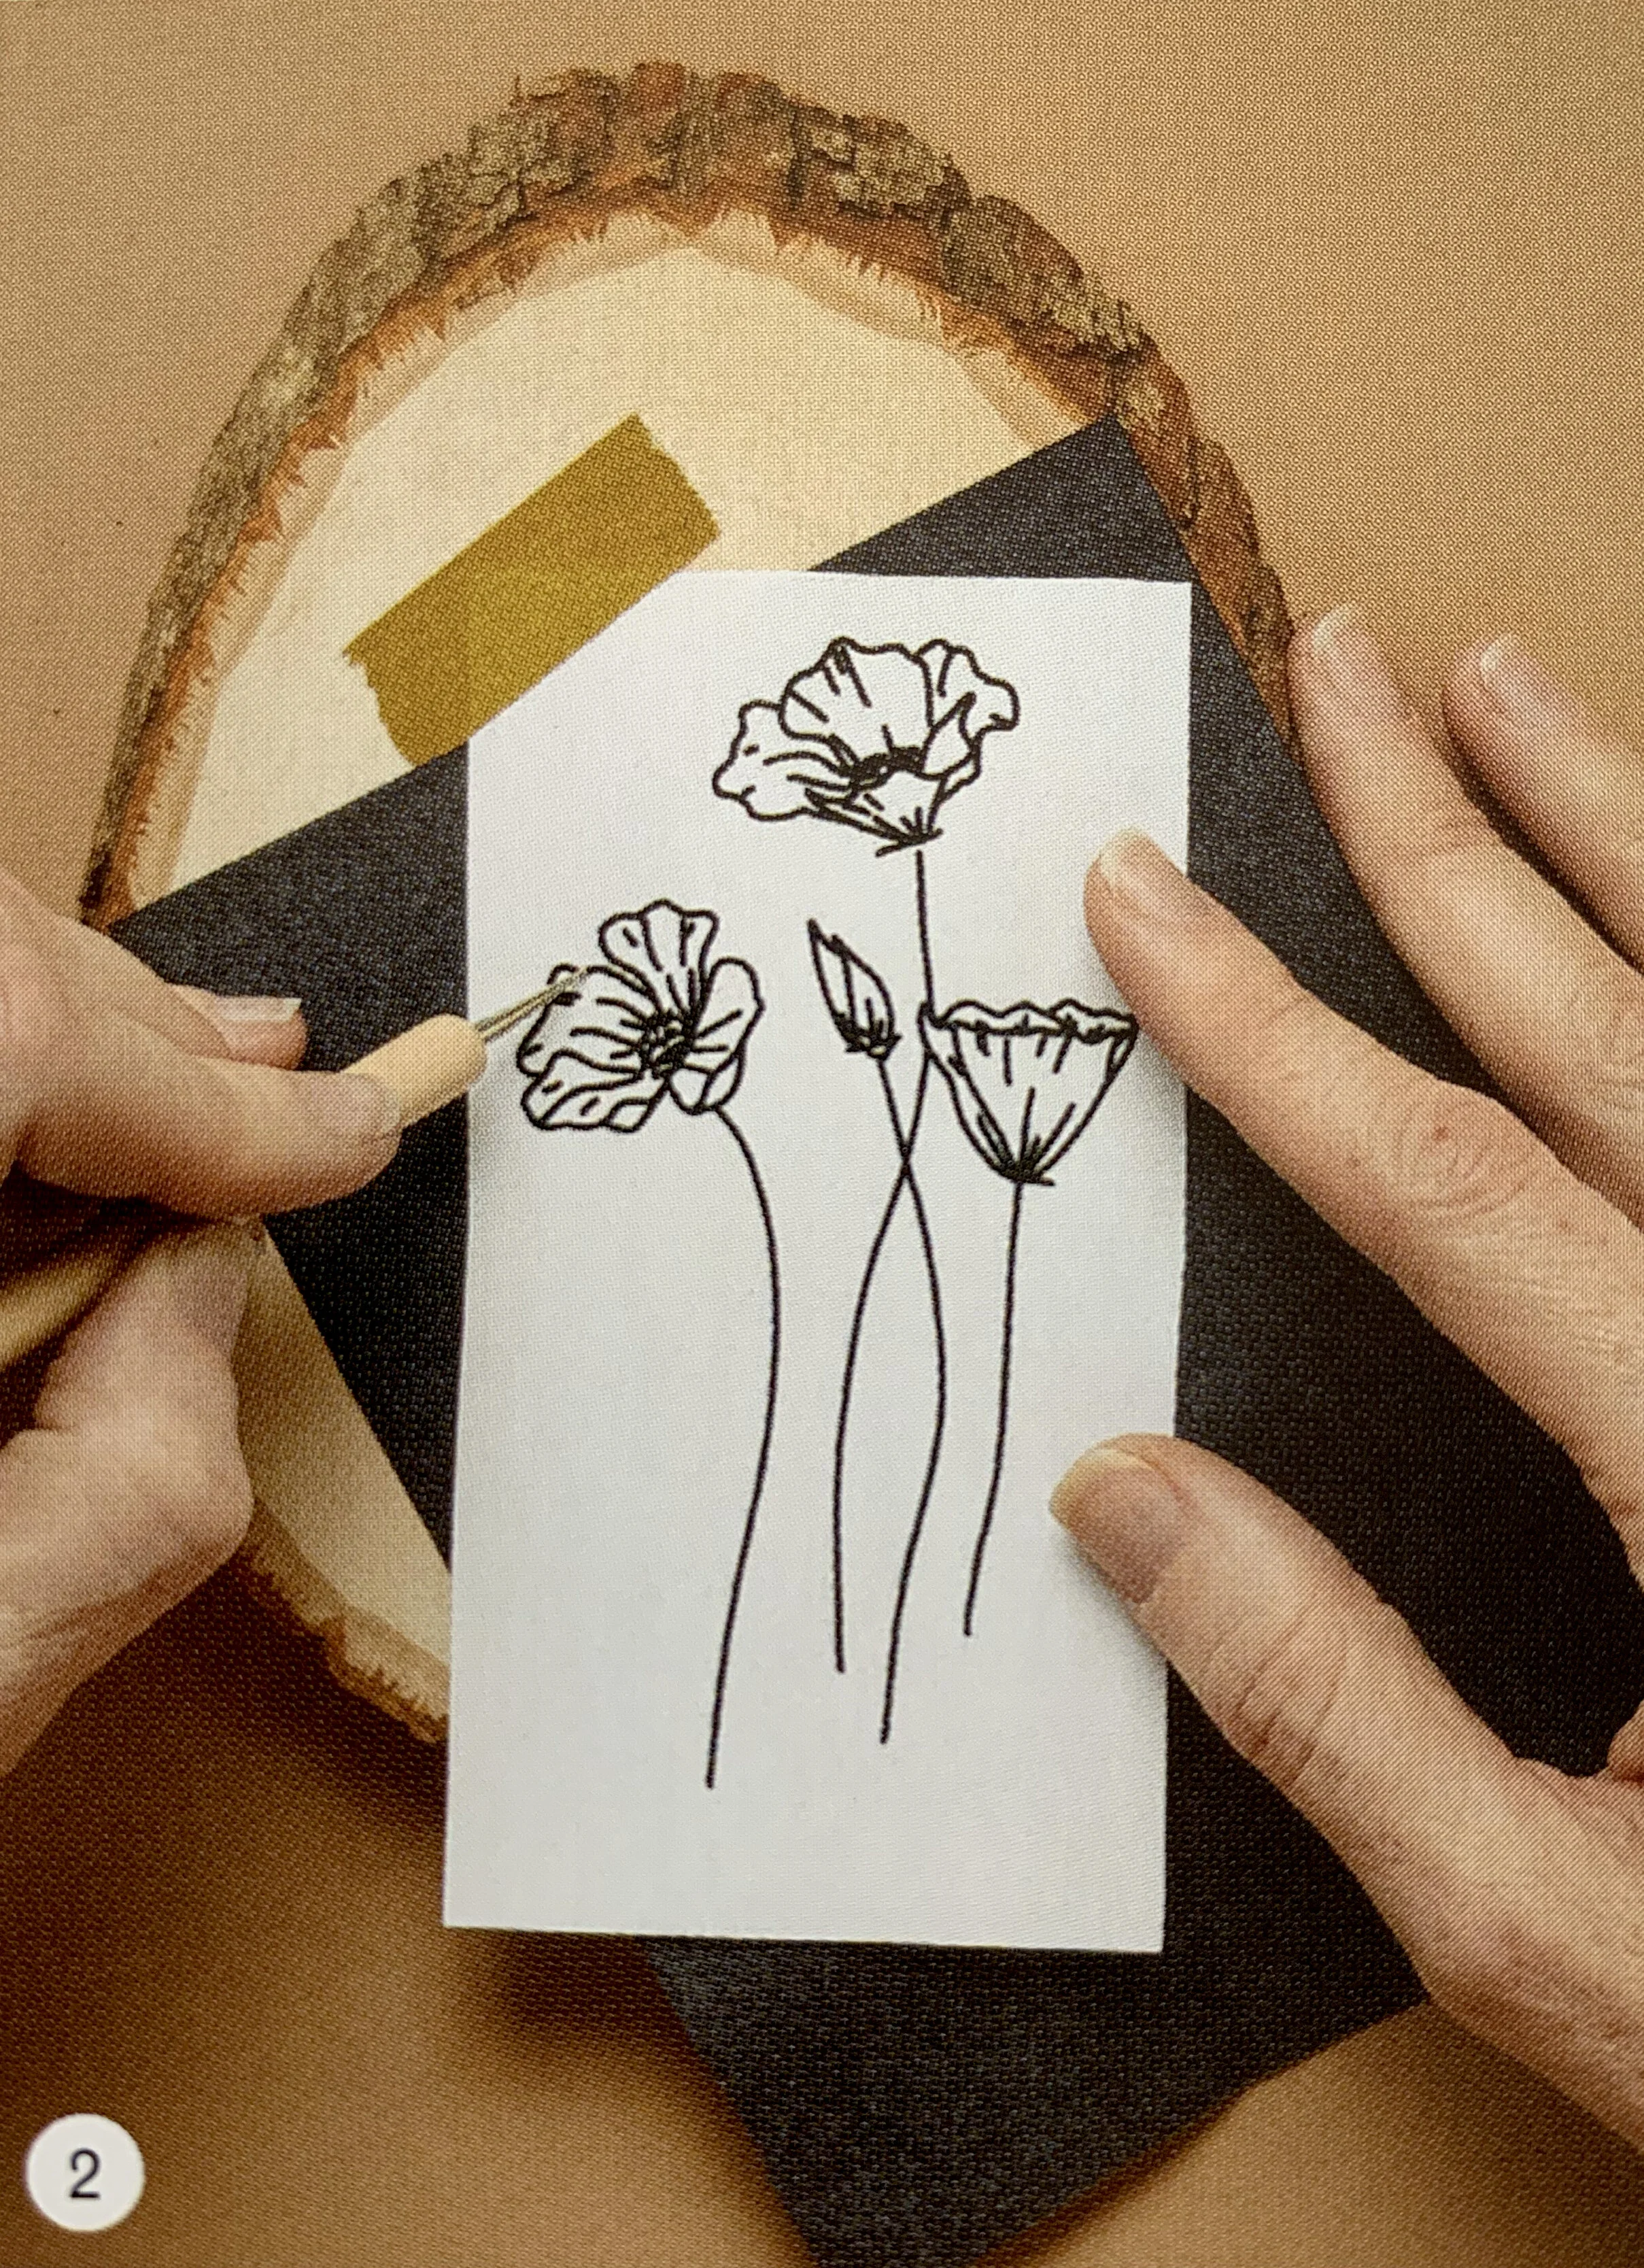
  3. Take your pencil/pen/embossing tool and follow your design lines using light-medium pressure. Ensure you follow the design lines as closely as possible.

  4. Check on the progress of your design, but do not move around or remove the design until you check to make sure it has completely transferred.

This video below features a Woodland Snail Template by Maria Johnson maple & Fern Co. from The Community Book of Templates, Volume 2. I used transfer paper to omit having to cut up the book or print anything and just traced it right off of the page!


You can also get White Graphite

Use the same technique as graphite paper but on a dark background, like walnut wood. The darker the background, the better this method shows up!


2. BLUE CHACO PAPER

PRO’s: Transfers easily like graphite paper, easily removes with damp cloth. Doesn’t stain/scar wood. Can be removed entirely.

CON’s: Be careful not to use too much water. It rubs off easily, so it is not great for long-term use. Also, since it blue in colour, it’s little harder to see on the wood if your wood is light.

transfer an image onto wood

This is a special paper with blue chalk on it. It transfers much like graphite paper, but erases with just a damp cloth.

How to transfer using ChACO paper:

  1. Tape your design onto your wood, face up.

  2. Slide the blue Chaco paper underneath with the blue side facing the wood.

  3. Follow your design lines using an embossing tool or a ballpoint pen.

  4. Check on progress of transfer, and remove design and chaco paper when everything has transferred Can be used for woodburning.

  5. After wood burning is complete, you can remove the excess chaco markings with a damp cloth.

You can also use White Chaco Paper

Works the same as blue chaco paper but is great for an already darkened background, the darker the better. Can be removed with a damp cloth, sand eraser or mars plastic eraser.


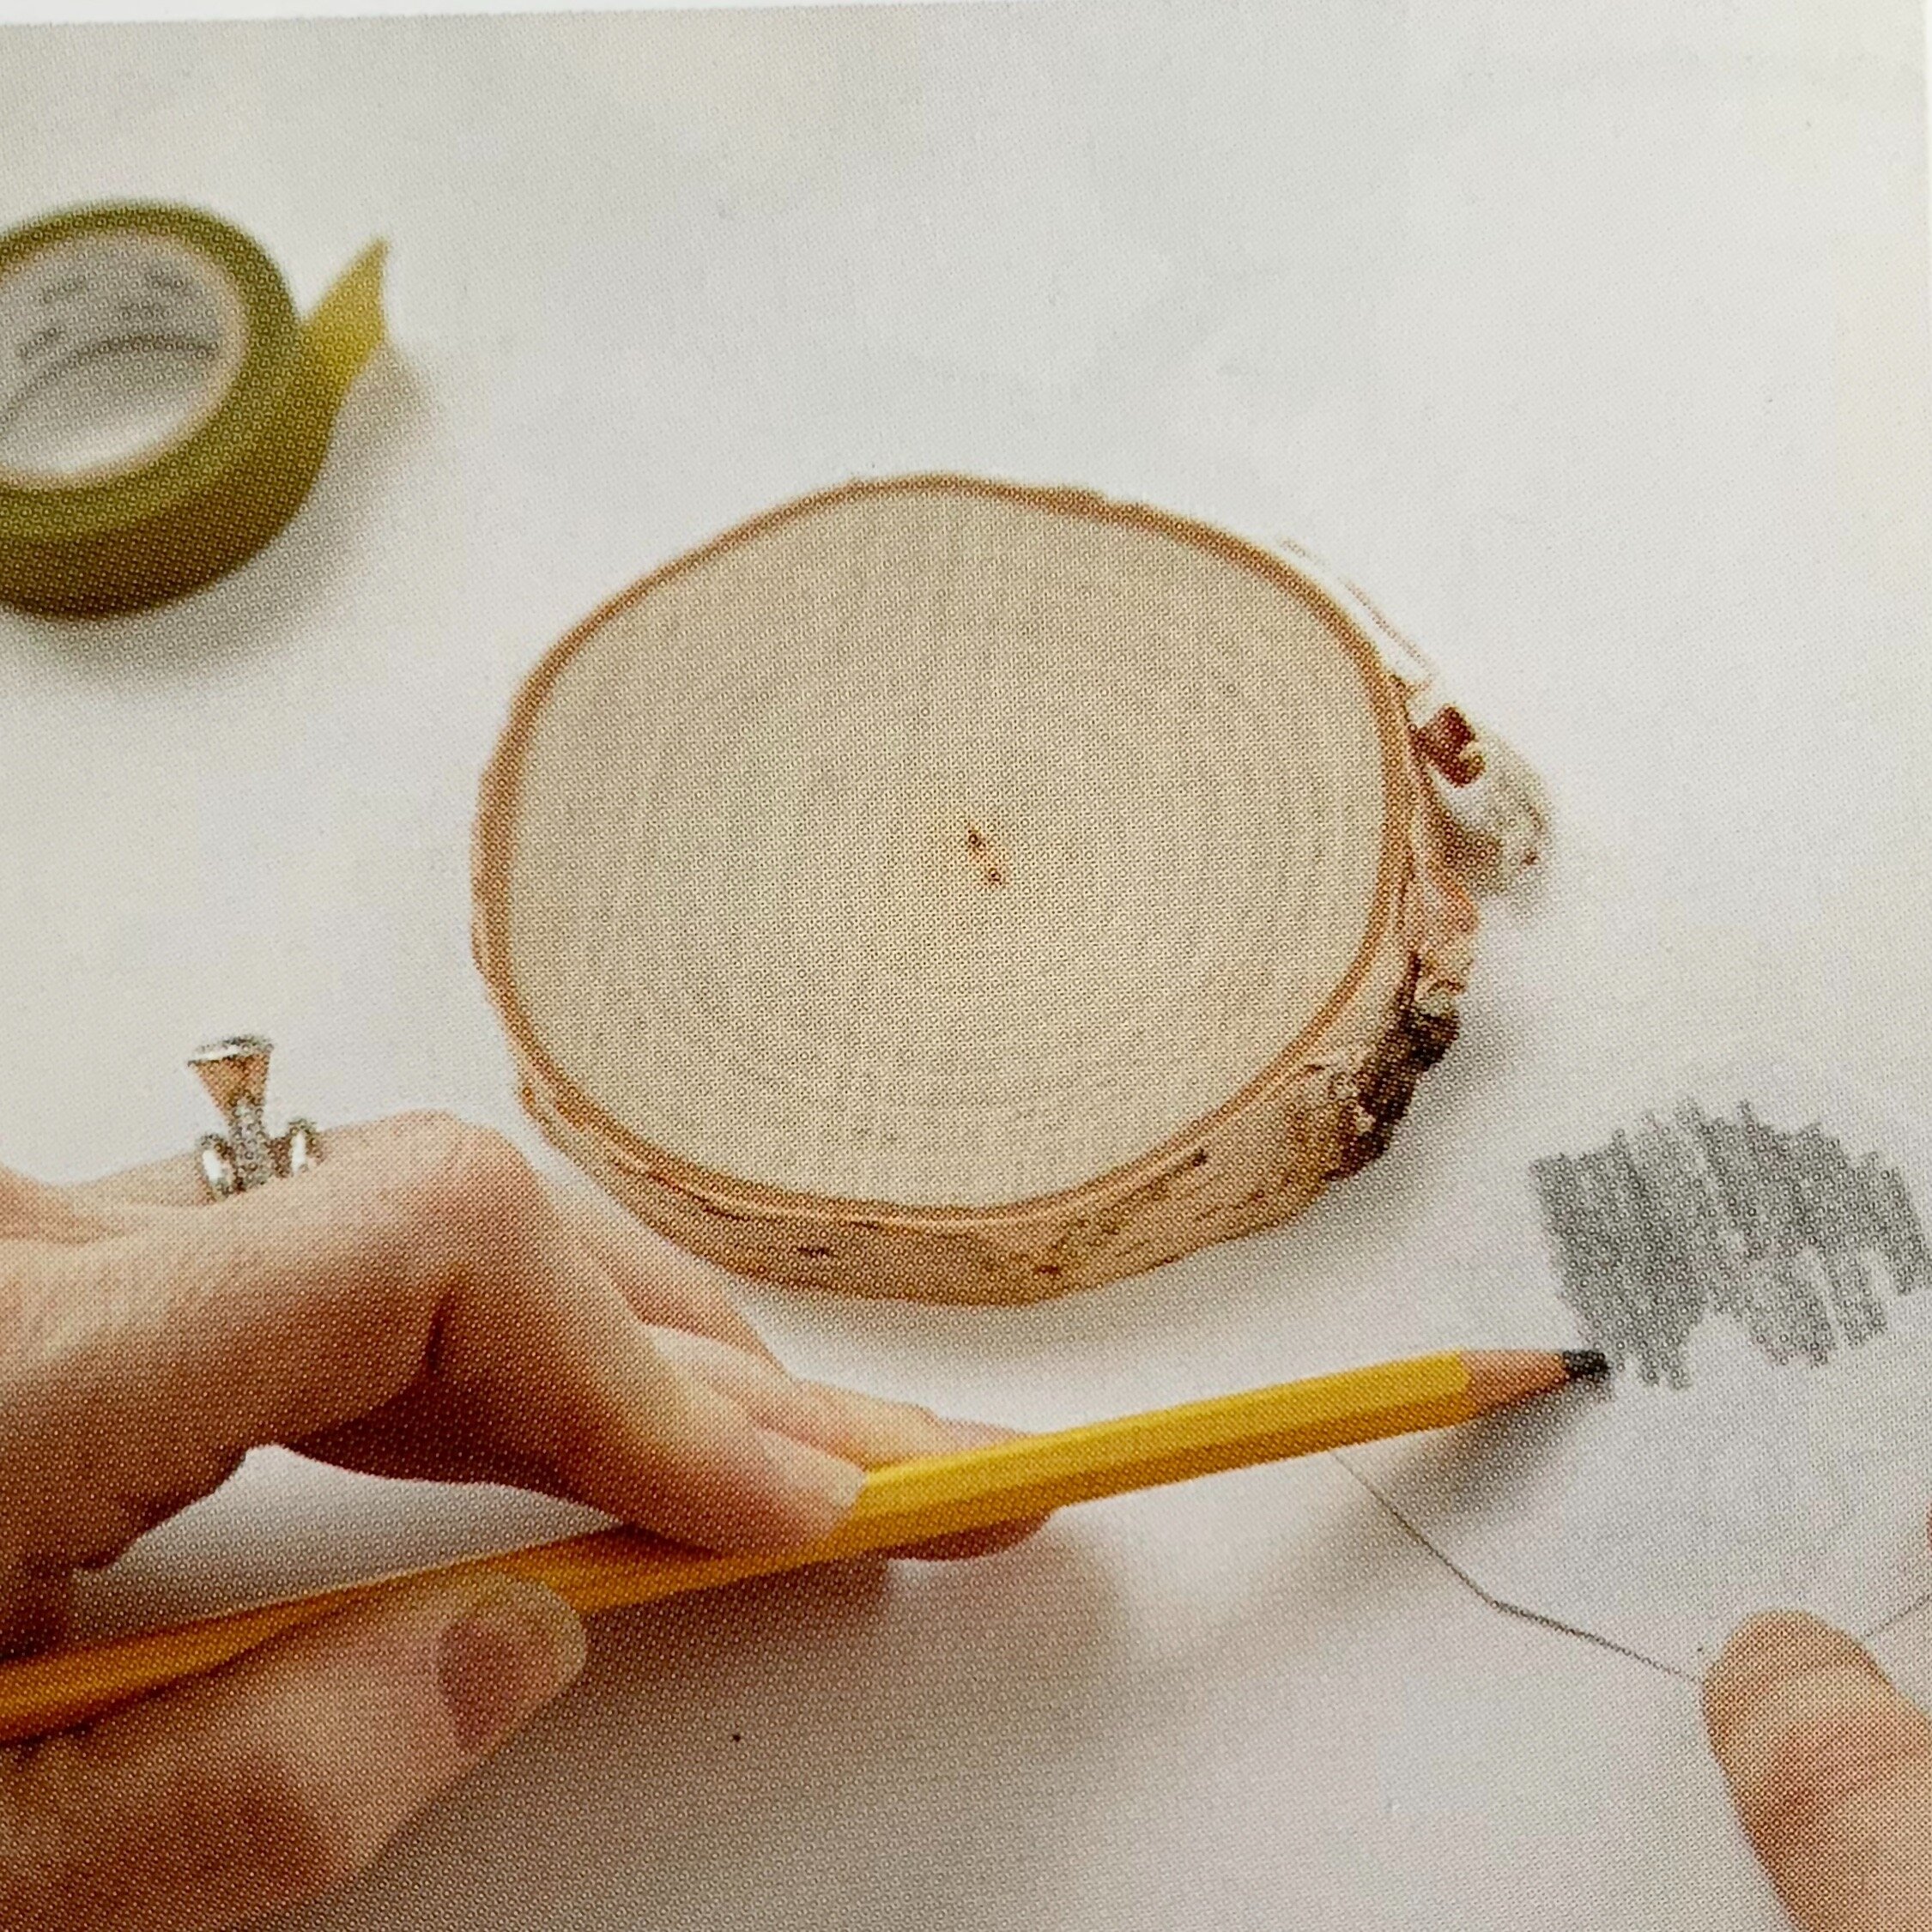
3. Pencil on Paper

We like to use the Tombow Pencils $9 (6 pack) or Ticonderoga Pencils $5 (12 pack) but any pencil will do; the softer the lead, the better (ie. 10B is better to use versus a 2B or any H’s)

transfer pencil on paper.jpeg

PRO’s: It doesn’t require any fancy tools. It works well, and makes for a nice transfer. Works well for fonts and most designs.

CON’s: Time consuming, messy and can have some missing spots. Not great for really fine detailed pieces.

  1. Take your design and flip it over

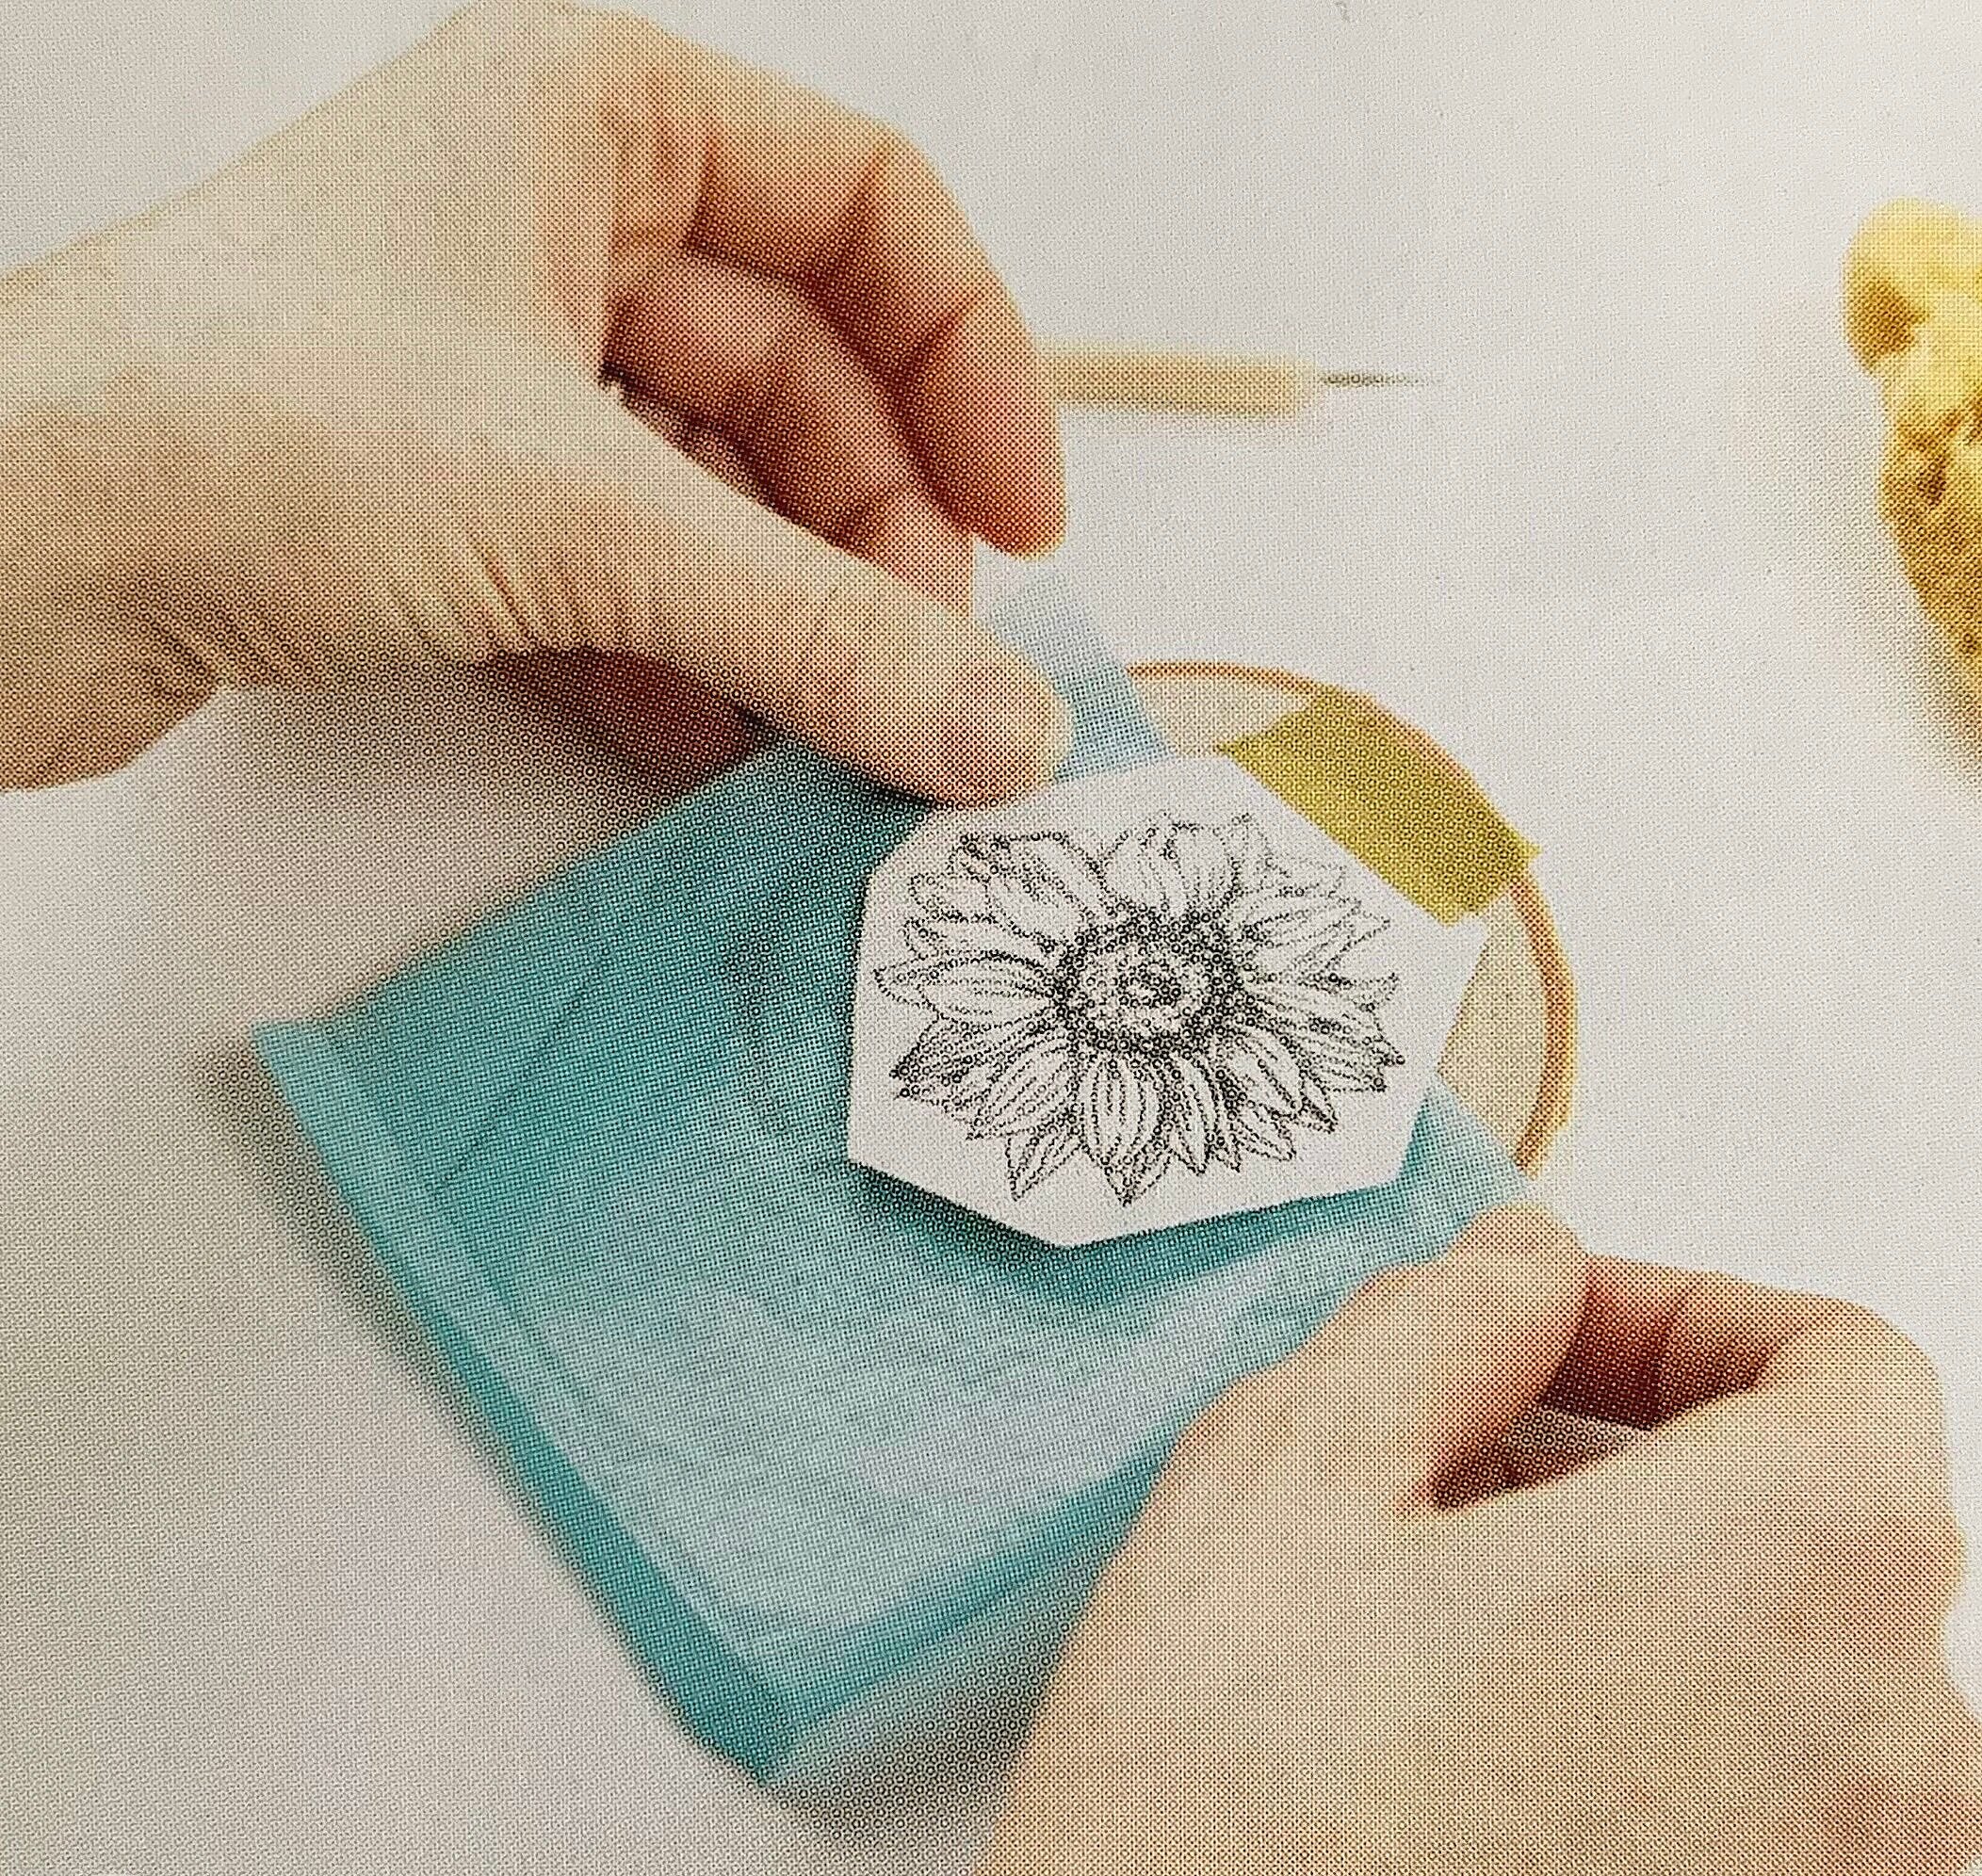
  2. Blacken/shade the entire backside of your design with an extra-soft pencil, or any line that you will want transferred. Go past the lines on either side, to give yourself some wiggle room when you do the actual transfer.

  3. Flip it back over, with the blackened side down, and carefully place and secure it to the wood slice. You don’t want to rub or move it around too much, because it will rub onto the wood.

  4. Take your pen/pencil/embossing tool and go over the design with a light to medium pressure. Follow your lines as closely as possible. The more precise your transfer, the better your design will look.

  5. Ensure you have completed the transfer before removing the design.


Click Here to see the instructions on how to transfer your image using heat.


For more pyrography tips and tricks and to learn wood burning at your own pace from your home consider The Complete Wood Burning Toolkit.


A Brief History of Pyrography

history of pyrography

Pyrography is one of the oldest human art forms. As long as humans have been taming fire, they have been drawing with it. It used to be called “pokerwork” before the term pyrography came to be.

Pyrography has a long and varied history.

In a nutshell: It is thought to have originated in Egypt, where it was used to decorate pottery and furniture. The practice then spread to Europe, where it was used to decorate furniture, musical instruments, and other items. In the 19th century, the art form saw a resurgence in popularity and was used to decorate a variety of items. In modern times, pyrography has become a popular art form and is used to create detailed and intricate designs. Today, pyrography is used to decorate furniture, musical instruments, kitchenware, and more.

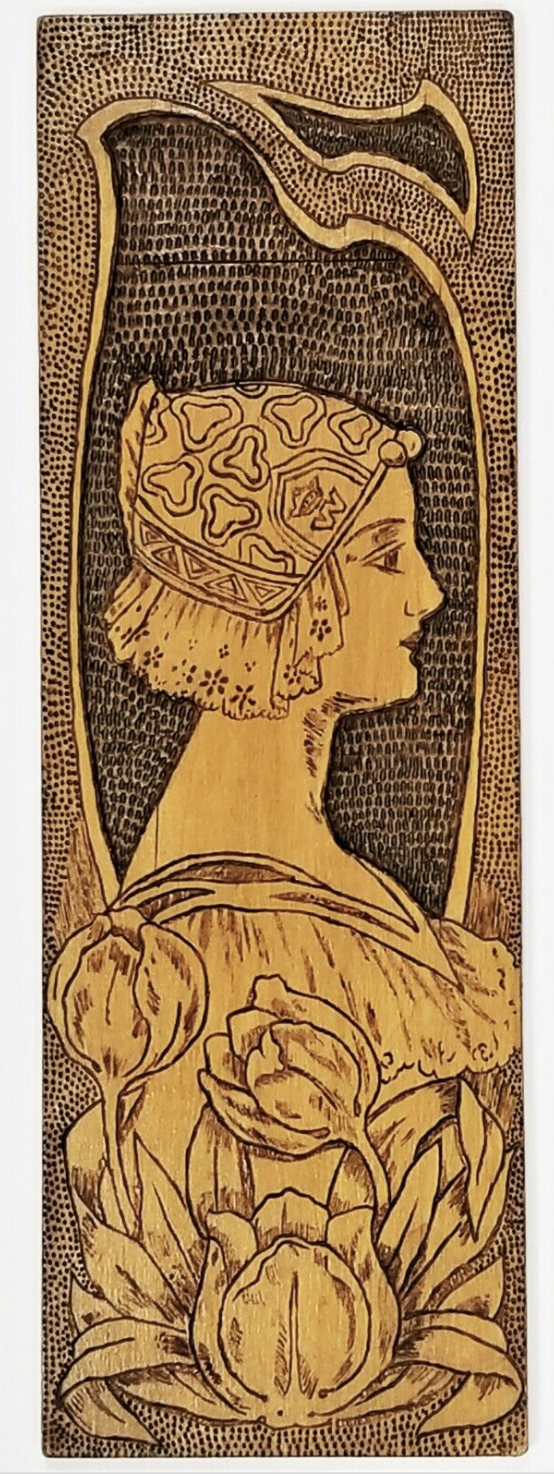
Antique Circa 1890 Flemish Art Co. Pyrography Maiden Wood Wall Hanging Plaque

Antique Circa 1890 Flemish Art Co. Pyrography Maiden Wood Wall Hanging Plaque

The history of pyrography: Wikipedia tells us that the process has been practiced by a number of cultures including the Egyptians and some African tribes since the dawn of recorded history. Pyrographer Robert Boyer hypothesizes that the art form dates back to prehistory when early humans created designs using the charred remains of their fires.

Pyrography artists in the middle ages used newly invented portable wood stoves as a heat source. These stoves had small holes in their lids for pokers to be placed through. The pokers rested in the holes and heated over the coals of the stove until they were hot enough to use. Artists would carry several pokers (needles and knives were also used) with them at all times so they could continue working while other pokers heated.

It was known in China from the time of the Han dynasty, where it was known as "Fire Needle Embroidery". During the Victorian era, the invention of pyrography machines sparked a widespread interest in the craft, and it was at this time that the term "pyrography" was coined (previously the name "pokerwork" had been most widely used).

The term, pyrography, means "writing with fire", from the Greek pur (fire) and graphos (writing). It can be practiced using specialized modern pyrography tools, or using a metal implement heated in a fire, or even sunlight concentrated with a magnifying lens.

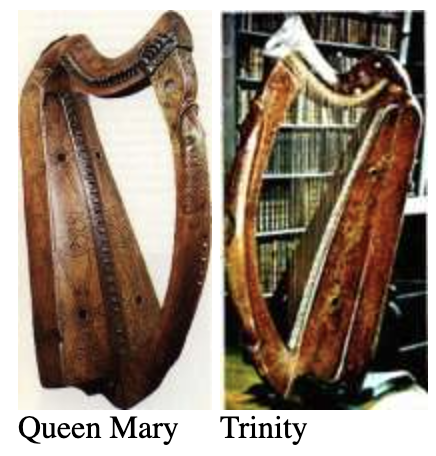
old pyrography on instruments

Surviving examples of Western European pyrography from the 15th and 16th centuries include decorative designs on musical instruments such as the Trinity and Queen Mary harps and richly ornamented chests, coffers and panels from the 15th and 16th centuries. The Queen Mary harp currently resides in Scotland and the Trinity harp in Ireland. The pyrographic designs are faint and the pigments faded.

According to SophieNBurg, museum and archives, A mechanical tool was invented around 1900 that made the creation of pyrography art easier. In the early 20th century, the development of the electric pyrographic hot wire wood etching machine further automated the pokerwork process.

The craft of pyrography enjoyed a surge of popularity in the United States from the 1880s to the 1920s. Housewives and young adults were encouraged to keep their hands busy and make small craft projects to beautify their homes. Books and magazines published designs and patterns. Kits were available through mail-order catalogues like Sears, Roebuck & Co. and Montgomery-Ward. Pyrography is a traditional folk art in many parts of Europe, including Romania, Poland, Hungary, and Flanders, as well as Argentina and other areas in South America.

It has been gaining traction and becoming more mainstream these past couple of years, and that is all thanks to the incredibly relaxing qualities that pyrography naturally has and you all! Keep spreading the word about the wonderful world of Pyrography!


WANT TO LEARN MORE ABOUT WOOD BURNING AND IMPROVE PYROGRAPHY SKILLS?

Learn everything you need to know at your own pace from your home with The Complete Wood Burning Toolkit.

Grow with the community: Join Burn Club+, a place where you can ask questions, and get the full answers, a place of fun and learning.


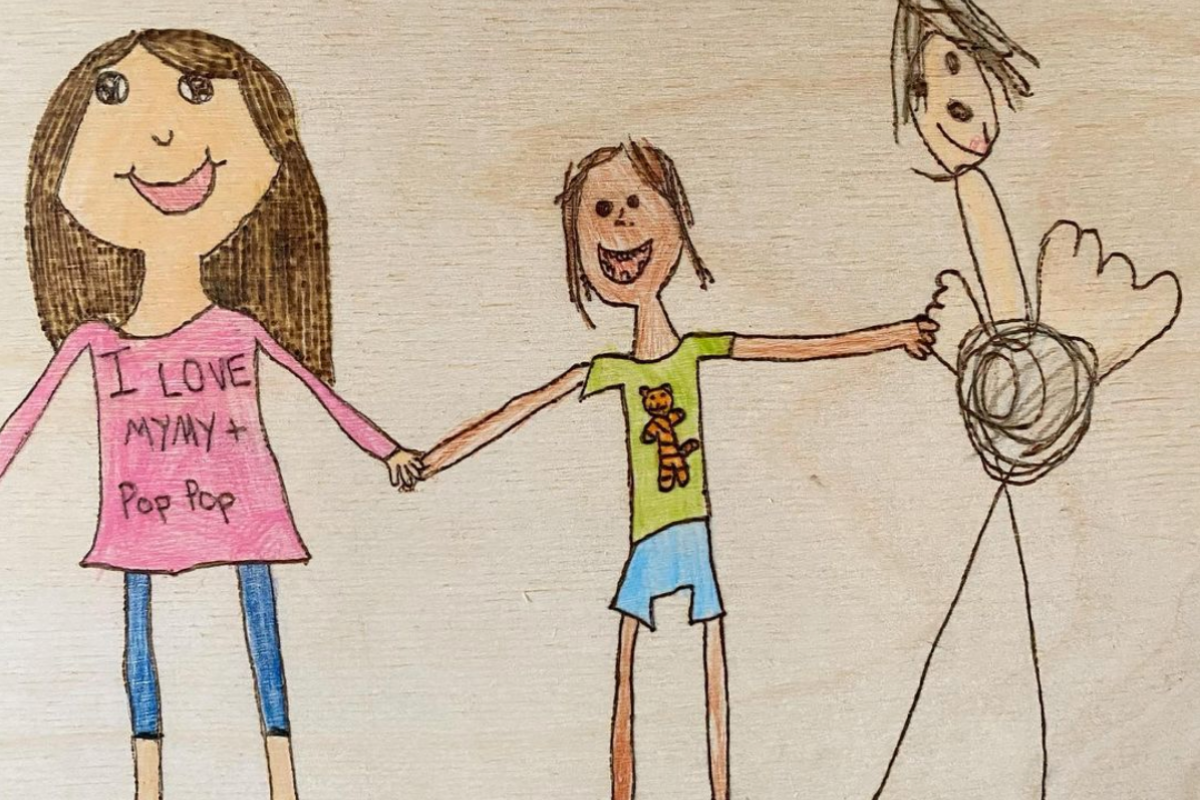
Transferring and Burning Your Children's Artwork

Parents are always looking for a way to preserve their children's art. I personally think woodburning is the best way to do that. It's a great keepsake, it makes for a great personalized gift, and it's so much fun to do with kids.

wood burning children's art

Kids of all ages can participate in this collaboration. You could use a tracing of a babies hand or foot print you can use the scribbles of a toddler or the self portrait of an eight-year-old. You can use original art drawn directly on the wood piece itself or transfer a treasured drawing that the child has already created.

These techniques also work for lettering, hand written recipes, love notes, you name it! Pyrography is such a great way to preserve those memories.

Let's talk about supplies. You don't need many supplies or expensive equipment in order to create a beautiful piece of art that you can cherish forever.


What you will need:


Instructions:

Step 1.

Choose your design or have your child draw the design directly onto the piece of wood. Make sure that your wood is sanded smooth, clean, dried, and unfinished. Check out this blog post on: Prepping Wood Surfaces for Wood Burning.

 
IMG_4388.jpg
 

Step 2.

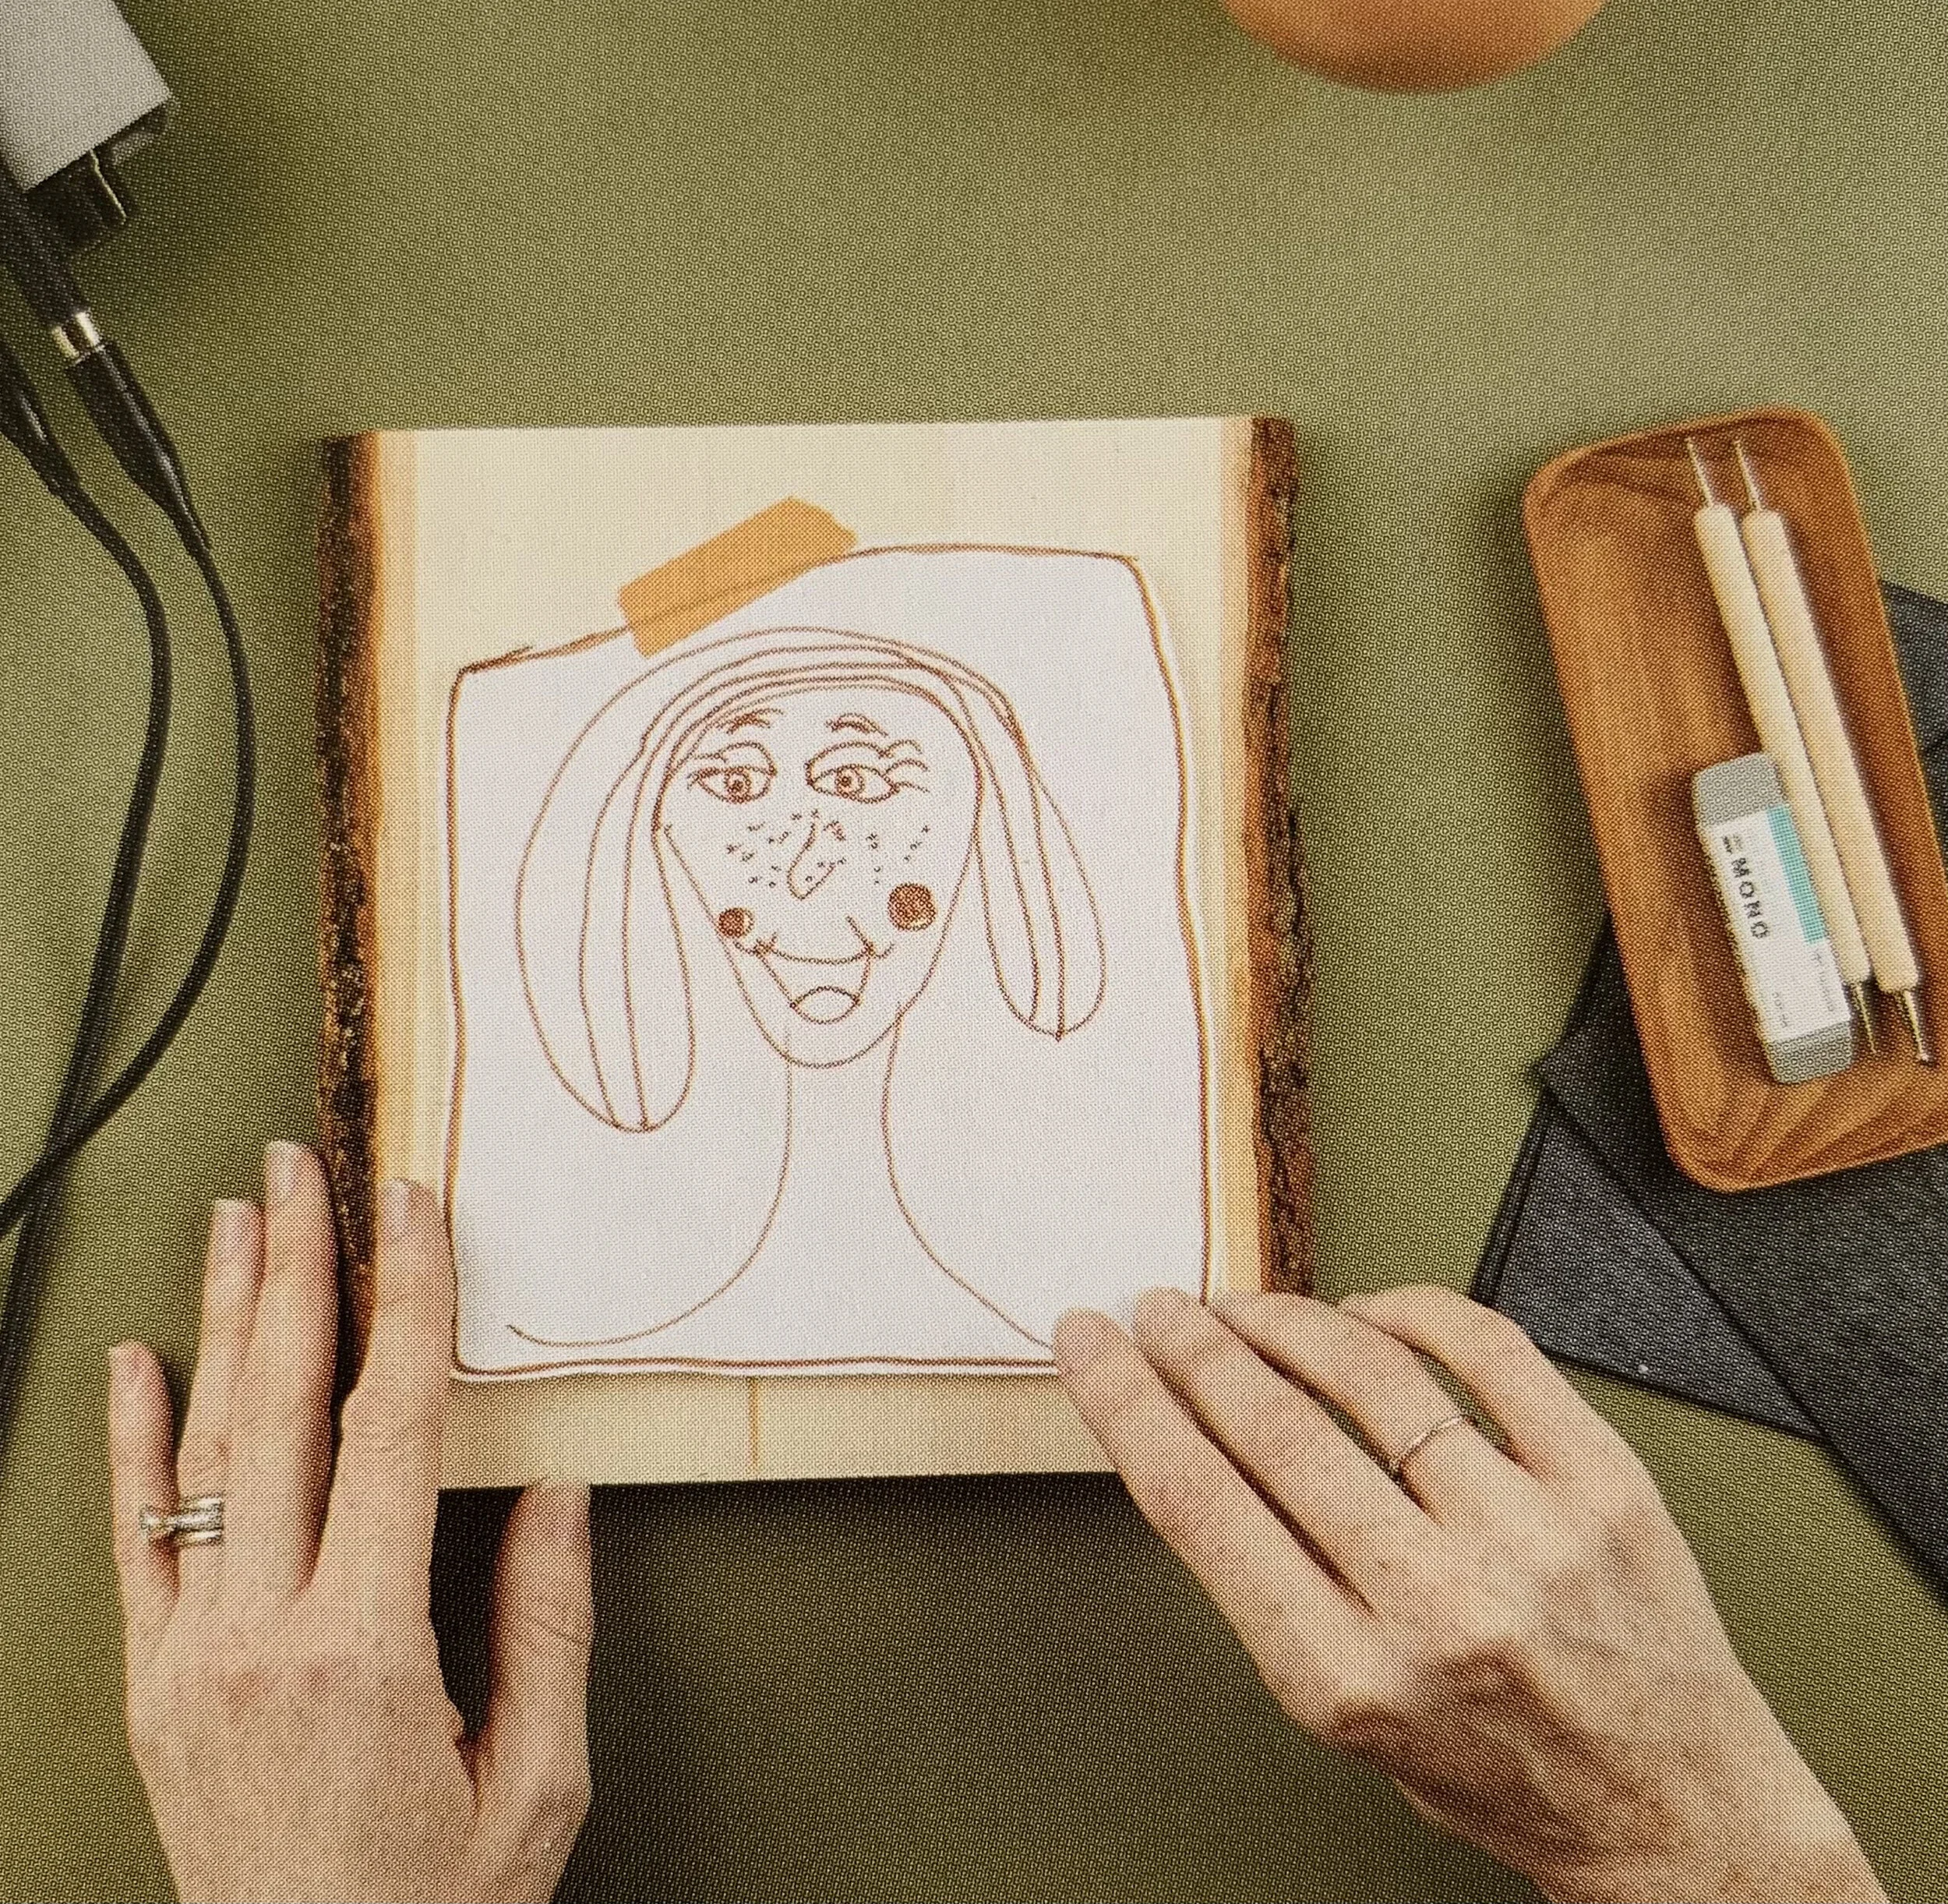
Place your design on your wood (make sure it is right where you want it) and tape down on one side (two if it's a large design.)

 
IMG_4389.jpg
 

Step 3.

Slide your graphite paper with the black side facing the wood underneath your design.

 
IMG_4390.jpg
 

Step 4.

Use your embossing tool or a pencil to trace your design using medium pressure. The more accurate you are with the transfer, the better your burn will be. Make sure you transferred everything before you remove your design and graphite paper.


Step 5.

Ensure you are in a well ventilated space, and don any safety equipment. Check out my FREE Safety guide here. Do remind children of the dangers of a hot tool. Warm up your burner, and get started. Some children may be old enough to do the burning with adult supervision. Kids and adults, no matter the age, will get a kick out of watching the wood burn take shape, just do it safely.

 
IMG_4391.jpg


Step 6.

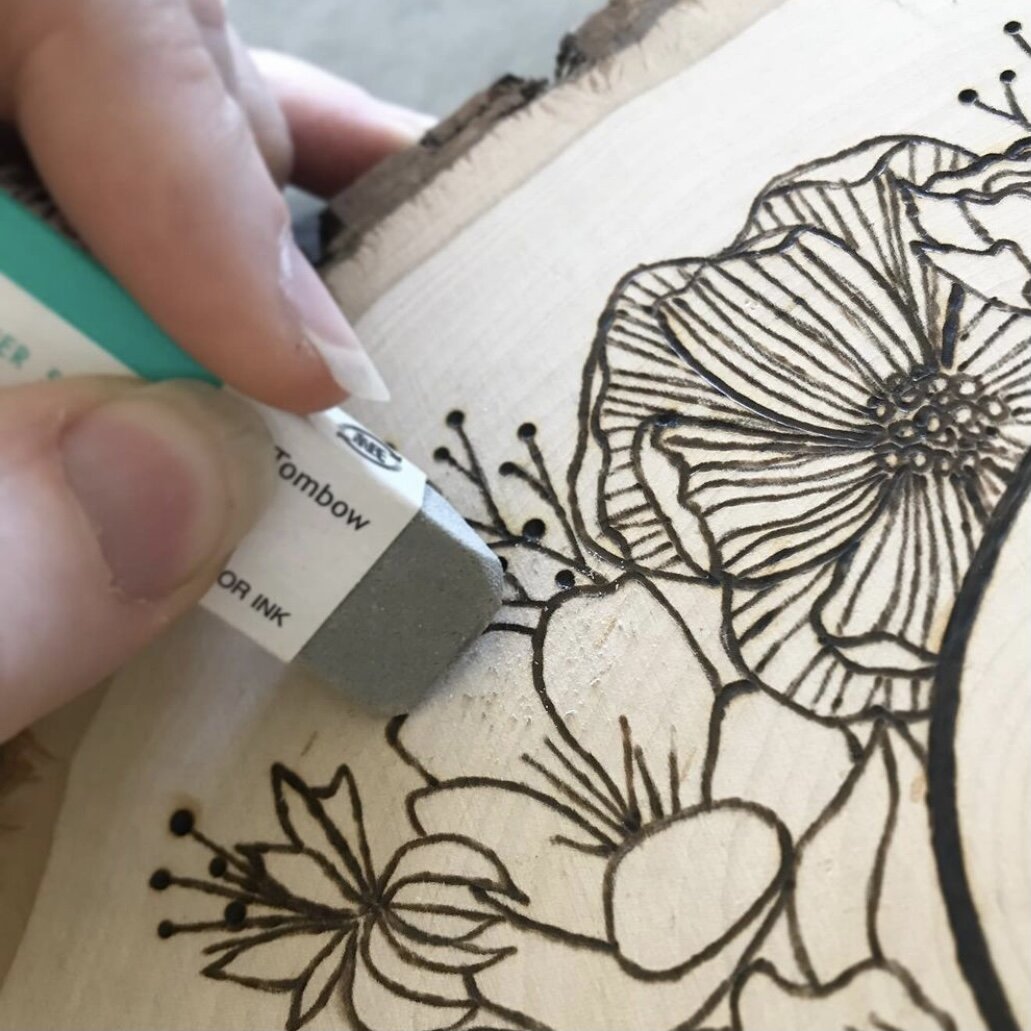
Carefully wood burn the art by simply following your transferred lines. Go slowly. Let the burner do the work. Glide along the surface. When you're finish you can remove any remaining graphite lines with a quick sand with some sandpaper or a Tombow sand eraser. For more tricks and tips, check out: Start Here if you are NEW to Wood Burning

Step 7.

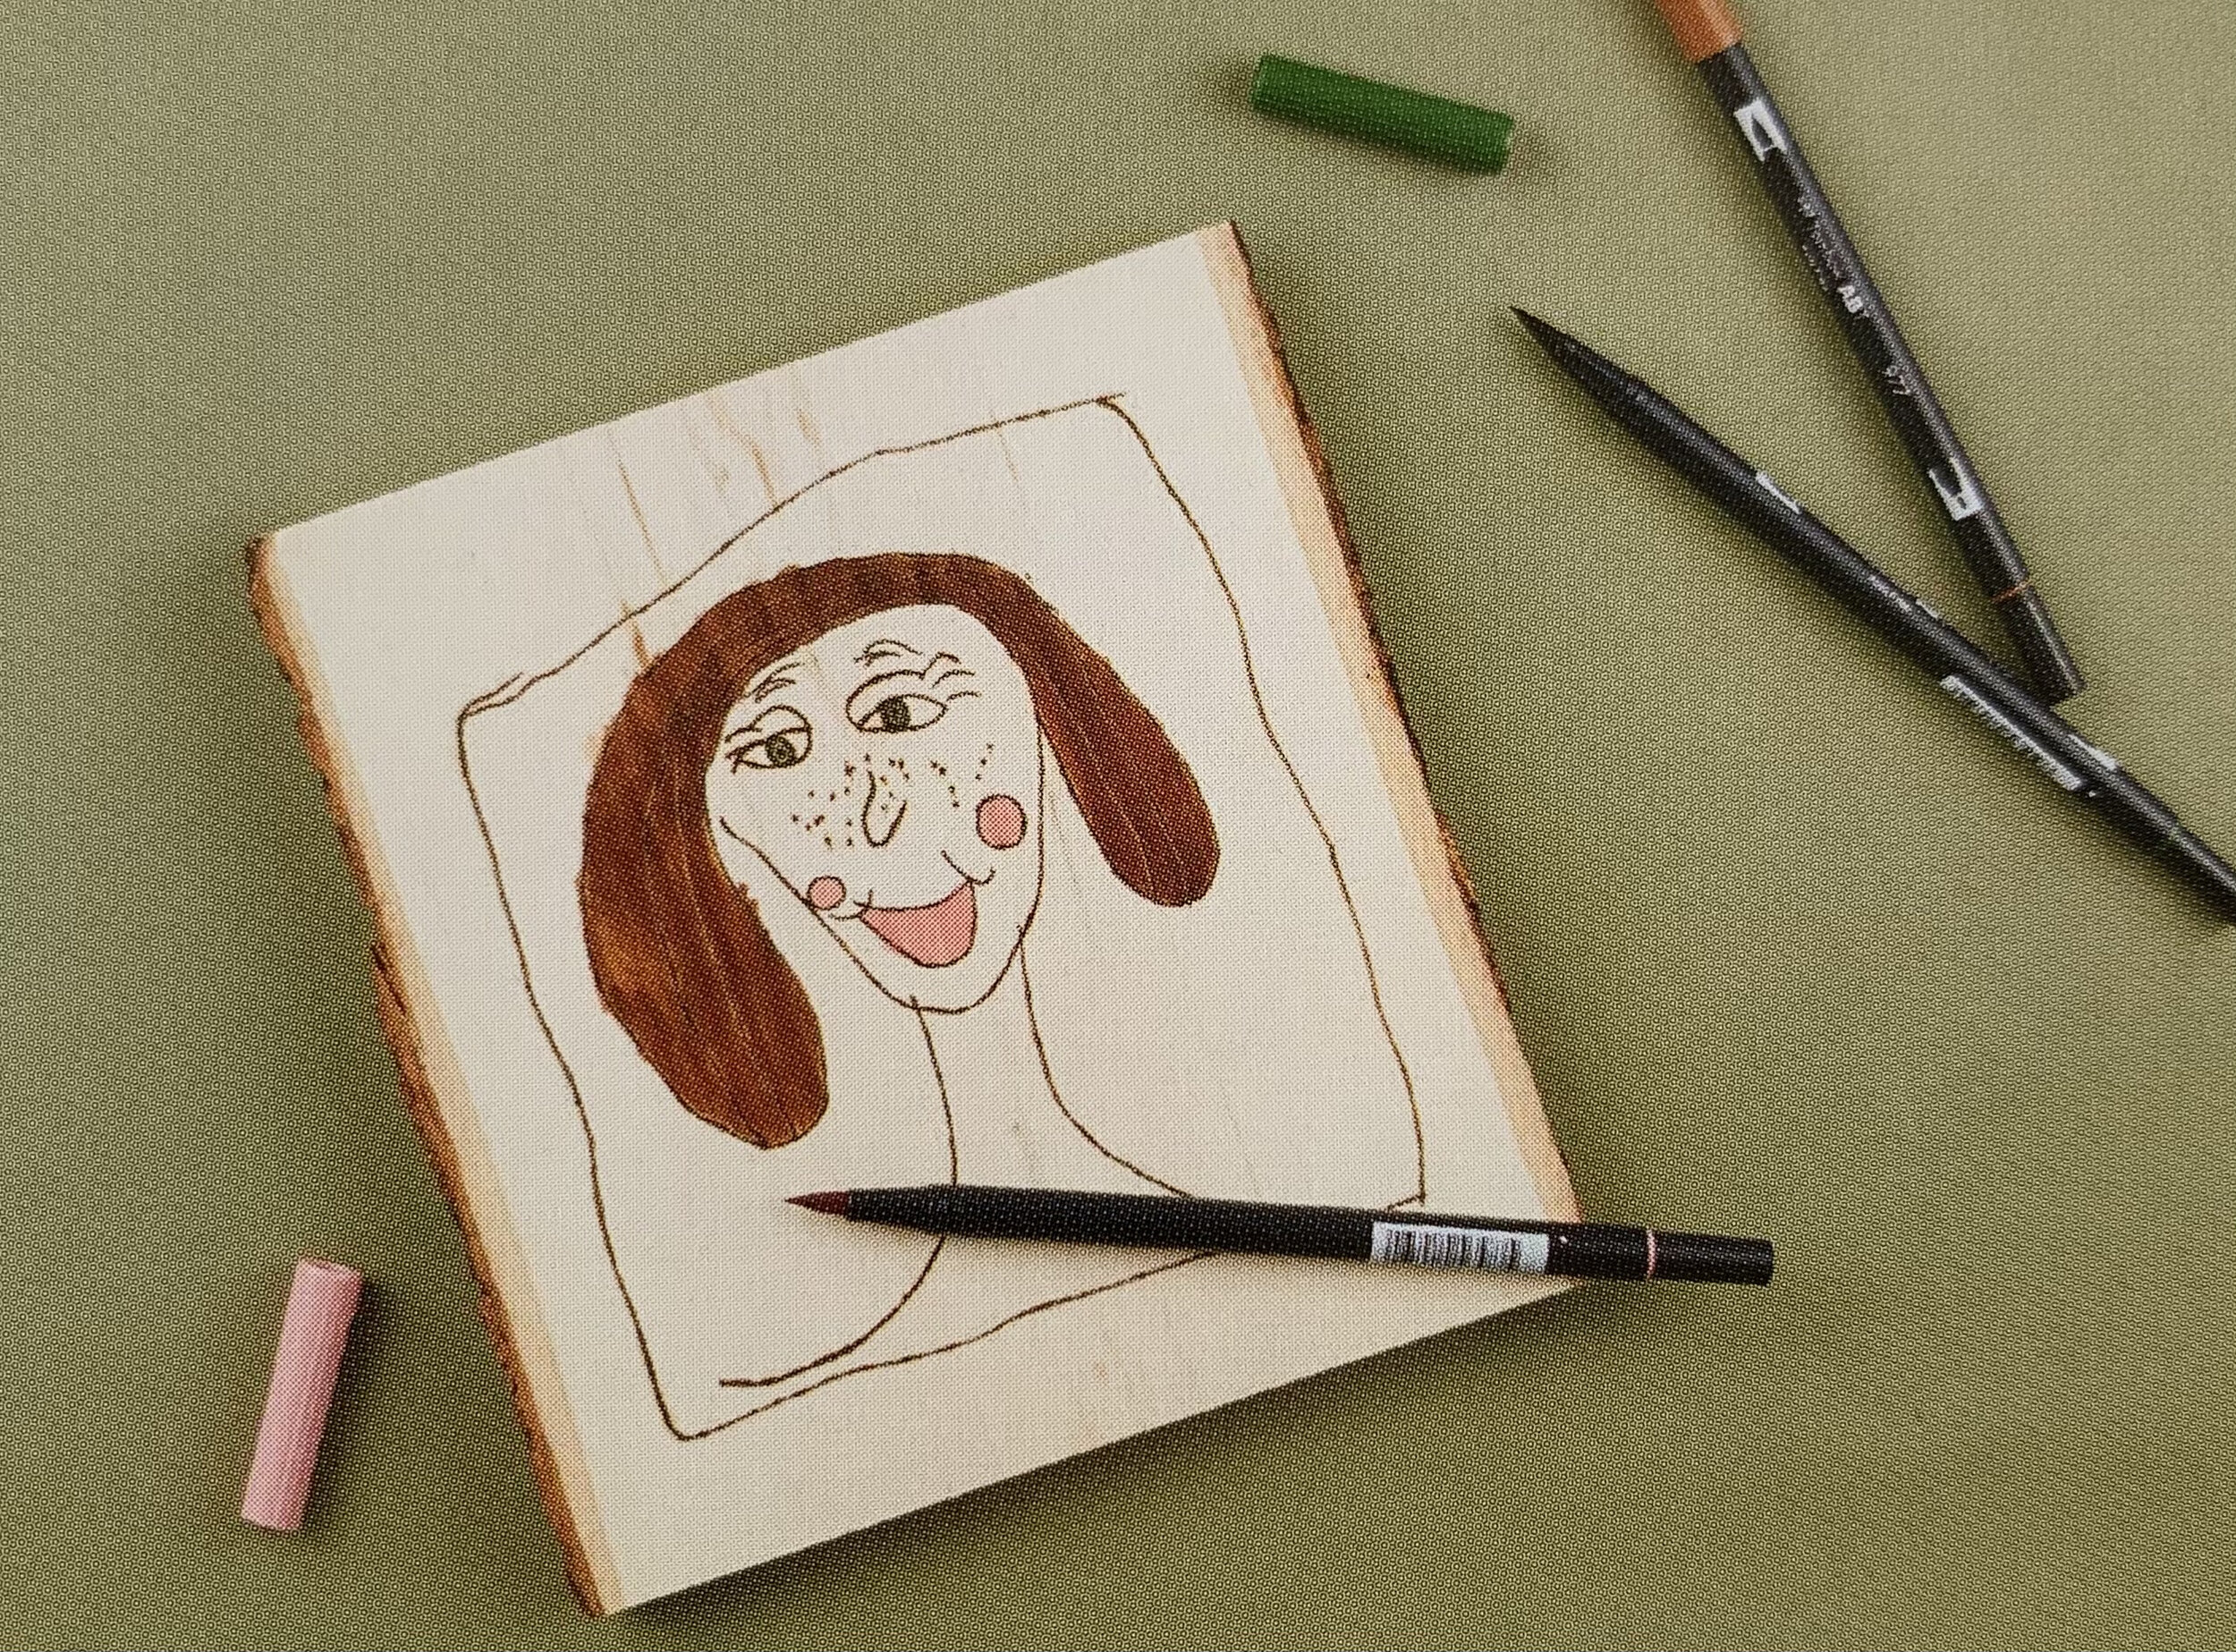
Optional, add a finish or let the child artist finish off their masterpiece with some watercolor or markers. Check out this blog post on adding watercolor to wood for tricks and tips as well as my go to supplies!

 
IMG_4393.jpg
 

Step 8.

Add a picture hanger and hang it on your wall to enjoy for years to come.

 
IMG_4392.jpg
 

Be sure to share about your project with your kiddo or the finished masterpiece on instagram and/or Pinterest and tag me @woodburncorner. I would love to see it! You can also find this full project in my book, The Wood Burn Book.


Want to watch a video of this process instead?

Click Here to watch the process of me burning my children’s artwork for a Micheal’s class.


10 Reasons to Hire a Business Coach

hire a business coach

A business coach provides valuable expertise and knowledge in various areas of business, holds entrepreneurs accountable for their goals and actions, and provides an objective perspective on business challenges. Additionally, a business coach can offer emotional support and encouragement to help entrepreneurs stay motivated and focused, while also fostering personal development to improve communication, time management, and leadership abilities.

I have personally helped artist entrepreneurs achieve their goals, overcome obstacles, and saw first hand how their businesses grew in a more efficient and effective way.

Check out my services HERE and keep reading to learn 10 different ways I can help you grow yours.

Hiring a business coach can be a valuable investment for entrepreneurs for several reasons:

1. Accountability

There is nothing quite like paying a coach to check in on you to help motivate you towards achieving your goals. Having someone hold you accountable is one of the best things you can do for your business.

When you tell your coach, “My goals are to make two videos this week,” you will be much more likely to actually do them. Accountability is huge for making steps towards your larger picture goals. Your coach should not only help motivate you to accomplish tasks, but ensure you are focusing your efforts on the right tasks that will work towards achieving your goals. Knowing that your coach is going to check in on you and your progress is quite motivational.

2. Invest in Your Business

When you invest in your business by getting a coach, you should be hiring someone who you trust and who will in turn invest in you. When you and your business succeed, it means your mentor is also succeeding. It’s such a fantastic mutualistic relationship.

Having dedicated time to talk about you, your business, your successes, your failures, your worries, your pain points, and your ideas makes ALL the difference.

When you invest real money and time in yourself and your business, the results will show. I invest in coaching monthly, and see first-hand how it has benefitted me, my life, and my business. It is one of the best things I have done for my business, and I know my coaching clients feel the same.

3. Motivation

A coach will not only provide you with accountability, but they should inspire and motivate you to go after your biggest dreams and goals. They are your cheerleader. Your wins are theirs, and it should be clear they want you to succeed. They will help you break down the barriers to your success, and help you relinquish your fears.

hire a business coach

Your coach should be able to help you break down your biggest dreams into tangible, attainable, and specific steps. The simple act of talking about goal setting with someone for a dedicated period of time will motivate you in ways you never imagined. Preparing for a coaching call is motivating, too. I always come to my own coaching sessions prepared with a list of questions, pain points, ideas, etc so the time with my coach is well spent. Every time you have contact with your coach it should and will feel motivating, because they are your motivator. They will help keep the fire lit, and the energy focused.


4. Dedicated Time to Talk Business

Coaching time is dedicated time where someone you trust and respect is spending their energy and focus on you, your business, and your success. It almost feels like therapy.

So much mental energy, time, and love goes into owning and operating a small business. Having someone that you pay for dedicated time to discuss your business will help you see it from an outside perspective. Their knowledge will help you find focus, help you grow, solve problems, and learn faster. Coaches are like cheat codes.


5. Focus Efforts

This is one of the best things that a coach can provide. Being able to sit down with a coach, talk about your dream life, and sort out ways to achieve it is so much fun and so valuable.

unsplash-image-7KLa-xLbSXA.jpg

Without focusing your efforts, you will find yourself being pulled in all the different directions owning a business will pull you, but aimlessly. Having defined, well thought out, specific goals that lead up to your big picture goal will ensure that your time that you are spending on your business is focused time, and time well spent. This is what good coaches can do, and something I specialize in.

A coach provides that outside perspective to help their client not only identify but accomplish their goals.

6. Optimize Business and Life

A good coach won’t just provide you with sound business advice, but they will also help with other aspects of life. You are hopefully coming to them not just for their business skill set. They should have tools to help organize, and optimize your life, too. Because work is affected by life, and vice versa. They are not mutually exclusive.

how to schedule your time efficiently

In order to have a successful business, there are some practices you can put in place to free up time, and mental space to succeed in business. For instance, batch working, time blocking, 3 things, goal setting, to-do lists, ta-da lists, and so much more. A coach should be offering you great advice regardless of the topic and it should all be specific to you.

I personally read an unhealthy number of self-help books and have implemented them in my own life. I have found success with many things I have read in them. I bring that advice into my coaching sessions, because you need life to allow for you to have the mental space, time, and energy to work on business. Coaching is so much more than just business advice.


7. Outside Honest Perspective

If you are looking for an honest perspective from an outside source, a coach is a fantastic choice. They are on your team, are knowledgeable, and willing to share their knowledge, but most importantly want to see you succeed. A good coach should be able to motivate you and also provide honest and constructive feedback to improve your business and get you closer to your goals.

Remember when they are giving you constructive criticism it is because they have your best interest at heart. They want to see you succeed.


8. Earn More

unsplash-image-3DS6EBOsv7U.jpg

If you want to earn more money sometimes you need to spend it. Your business should grow with a coach, and so should your income. That is the goal, after all. Yes, a business coach should help you feel good about your business, and help you create an authentic business for your specific voice, but the bottom line is they should also be helping your bottom line.

It can be a simple suggestion on scheduling, a tactic for accomplishing tasks, a specific tip about Pinterest, connections to other people/businesses, or one of the other myriad of ways a coach will help you grow financially.


9. Talking One-On-One with an Expert

This is HUGE. They have done it before. They know what to expect. You can learn so much faster the proper ways to do things from someone who has already done it, then trying to figure it out for yourself. This is also why I am a huge fan of information sharing. We are all better when we help each other out. #communityovercompetition.

Getting the opportunity to talk in a focused manner about your specific business and your specific problems can solve so many issues, answer so many unknowns, and help guide you to making good choices for your business. A good coach will do their research into you, and your business. They will listen to your needs, questions, worries, and goals and cater their coaching to you.
I like to have my new coaching clients fill out a survey so I can get to know them better, their goals, and make sure I am the right fit for them before I take them on as a client.


10. Grow Faster

If you want to grow faster, and make fewer mistakes in the process, a coach is for you. A coach will save you time and money. They will help guide your decisions to help you grow towards your dream, and provide feedback along the way. Your success is also theirs.

grow your business faster

Coaching is one of the best things I have done for my business to date. I have seen my growth in myself, personally, in my business processes, in my numbers, in my motivation, and in my pride when it comes to my business. I am not just working without a clear goal as to why, I am now working with purpose and intention.

Boost Your Business

If you are ready to take your creative business to the next level, check out my One-On-One Coaching Services.

Aren’t fully convinced you want a coach? Check out the Toolkits designed to guide you through the steps of growing your business while allowing you to work at your own pace, on your own time, at your own speed, and in your own order.


Book Recommendations for Creative Businesses

Most of what I have learned in business has been through trial and error and through reading.

Book recommendations for artists

I think a lot of finding success has to do with mindset and habits. I read and listen to a lot of self-help books that I think will benefit me and/or my business. I enjoy the process of optimizing my life.

Here are a few of my personal favorites that have had the biggest impacts on me, my life, and my business. These are Amazon links, and I receive a small portion if you choose to purchase yourself a copy, and I HIGHLY recommend you do! These books are fantastic.


My top 12 Book Recommendations for Creative Businesses:

The 5-Second Rule - Mel Robbins

"The 5-Second Rule" by Mel Robbins offers a simple, actionable tool to combat procrastination and instigate change: counting backward from 5 to 1 to trigger action. The book combines personal anecdotes and scientific backing to show the rule's effectiveness in various life aspects. While some may find it too anecdotal, its core strength lies in its straightforward, motivational approach. It's a quick read that emphasizes immediate action to improve one’s life, making it a practical guide for those seeking to break the cycle of hesitation and fear.

Why I like it: It’s a super simple premise, but a really valuable tool. If you learn well with anecdotes, this book is for you.


Unfu*k Yourself - Gary John Bishop

"Unfu*k Yourself" by Gary John Bishop is a straightforward self-help book that pushes readers to overcome self-imposed barriers and take charge of their lives. Through seven key assertions, Bishop advocates for personal accountability and action with a direct, no-nonsense tone. The book's strength lies in its clear, motivational message, although it may oversimplify complex personal development concepts. Overall, it's a compelling call to action for those ready to challenge their mindset and make significant changes.

Why I like it: Best listened to, because the author’s voice and tone is fantastic. A great book to cut through the BS. A good listen when you need a kick in the pants.


Artists Way - Julia Cameron

"The Artist's Way" by Julia Cameron is a guide to unlocking creativity through a 12-week program of exercises and self-exploration. Its core practices, morning pages, and artist's dates, aim to overcome creative blocks and nurture artistic expression. While its spiritual approach may not suit everyone, its widespread acclaim and effectiveness in fostering creativity make it a seminal work in personal development and artistic empowerment.

Why I like it: By far the book that has changed my life the most for the better. It is an intense 12 week course, really, and best done with creative friends, or friends who want to be more creative.


You are a Badass - Jen Sincero

"You Are a Badass" by Jen Sincero is a self-help book that combines humor, personal anecdotes, and practical advice to inspire readers to improve their lives and achieve their goals. Sincero emphasizes self-love, financial acumen, and a positive mindset, urging readers to identify and overcome the limiting beliefs that hold them back. With a conversational and sometimes irreverent tone, the book aims to motivate and empower individuals to take control of their lives and pursue success. It's known for its straightforward, relatable guidance and empowering messages, making it popular among those looking for a boost of confidence and actionable strategies for personal development.

Why I like it: I love this author. She does a great job at giving you valuable information and simultaneously lights a fire. She will make you feel like a BOSS.


You are a Badass at Making Money - Jen Sincero - Money and money talk is very taboo. Not many people talk about it, or the mindset of getting more of it. This book is a deep dive into money mindsets.


Daring Greatly - Brené Brown - Anything by Brene Brown is going to be valuable for you as a person and for your business. This book is a must read.

The 7 Habits of Highly Effective People - Stephen R. Covey - Effective is the operative word here. I recommend a physical copy. You will want to take notes.


The Gifts of Imperfection - Brené Brown - Another fantastic book by Brene Brown. This woman is a wealth of knowledge. She makes you think and uses real science to back up her claims. Also listen to her podcast, it’s so very good.


Steal Like an Artist - Austin Kleon - Every creative person should read this book. It is a very quick read, but explains really well how there are no original ideas, and every artist steals from the world around them. 10/10 highly recommend.


Contagious - Jonah Berger - OOOOOO. If you want to know why things catch on, or “go viral” this book explains the many marketing tools businesses can use to get their work in front of more eyes and have it be memorable. Sparked 2 big ideas for me while reading it.


4-hour Workweek - Timothy Ferriss - I have more dog ears on this book than any other. If you want to work less, make more, and live your dream life, this guy takes it to the extreme, but offers so many valuable bits of information.


Influence: The Psychology of Persuasion - Robert B. Cialdini - Another incredible book. This one is more about the psychology of marketing, and how to make it work for you. It’s brilliant.


I know these will have a positive impact on you. If you read any of them and you find it helps, I would love to hear about it.

What books do you recommend?? What do I need to add to my list?


Want to learn more about wood burning and boost your creative business??

Grow with the community: Join Burn Club, a place where you can ask questions, and get the full answers, a place of fun and learning (just scroll to the bottom)


Favorite Odd Tools for Woodburning

These are some of our favourite tools to have nearby when creating pyrography projects of any kind. These are tools that are not necessarily essential, but sure feel essential to me. They make the task at hand easier, faster or simply just more convenient.


IMG_7491.jpg

This is THE BEST tool that I have found to get rid of unwanted graphite markings. I first discovered this when I saw an ink artist using the eraser, and saw that it was called a “sand eraser,” so I wondered if it would work on wood, and it did! Now I see this eraser being using widely amongst pyros, and it makes me so happy I decided to experiment that day.


This saves so much time with watercolor/gouache/acrylic. Instead of having to dip back in water, the water is held in the pen. It’s brilliant!!! It’s easy to adjust the amount of water too which is key to painting on wood. Too much water can split it… Always remember to burn first, and then add your color. CLICK HERE for more water-colour on wood tips.


This is my go-to, must-have tool next to me while I burn. I use it to quickly and gently scrape away any char on my nib so I can keep a nice smooth burn. Some artists may think this is too harsh for their nibs, but I have had zero issues with scratching/damaging nibs with this technique. Look for something with softer bristles. Giving it a quick scrape keeps my lines clean and smooth. Highly recommend. CLICK HERE to learn more about maintaining and cleaning your tools.


Blue Chaco Paper

This stuff is a great alternative to graphite paper, and only requires a little damp cloth to wipe away. It’s a bit pricey, but worth it, and can be used over and over again just like graphite paper. You transfer it in the exact same way you do for a transfer or graphite paper, but any unwanted lines can be removed so much easier. (Check out How To Transfer Designs To Wood Without Using Heat).


Metal Ruler

Metal is key here, because you can use it to burn straight lines by cozying your burner right up next to the edge of the ruler. If you were to use plastic, you’d melt it, so be sure it is a metal ruler. It works really well to create nice straight lines, just be sure to hold it firmly in place and keep your fingers out of the way.


This is like having a magic eraser. Any over burned areas, or little mistakes you can gently chip them away with a razor blade and no one will ever know. Be careful though. Once. you chip it away, you won’t have a flat texture to burn on and the spot may be noticeable, especially if you go deep. Try gently scraping it first. On the other hand, getting the inverted texture is something you are looking for: it is great for creating fine hairs in detailed photorealistic pieces after you’ve burned it.


Needle Nose Pliers

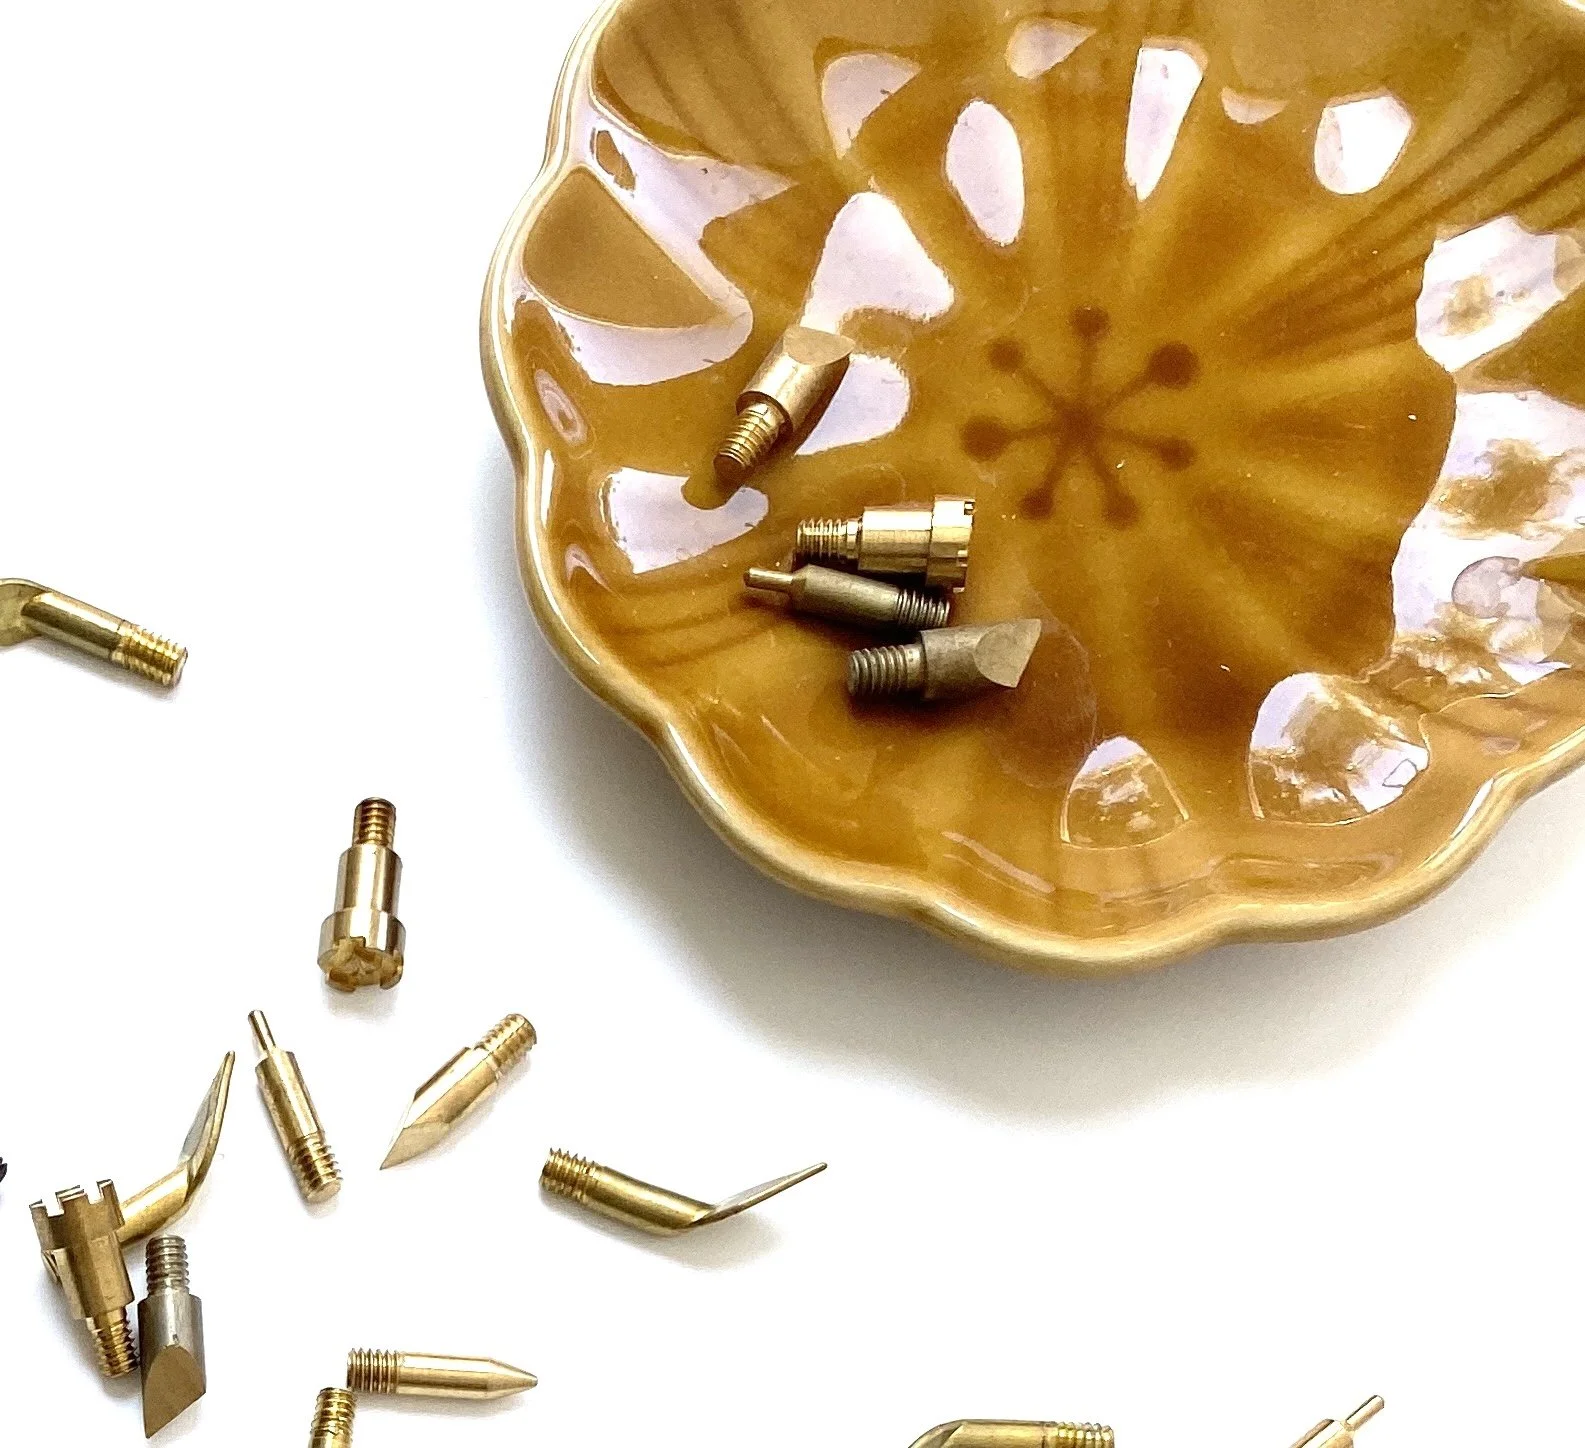
This is so I can carefully change nibs while they are still warm. If you are impatient, like me, I suggest having a pair of these at the ready when you are burning. Also have a ceramic dish or glass jar/bowl to catch those hot nibs to go along with it. This is obviously not necessary, because you can always wait for your burner to cool before changing nibs by hand.


ceramic ring dish

This is where I ditch my hot nibs/tips when changing them out mid-burn. A glass or metal dish would work as well.

odd-pyro-tools
 

These sand paper pens/sticks are also great for those finer details, and little mistakes. No matter how good of a job I did on the burn, I can always tidy it up a bit with one of these bad boys. It only takes a little bit of time, but they clean up any piece to give it that polished look.


Wooden ball stylus dotting tool

I use this for transferring designs to wood (Check out How To Transfer Designs To Wood Without Using Heat). It allows me to use the same design over and over again.


Gooseneck Camera Holder

This is so I can film and photograph while I burn hands-free. It is much safer and creates better quality content. I have one gooseneck holder that is attached to my wall so it hangs right over my work. If you are a pyrographer that utilizes social media for marketing, then I can not recommend this enough. Hit that record button each time you sit down, and you will find yourself with so much great content that you can use.


What are your favorite odd tools for wood burning?


Check out this blog post for learning how to take care of all your wood burning tools.


Want to learn more about Wood Burning and improve pyrography Skills?

Learn at your own pace from your home with The Complete Wood Burning Toolkit.


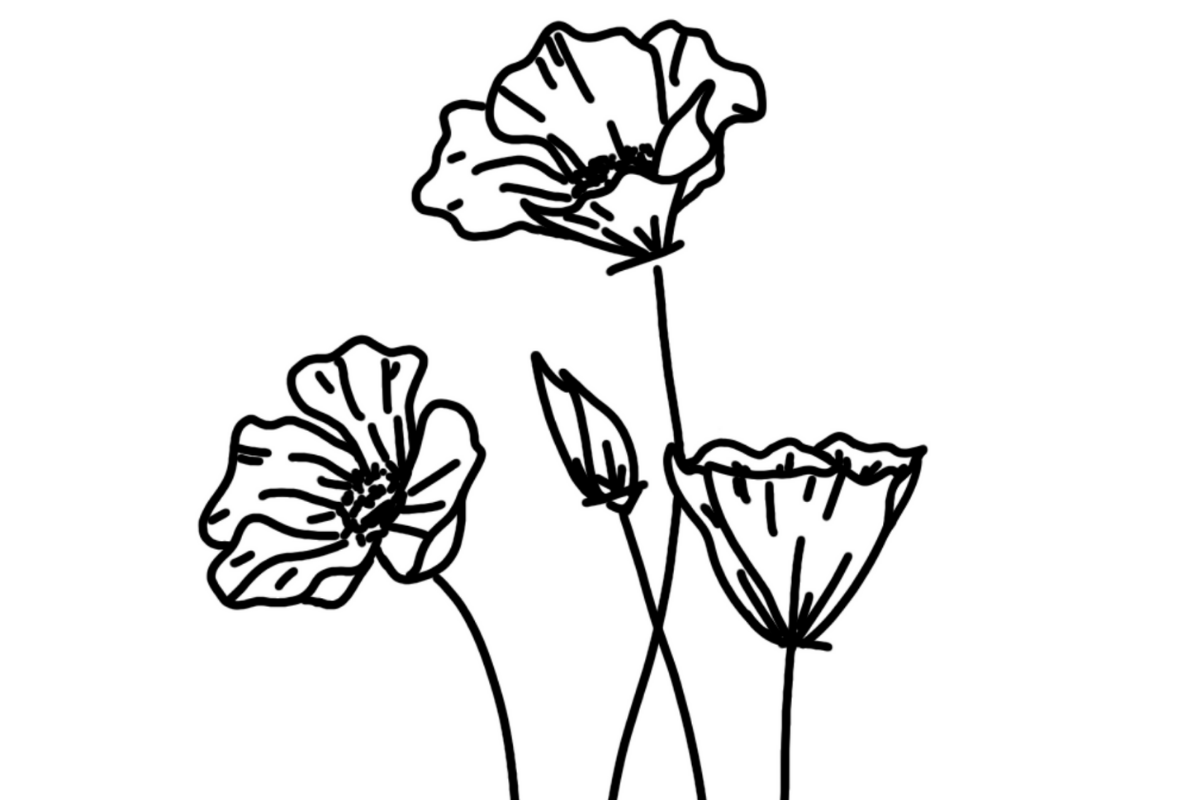
Free Poppy Pattern for Wood Burning

This is a pattern that has a whole lot of meaning for me, and I am happy to share it with the world. The template, and complete instructions can be found in my book, The Wood Burn Book. You can also find the beginner class that I did for Michael’s using this design here, or check out this blog post on adding loose watercolor to wood using this poppy pattern as well! You also might recognize part of it from the #burntmay prompts as well. I have been able to take this one design and use it in so many different ways.

Poppies are my favorite flower. I love them. Their extreme orange color can’t be ignored, and I love that about them. They are hardy, and can grow just about anywhere, here in my home state of California. You will find them thriving in cracks in the sidewalk. It’s the coolest.

I grow them in my backyard. I have a poppy tattoo. I pop poppy top “hats” as we call them whenever I find a patch of poppies. I’ve trained my kids to do the same. I once cried over seeing poppies while heavily pregnant. I tried growing them while living in Boston 3 years in a row, and only ever saw one flower. I have always been fearful of picking them because they are the state flower of California, and schoolyard rumor had it that if you picked it you could go to jail. gasp I would never! I would stare at them through the fence of my elementary school field instead. I own 15-20 different pieces of poppy art in my home. I just think they are are magnificent, mysterious, bold, and unique.

This design has become one that I have used for teaching, for community building, in my book, and in my home.

Go check out the amazing pieces created by Burn Club+ community members with this design for the #bcpluschallenge on Instagram. Or check out the #thewoodburnbook to see other artist’s re-ceations. Sharing this design, and my love of poppies with the world has been awesome, and I can’t wait to see where my 4 poppies will take me, and you!

What can you make using this design? Post using #thewoodburnbook on your favorite platform, and tag @woodburncorner so I can see your take on it.

Not sure how to get these poppies onto your wood?

Check out the instructions on how to heat transfer an image onto your wood slice or how to transfer without having to use heat!

 
free-poppy-template


If you like this poppy template, you may be interested in how the radial symmetry poppy! Using my poppy template, Basia has created a mandala version. Check it out here. This is also a freebie you can download.


For more great templates to practice your pyrography skills with, check out The Wood Burn Commuity Book of Templates


Want to learn more about wood burning and improve pyrography Skills?

Learn everything you need to know at your own pace from your home with The Complete Wood Burning Toolkit.

Grow with the community: Join Burn Club+, a place where you can ask questions, and get the full answers, a place of fun and learning.


Burnt March 2021

Burn challenges are a call to all artists to create a piece of artwork based on a specific word/prompt. The challenges are living in the wood burning community on Instagram. Follow us there and watch out for the prompts or join Burn Club+ to get your prompts in advance. Below is Burnt March 2020!

 
Screen Shot 2021-08-11 at 12.29.09 PM.png
 

Thank you so much to each and every one of you who participated, liked, commented, shared, and enjoyed these prompts and the art that came out of #burntmarch. Thank you @walnuthollow our incredible sponsor, for supporting these artists and this challenge.

The art that was created, the connections that were made, the artistic growth that occurred, the sales, the encouragement shared, the creativity, the memories, and the stories that were shared this month have all been so much better and gone so much further than I could have ever imagined for this challenge. This community rocks!

Make sure to check out the hashtag #burntmarch - it’s like a free art gallery. Follow your favorites! Keep sharing and spreading the love.

Our winner for the giveaway of a big box of goodies from our sponsor, Walnut Hollow, and a signed copy of my book The Wood Burn Book, goes to @calisanja

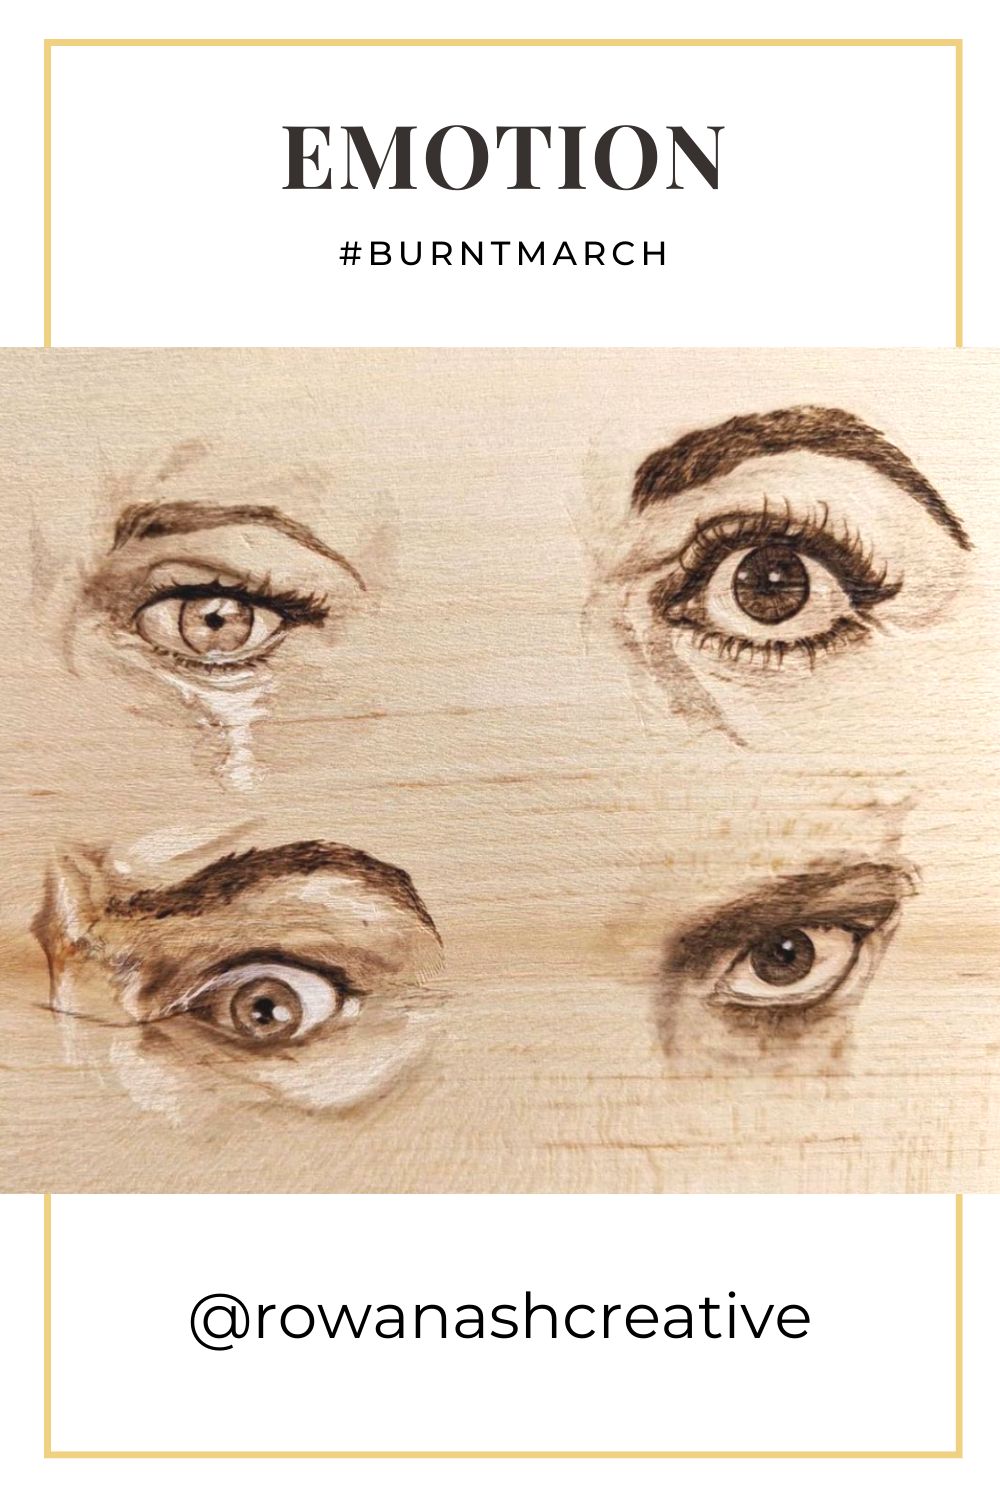
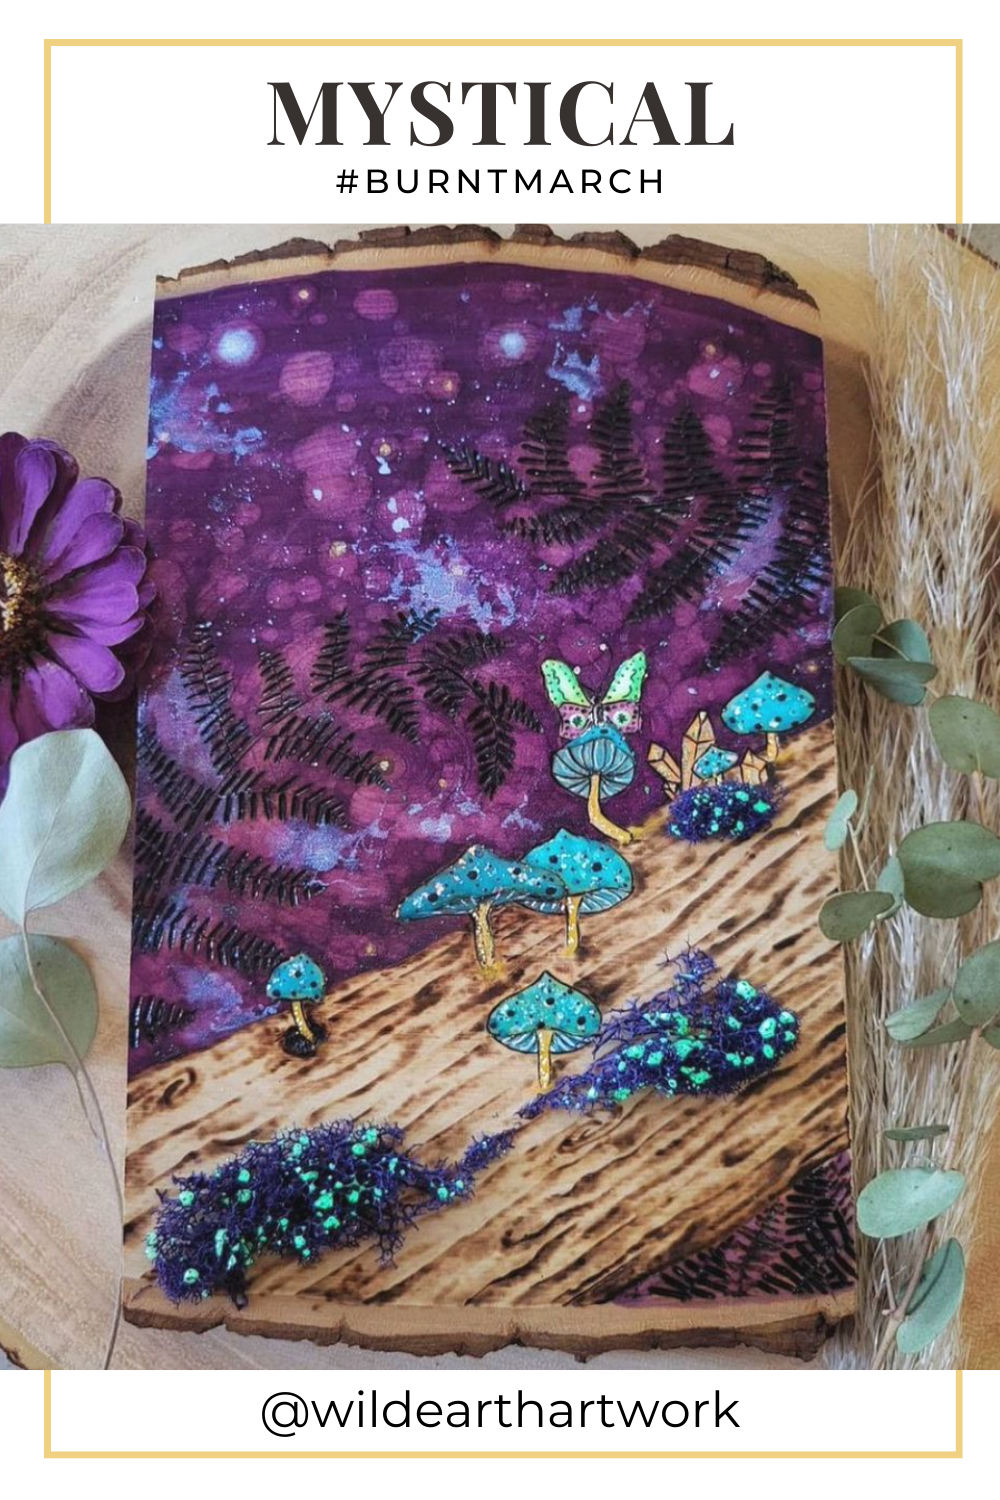
Below are the featured artists for each prompt. Click on the image to get a closeup of all the gorgeous wood slice art!

Thank you to all of you for joining in the fun. Can’t wait for the next one!

Check out more past challenges here!


Want to join future Burnt Month challenges?

SIGN UP FOR OUR Burn Club NEWSLETTER TO SEE WHEN THE NEXT CHALLENGE IS HAPPENING.

JOIN BURN CLUB+ TO GET YOUR PROMPTS EARLY!

OR FOLLOW US ON INSTAGRAM AND STAY TUNED FOR THE ANNOUNCEMENT!

These challenges are a great way to hone your skills, grow your following, try new things, and meet your fellow wood burning artists. #communityovercompetition